# Logi Actions SDK
> Documentation for Logi Actions SDK, a platform for creating custom plugins for Logitech devices.
## actions-sdk-docs
### ai-friendly-documentation-setup
Point your AI coding assistant at this documentation so it can answer Logi Actions SDK questions from authoritative content. Every page on the site is also published as plain Markdown for direct AI consumption.
- [AI-friendly Documentation Setup](/ai-friendly-documentation-setup.md): Point your AI coding assistant at this documentation so it can answer Logi Actions SDK questions from authoritative content. Every page on the site is also published as plain Markdown for direct AI consumption.
### copyrights
© 2026 Logitech Europe S.A. All Rights Reserved.
- [Copyrights](/copyrights.md): © 2026 Logitech Europe S.A. All Rights Reserved.
### csharp
#### haptics
- [Best Practices](/csharp/haptics/haptics-best-practices.md): Example Use Cases
- [Getting Started](/csharp/haptics/haptics-getting-started.md): Plugin events enable haptic feedback interactions, triggered by user actions or application state changes. A plugin or virtual device can define one or more event sources.
- [Overview](/csharp/haptics/haptics-overview.md): New in Plugin API 6.2.1 (Logi Options+ 1.95).
- [Haptics Tutorial](/csharp/haptics/haptics-tutorial.md): Overview
#### icons
- [Action Symbols](/csharp/icons/action-symbols.md): Plugin action symbols are small icons that represent the actions. The symbols are located next to the action names in the action picker of the configuration UI:
- [Icon Editor](/csharp/icons/icon-editor.md): Icon Editor is a part of the Options+ and Loupedeck user interfaces that lets users customize action icons. It provides navigation controls and tools, allowing you to select an icon and modify its appearance or associated text.
- [Icon Templates](/csharp/icons/icon-templates.md): Icon Templates define button appearance by specifying its image and text layout. These templates improve customization and maintain clarity when handling button designs. Icon Template files have the .ict extension and can be used across various precedence levels.
- [Plugin Icon](/csharp/icons/plugin-icon.md): A plugin icon is a graphical image that represents your plugin in user interfaces. The plugin icon is displayed in the Options+ and Loupedeck applications, as well as in the Logitech Marketplace.
- [Vector Images](/csharp/icons/vector-images.md): Logi Plugin Service can use vector images instead of raster images when drawing action icons on device.
#### plugin-development
- [Distributing the Plugin](/csharp/plugin-development/distributing-the-plugin.md): Plugins can be distributed via the Logitech Marketplace and Loupedeck Marketplace to all other users.
- [C# SDK Introduction](/csharp/plugin-development/introduction.md): SDK Introduction
- [Testing and Debugging the Plugin](/csharp/plugin-development/testing-and-debugging-the-plugin.md): You can test your plugin by using it with the Logi Plugin Service.
#### plugin-features
- [Action Editor Actions](/csharp/plugin-features/action-editor-actions.md): Action Editor actions allow plugin developers to create custom controls with configurable user interfaces. These controls appear when users assign a plugin action to a device button or dial, enabling users to configure the action's behavior through a simple interface.
- [Default Application Profiles](/csharp/plugin-features/default-application-profiles.md): Default application profiles should be used only with application plugins.
- [External Service Login](/csharp/plugin-features/external-service-login.md): Plugin account handling is managed through plugin preferences, where the plugin account is one of the available preference types. This system enables integration with external services that require user authentication.
- [Dynamic Folders](/csharp/plugin-features/implementing-dynamic-folders.md): A dynamic folder (also known as "Control center") is a dynamic workspace that is fully controlled by a plugin.
- [Installation and Uninstallation](/csharp/plugin-features/install-and-uninstall.md): Plugin Installation
- [Logging](/csharp/plugin-features/logging.md): Logging provides essential debugging and monitoring capabilities for both the Logi Plugin Service itself and individual plugins. The logging system helps developers troubleshoot issues, monitor plugin behavior, and track system events during development and production use.
- [Managing Plugin Settings](/csharp/plugin-features/managing-plugin-settings.md): For each plugin, Logi Plugin Service stores a collection of setting names and values. Here are some characteristics of plugin settings:
- [Multistate Plugin Actions](/csharp/plugin-features/multistate-plugin-actions.md): By default, plugin actions have one state.
- [Plugin Capabilities](/csharp/plugin-features/plugin-capabilities.md): Application and Universal Plugins
- [Plugin Localization](/csharp/plugin-features/plugin-localization.md): Plugin can be localized to any language, even if this language is not supported by Logi Options+ or Loupedeck.
- [Plugin Status](/csharp/plugin-features/plugin-status.md): Each plugin can be in one of the following states:
- [Profile Actions](/csharp/plugin-features/profile-actions.md): Profile action is a special type of actions with parameters, but there are some key differences.
- [Storing Plugin Data Locally](/csharp/plugin-features/storing-plugin-data.md): Logi Plugin Service provides a possibility for plugins to store data locally.
#### tutorial
- [Add a Command With a Parameter](/csharp/tutorial/add-a-command-with-a-parameter.md): Commands and adjustments can contain parameters. As an example, the "apply develop profile" command in the Lightroom plugin takes the preset file name as a parameter.
- [Add a Simple Adjustment](/csharp/tutorial/add-a-simple-adjustment.md): To create a simple adjustment, add to the plugin project a class inherited from the PluginDynamicAdjustment class. To alter the command appearance and behavior, change the properties and overwrite the virtual methods of this class.
- [Add a Simple Command](/csharp/tutorial/add-a-simple-command.md): To create a simple command, add to your plugin project a class inherited from the PluginDynamicCommand class. To alter the command appearance and behavior, change the properties and overwrite the virtual methods of this class.
- [Change a Button Image](/csharp/tutorial/change-a-button-image.md): By default, when the Logi Plugin Service needs to draw a button image, it uses the display name of the command that is assigned to the button.
- [Link the Plugin to an Application](/csharp/tutorial/link-the-plugin-to-an-application.md): You can link your plugin to an application so that the plugin is activated when the application comes to the foreground.
- [Plugin Structure](/csharp/tutorial/plugin-structure.md): Plugin consists of core implementation classes and an organized package structure that defines functionality, appearance, and localization.
### getting-started
Welcome to the Logi Actions SDK! This guide will help you get started with developing plugins and actions for Logitech devices. Follow the steps below to initiate your development journey and unlock the full potential of the Actions SDK.
- [Getting Started](/getting-started.md): Welcome to the Logi Actions SDK! This guide will help you get started with developing plugins and actions for Logitech devices. Follow the steps below to initiate your development journey and unlock the full potential of the Actions SDK.
### glossary
This glossary defines key terms as used throughout the Logi Actions SDK documentation.
- [Glossary](/glossary.md): This glossary defines key terms as used throughout the Logi Actions SDK documentation.
### help
Join our Discord community! Our team and fellow developers are ready to help.
- [Need immediate assistance or have a question?](/help.md): Join our Discord community! Our team and fellow developers are ready to help.
### marketplace-approval-guidelines
The capitalized terms used in this document have the same meaning as those defined in the Logitech Marketplace Developer Agreement.
- [Marketplace Approval Guidelines](/marketplace-approval-guidelines.md): The capitalized terms used in this document have the same meaning as those defined in the Logitech Marketplace Developer Agreement.
### nodejs
#### api-documentation
The Node.js SDK provides comprehensive API documentation to help you understand and use all available classes, methods, and types in your plugin development.
- [API Documentation](/nodejs/api-documentation.md): The Node.js SDK provides comprehensive API documentation to help you understand and use all available classes, methods, and types in your plugin development.
#### api
- [Action](/nodejs/api/classes/Action.md): Abstract base class for Plugin Actions.
- [AdjustmentAction](/nodejs/api/classes/AdjustmentAction.md): Abstract base class for adjustment actions
- [CommandAction](/nodejs/api/classes/CommandAction.md): Abstract base class for command actions (buttons, keys, etc.).
- [PluginSDK](/nodejs/api/classes/PluginSDK.md): The PluginSDK provides the core functionality for building plugins that communicate
- [LoggerLevel](/nodejs/api/enumerations/LoggerLevel.md): Logging verbosity levels for the SDK. Pass one to PluginSDKOptions
- [AdjustmentActionExecuteEvent](/nodejs/api/type-aliases/AdjustmentActionExecuteEvent.md): Event data passed to adjustment actions when executed.
- [PluginSDKOptions](/nodejs/api/type-aliases/PluginSDKOptions.md): Configuration options for the PluginSDK constructor.
- [ASSETS_PATH](/nodejs/api/variables/ASSETS_PATH.md): Runtime path to the plugin's assets folder. Use this to build absolute
#### creating-action
Actions are how Logitech devices interact with your plugin. There are two types of actions:
- [Creating an Action](/nodejs/creating-action.md): Actions are how Logitech devices interact with your plugin. There are two types of actions:
#### debugging
Console output from the plugin can be accessed by enabling developer mode in Logi Plugin Service.
- [Debugging](/nodejs/debugging.md): Console output from the plugin can be accessed by enabling developer mode in Logi Plugin Service.
#### introduction
- New in Plugin API 6.2.3 (Logi Options+ 1.97, Loupedeck 6.2.4)
- [Node.js SDK Introduction (Beta)](/nodejs/introduction.md): - New in Plugin API 6.2.3 (Logi Options+ 1.97, Loupedeck 6.2.4)
#### using-sdk
The sample plugin will already have the following code added to the index.js file. Here we will describe the functionality of the SDK class, but it is not required to run the sample plugin.
- [Using the SDK](/nodejs/using-sdk.md): The sample plugin will already have the following code added to the index.js file. Here we will describe the functionality of the SDK class, but it is not required to run the sample plugin.
#### working-with-assets
Plugins may require external non-source files as part of their functionality. These can be text files, executables, databases, images, etc. The JS SDK provides the “assets.yml” file to allow users to specify files which are to be included as part of the plugin build process.
- [Working with Assets](/nodejs/working-with-assets.md): Plugins may require external non-source files as part of their functionality. These can be text files, executables, databases, images, etc. The JS SDK provides the “assets.yml” file to allow users to specify files which are to be included as part of the plugin build process.
#### working-with-external-packages
A JS plugin is not a typical Node application as it must be bundled and registered with Logi Plugin Service in order for it to run. If a plugin was created using the logitoolkit create command, the build NPM script will include external JS dependencies as part of a bundling process. However, some packages may include certain assets in order to function. These may be non-JS script files, binaries, json files, etc. that are used by the package during runtime. If these files are not included as part of the build process, then there will likely be issues using these packages at runtime.
- [Working with External Packages](/nodejs/working-with-external-packages.md): A JS plugin is not a typical Node application as it must be bundled and registered with Logi Plugin Service in order for it to run. If a plugin was created using the logitoolkit create command, the build NPM script will include external JS dependencies as part of a bundling process. However, some packages may include certain assets in order to function. These may be non-JS script files, binaries, json files, etc. that are used by the package during runtime. If these files are not included as part of the build process, then there will likely be issues using these packages at runtime.
### plugin-basics
This page introduces the core concepts for plugin development.
- [Plugin Basics](/plugin-basics.md): This page introduces the core concepts for plugin development.
### supported-devices
This page describes two categories of devices: devices for executing plugin actions and devices for providing haptic feedback.
- [Supported Devices](/supported-devices.md): This page describes two categories of devices: devices for executing plugin actions and devices for providing haptic feedback.
---
# Full Documentation Content
# AI-friendly Documentation Setup
Point your AI coding assistant at this documentation so it can answer Logi Actions SDK questions from authoritative content. Every page on the site is also published as plain Markdown for direct AI consumption.
## llms.txt[](#llmstxt "Direct link to llms.txt")
Give your AI tool the URL below as its entry point. `llms.txt` is a flat index of every page's Markdown twin — one entry per page, each with a short description and a direct link to the `.md` file:
* [/actions-sdk-docs/llms.txt](/actions-sdk-docs/llms.txt)
## llms-full.txt[](#llms-fulltxt "Direct link to llms-full.txt")
`llms-full.txt` is the whole documentation set in one file — the `llms.txt` followed by the complete Markdown of every documentation page. Use it when your AI tool can load one large file up front instead of fetching pages on demand:
* [/actions-sdk-docs/llms-full.txt](/actions-sdk-docs/llms-full.txt)
Confirm this file fits your tool's context window before loading it whole. For smaller context windows, use the `llms.txt` index above and fetch individual pages as needed.
## Per-page Markdown[](#per-page-markdown "Direct link to Per-page Markdown")
Every page has a Markdown twin at the same URL with `.md` appended. For example:
* HTML page: [/actions-sdk-docs/csharp/plugin-development/introduction](/actions-sdk-docs/csharp/plugin-development/introduction.md)
* Markdown twin: [/actions-sdk-docs/csharp/plugin-development/introduction.md](/actions-sdk-docs/csharp/plugin-development/introduction.md)
## Local C# API reference (PluginApi.xml)[](#local-c-api-reference-pluginapixml "Direct link to Local C# API reference (PluginApi.xml)")
Logi Plugin Service ships with an XML documentation file that gives IDEs their tooltips for the Actions SDK, and it's already on every Windows machine where Logi Plugin Service is installed. Note that the macOS version does not ship with this XML documentation file.
Point your AI tool at it when you want API summaries that match the SDK version you have installed:
* Windows: `C:\Program Files\Logi\LogiPluginService\PluginApi.xml`
Use PluginApi.xml alongside this documentation, not as a replacement for it. The XML file describes individual API members in isolation; it carries no guidance on how to structure a plugin.
## Staying up to date[](#staying-up-to-date "Direct link to Staying up to date")
The Markdown files are always kept in sync with the published documentation, so anything your AI tool fetches reflects the current docs. Re-fetch whenever you want fresher context — the hosted files need nothing to install or maintain locally.
`PluginApi.xml` is part of the Logi Plugin Service installation, so it tracks the Plugin API version on that machine and refreshes whenever the service updates.
---
# Copyrights
© 2026 Logitech Europe S.A. All Rights Reserved.
***
* Windows® is a registered trademark of Microsoft Corporation in the United States and/or other countries.
* Mac® and macOS® are trademarks of Apple Inc., registered in the U.S. and other countries.
* Adobe® and Lightroom® are either registered trademarks or trademarks of Adobe Systems Incorporated in the United States and/or other countries.
* Other company and product names mentioned in this document may be the trademarks of their respective owners.
***
---
# Best Practices
## Example Use Cases[](#example-use-cases "Direct link to Example Use Cases")
There are two primary types of use cases when designing haptic experiences: Feedback and Notifications.
### Feedback[](#feedback "Direct link to Feedback")
Haptics provide immediate tactile confirmation of user actions, helping users to build muscle memory, speed up reaction times, and feel more precise.
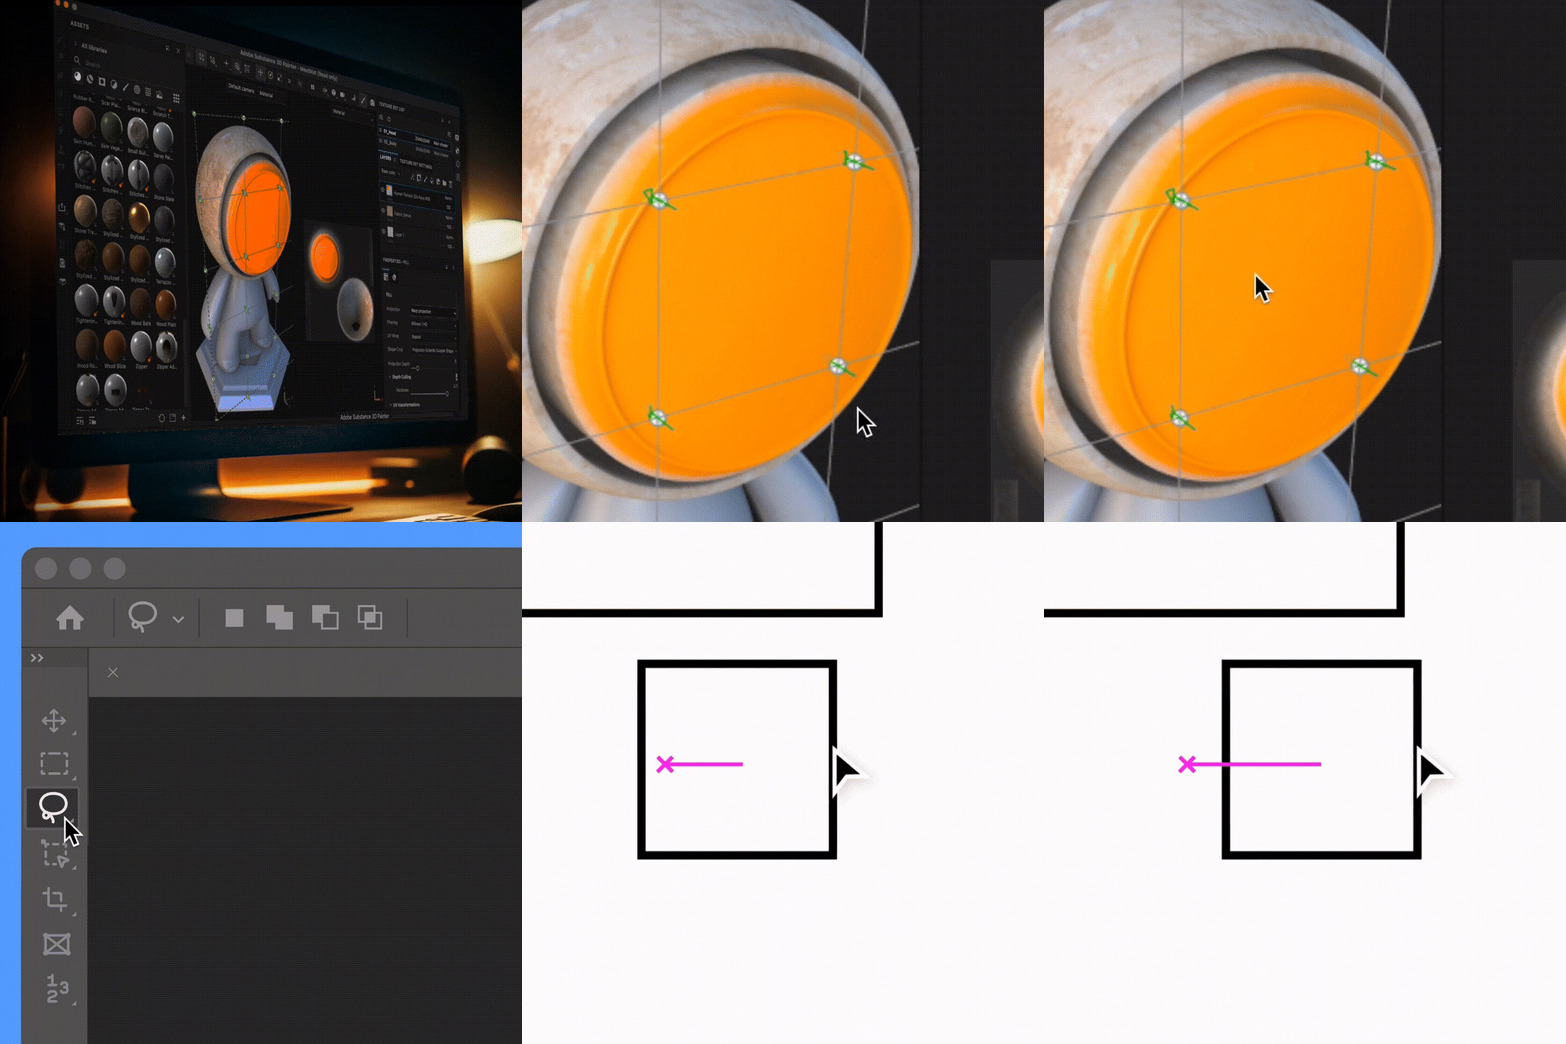
Trigger haptic feedback when the cursor or an object spatially snaps with:
* Alignment guides
* Important vertices & handles
* Artboard edges
* Timeline markers
Trigger haptic feedback to highlight when there is a change in the click input context:
* More options available
* Change in the type of selection
* Different manipulation for the selected element
### Notifications[](#notifications "Direct link to Notifications")
Turn your sound off and stay longer in your flow state without missing gentle reminders being directed to the haptic button.
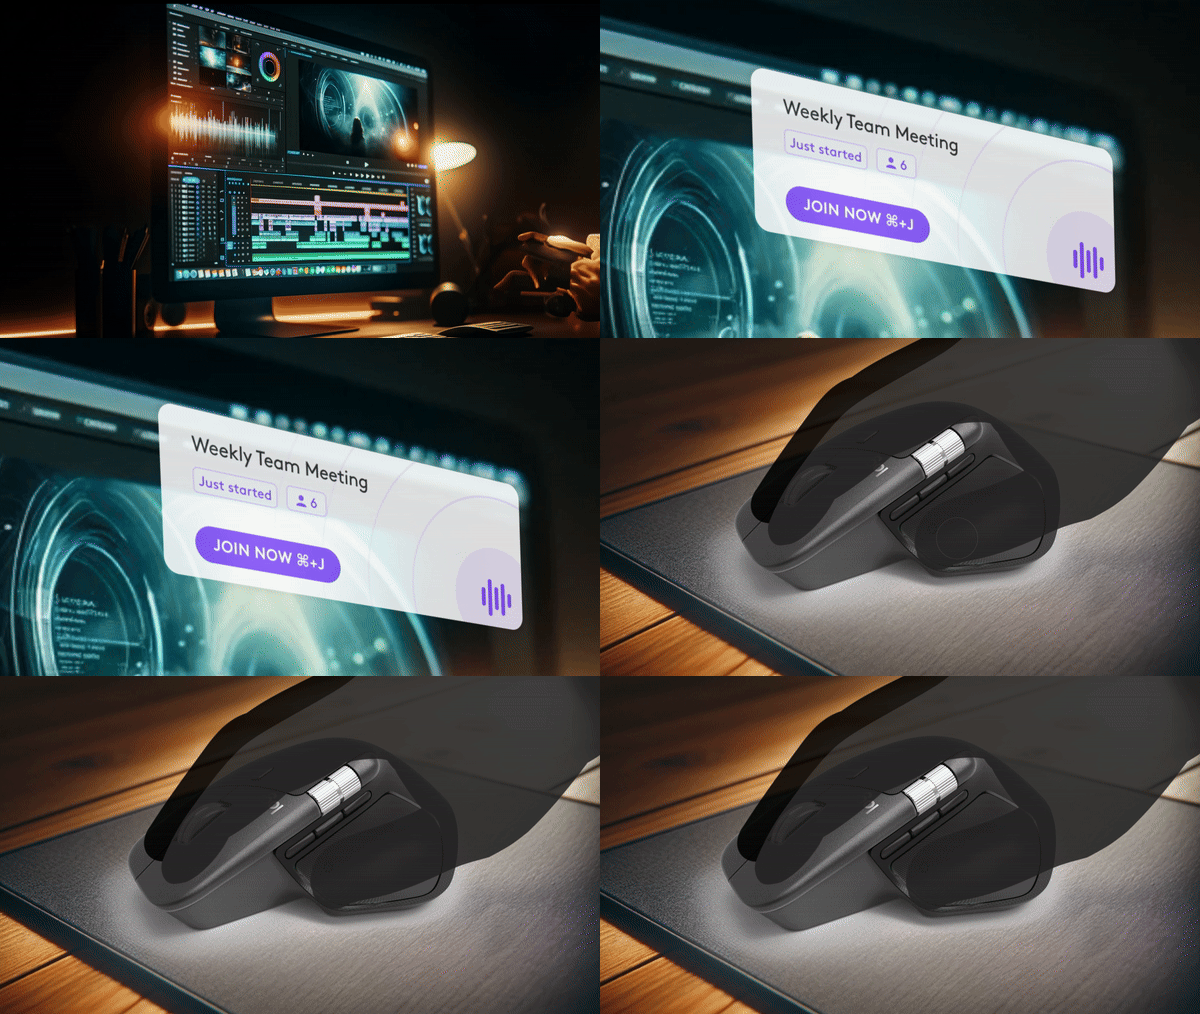
Trigger haptic notification to know when:
* A long process was completed
* An event is happening in the background
* Code is compiled
## Design Guidelines[](#design-guidelines "Direct link to Design Guidelines")
### Waveform Selection[](#waveform-selection "Direct link to Waveform Selection")
* Use subtle waveforms for frequent events
* Reserve intense waveforms for important notifications
* Consider the context of your application/plugin
### Event Timing[](#event-timing "Direct link to Event Timing")
* Avoid triggering haptic events too frequently
* Ensure haptic feedback aligns with visual feedback and plugin functionality
### Device Support[](#device-support "Direct link to Device Support")
* Always provide a `DEFAULT` waveform
* Test on supported devices when possible
## Examples[](#examples "Direct link to Examples")
### Precision Enhancers[](#precision-enhancers "Direct link to Precision Enhancers")
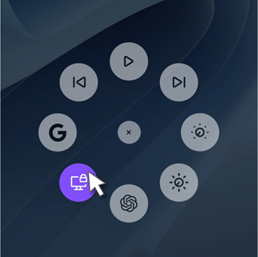
Event: Cursor hovers on Actions Ring Element
Haptic feedback: The waveform Subtle Collision is played
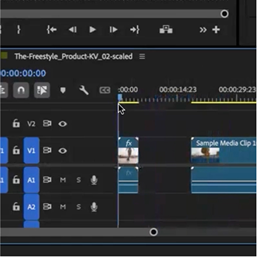
Event: Playhead snaps with beginning of clip
Haptic feedback: The waveform Subtle Collision is played
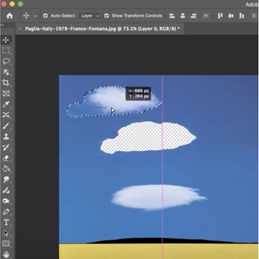
Event: Layer content snap with smart guide
Haptic feedback: The waveform Subtle Collision is played
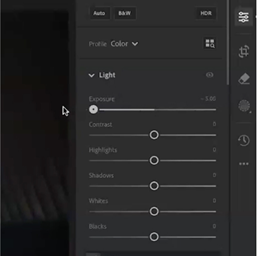
Event: Handle collides with end of slider
Haptic feedback: The waveform Subtle Collision is played
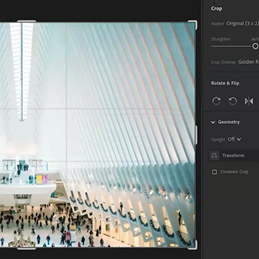
Event: Cropped area reached max height/width
Haptic feedback: The waveform Subtle Collision is played
### Progress Indicators[](#progress-indicators "Direct link to Progress Indicators")
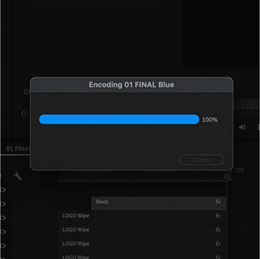
Event: Adobe Premiere Pro export progress bar is full
Haptic feedback: The waveform Subtle Collision is played
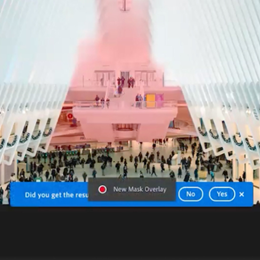
Event: AI Mask was created
Haptic feedback: The waveform Damp State Change is played
### Incoming Events[](#incoming-events "Direct link to Incoming Events")
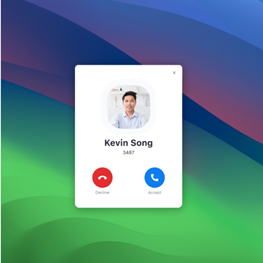
Event: Someone is calling you
Haptic feedback: The waveform Ringing is played
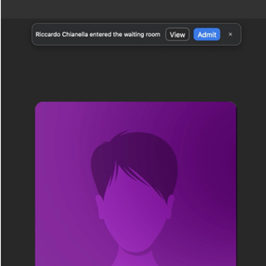
Event: Someone entered the waiting room
Haptic feedback: The waveform Knock is played
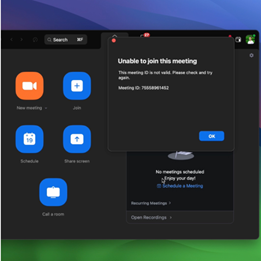
Event: Unable to join this meeting
Haptic feedback: The waveform Mad is played
---
# Getting Started
Plugin events enable haptic feedback interactions, triggered by user actions or application state changes. A plugin or virtual device can define one or more event sources.
### Core Elements[](#core-elements "Direct link to Core Elements")
* **Event Sources**: Collections of related events that can be triggered by your plugin
* **Event Registration**: Define event sources in [code](#defining-event-sources-in-code) or in a YAML [event source definition file](#defining-event-sources-in-yaml-files)
* **Event Triggering**: Raise events in [code](#triggering-events)
* **Event Configuration**: Define event metadata in YAML files for enhanced functionality
* **Default event source**: The first event source is defined as the default event source
### Event Naming Rules[](#event-naming-rules "Direct link to Event Naming Rules")
Event names must follow these conventions:
* First character must be a Latin letter or underscore (`_`)
* Subsequent characters may be Latin letters, underscores, or numbers
* Name is case sensitive and must match exactly in code and YAML files ([event source definition file](#defining-event-sources-in-yaml-files), [waveform mapping file](#waveform-mapping))
* Names must be unique within the event source
## Defining Event Sources in Code[](#defining-event-sources-in-code "Direct link to Defining Event Sources in Code")
* Defining an event source in a class inherited from the `Plugin` class
```csharp
public class HapticPlugin : Plugin
{
private const String EventName = "periodic15min";
public override void Load()
{
// Define event
this.PluginEvents.AddEvent(EventName, "Every 15 minutes", "This haptic event is sent every 15 minutes");
}
// ...
}
```
* Defining an event source in action code
```csharp
public class HapticDynamicCommand : PluginDynamicCommand
{
private const String EventName = "buttonPress";
public HapticDynamicCommand()
: base("Button Press", "Invokes the haptic event on button press", "Haptics")
{
}
protected override Boolean OnLoad()
{
// Define event
this.Plugin.PluginEvents.AddEvent(EventName, "Button Press", "This haptic event is sent when the user presses the button");
return true;
}
// ...
}
```
## Defining Event Sources in YAML Files[](#defining-event-sources-in-yaml-files "Direct link to Defining Event Sources in YAML Files")
An event source can be defined in a YAML file that should be located in the `events` directory of the [plugin package](/actions-sdk-docs/csharp/tutorial/plugin-structure.md#events).
The file name for the default event source should be `DefaultEventSource.yaml`.
The YAML file contains event source configuration with the following structure:
### Event Source Fields (Optional)[](#event-source-fields-optional "Direct link to Event Source Fields (Optional)")
These fields define the event source itself:
* `name` - name of the event source. Should be missing for the default event source. Should be unique within the plugin
* `displayName` - display name of the event source. Default is plugin display name
* `description` - description of the event source. Default is plugin description
* `iconFile` - file name of event source icon. Should be located in the same directory as the YAML file. Can be in either PNG or SVG format. If icon file is missing, then the plugin icon is used
### Events Field (Required)[](#events-field-required "Direct link to Events Field (Required)")
You can specify one or more events in the `events` field. Every event has the following fields:
* `name` - name of the event. This field is mandatory and should be unique within the event source.
* `displayName` - display name of the event. This field is mandatory.
* `description` - description of the event. This field is optional.
### Complete Example[](#complete-example "Direct link to Complete Example")
```yaml
displayName: My application
description: Contains various events generated for the application
iconFile: DefaultEventSource.svg
events:
- name: periodic15min
displayName: Every 15 minutes
description: This haptic event is sent every 15 minutes
- name: buttonPress
displayName: Button Press
description: This haptic event is sent when the user presses the button
```
### Non-Default Event Sources[](#non-default-event-sources "Direct link to Non-Default Event Sources")
For non-default event sources, all the fields mentioned in the [Event Source Fields](#event-source-fields-optional) section above should be specified.
`name` field value cannot be `Default`, as this value is reserved for the default event source.
## Waveform Mapping[](#waveform-mapping "Direct link to Waveform Mapping")
Define haptic waveform mappings in `/events/extra/eventMapping.yaml`:
```yaml
haptics:
periodic15min:
DEFAULT: happy_alert
buttonPress:
DEFAULT: sharp_state_change
MX Master 4: sharp_collision # Device-specific mapping
```
The `DEFAULT` key specifies the fallback waveform if no device-specific mapping is found.
See [Waveforms](#waveforms) for more information.
## Plugin Configuration for Haptics[](#plugin-configuration-for-haptics "Direct link to Plugin Configuration for Haptics")
To enable haptic functionality in your plugin, you must declare the `HasHapticMapping` capability in your plugin configuration file.
### Adding HasHapticMapping Capability[](#adding-hashapticmapping-capability "Direct link to Adding HasHapticMapping Capability")
Add the `HasHapticMapping` capability to the `pluginCapabilities` field in your `LoupedeckPackage.yaml` file:
```yaml
# ... other configuration fields
pluginCapabilities:
- HasHapticMapping # Enables haptics
# ... other configuration fields
```
See [Plugin Capabilities](/actions-sdk-docs/csharp/plugin-features/plugin-capabilities.md#plugin-configuration-file) and [Plugin Structure](/actions-sdk-docs/csharp/tutorial/plugin-structure.md#plugin-configuration-file-structure) for more information about plugin capabilities.
## Triggering Events[](#triggering-events "Direct link to Triggering Events")
* Triggering a defined event in a class inherited from the `Plugin` class
```csharp
public class HapticPlugin : Plugin
{
private const String EventName = "periodic15min";
private readonly System.Timers.Timer _periodicEventTimer = new();
public override void Load()
{
this.PluginEvents.AddEvent(EventName, "Every 15 minutes", "This haptic event is sent every 15 minutes");
this._periodicEventTimer.AutoReset = true;
this._periodicEventTimer.Interval = 900000;
this._periodicEventTimer.Elapsed += this.OnPeriodicEventTimerElapsed;
this._periodicEventTimer.Start();
}
public override void Unload()
{
this._periodicEventTimer.Stop();
this._periodicEventTimer.Elapsed -= this.OnPeriodicEventTimerElapsed;
}
private void OnPeriodicEventTimerElapsed(Object sender, System.Timers.ElapsedEventArgs e)
{
// Trigger event
this.PluginEvents.RaiseEvent(EventName);
}
}
```
* Triggering a defined event in action code
```csharp
public class HapticDynamicCommand : PluginDynamicCommand
{
private const String EventName = "buttonPress";
public HapticDynamicCommand()
: base("Button Press", "Invokes the haptic event on button press", "Haptics")
{
}
protected override Boolean OnLoad()
{
this.Plugin.PluginEvents.AddEvent(EventName, "Button Press", "This haptic event is sent when the user presses the button");
return true;
}
protected override void RunCommand(String actionParameter)
{
// Trigger event
this.Plugin.PluginEvents.RaiseEvent(EventName);
}
}
```
## Waveforms[](#waveforms "Direct link to Waveforms")
### Waveform Groups[](#waveform-groups "Direct link to Waveform Groups")
The following waveforms are available for haptic events:
**State Change Waveforms**:
* `sharp_state_change`: Short, high-intensity pulse for discrete state transitions (button presses, toggles)
* `damp_state_change`: Gradual intensity change for smooth state transitions
**Collision Waveforms**:
* `sharp_collision`: High-intensity impact simulation for collision events
* `damp_collision`: Medium-intensity impact with gradual decay
* `subtle_collision`: Low-intensity feedback for light contact events
**Alert Waveforms**:
* `happy_alert`: Positive feedback pattern for success states
* `angry_alert`: Attention-grabbing pattern for error conditions
* `completed`: Confirmation pattern for task completion
**Special Waveforms**:
* `square`: Sharp-edged waveform with defined start/stop points
* `wave`: Smooth sinusoidal pattern with gradual transitions
* `firework`: Multi-burst pattern with varying intensities
* `mad`: High-frequency chaotic pattern
* `knock`: Repetitive impact pattern
* `jingle`: Musical-style pattern with multiple tones
* `ringing`: Continuous oscillating pattern
### Available Waveforms[](#available-waveforms "Direct link to Available Waveforms")
The available waveforms offer a variety of haptic sensations to enhance user experiences. From textures to dynamic feedback, these waveforms allow developers to create immersive and engaging interactions tailored to their applications.
Waveform usage falls into three distinct categories, determined by the type of event that triggers them.
| Precision enhancers
(feedback on physical interaction between digital elements)
[See examples](/actions-sdk-docs/csharp/haptics/haptics-best-practices.md#precision-enhancers) | Progress indicators
(gently inform about a starting, ending or advancing process)
[See examples](/actions-sdk-docs/csharp/haptics/haptics-best-practices.md#progress-indicators) | Incoming events
(grab attention toward a new event or status)
[See examples](/actions-sdk-docs/csharp/haptics/haptics-best-practices.md#incoming-events) |
| ---------------------------------------------------------------------------------------------------------------------------------------------------------------------------------------------------------------------------------------------------------------------------------------------------------------------------------------------------------------------------------------------------------------------------------------------------------------------------------------------------------------------------------------------------------------------------------------------------------------------------------------------------------------------------------------------------------------------------------------------------------------------------------------------------------------------------------------------------------------------------------------------------------------------------------------------------------------------------------------------------------------------------------------------------------------------------------------------------------------------------------------------------------------------------------------------------------------------------------------------------------------------------------------------------------------------------------------------------------------------------------------------------------------------------------------------------------------------------------------------------------------------------------------------------------------------------------------------------------------------------------------------------------------------------------------------------------------------------------------------------------------------------------------------------------------------------------------------------------------------------------------------------------------------------------------------------------------------------------------------------------------- | ------------------------------------------------------------------------------------------------------------------------------------------------------------------------------------------------------------------------------------------------------------------------------------------------------------------------------------------------------------------------------------------------------------------------------------------------------------------------------------------------------------------------------------------------------------------------------------------------------------------------------------------------------------------------------------------------------------------------------------------------------------------------------------------------------------------------------------------------------------------------------------------------------------------------------------------------------------------------------------------------------------------------------------------------------------------------------------------------------------------------------------------------------------------------------------------------------------------------------------------------------------------------------------------------------------------------------------------------------------------------------------------------------------------------------------------------------------------------------------------------------------------------------------------------------------------------------------------------------------------------------------------------------------------------------------------------------------------------------------------------------------------------------------------------------------------------------------------------------------------------------------------------------------------------------------------------------------------------------------------------------------------------------------------------------------------------------------------------------------------------------------------------------------------------------------------------------------------------------------------------------------------------------------------------------------------------------------------------------------------------------------------------------------------------------------------------------------------------------------------------------------------------------------------------------------------------------------------------------------------------------------------------------------------------------------------------------------------------------------------------------------------------------------------------------------------------------------------------------------------------------------------------------------------------------------------------------------------------------------------------------------------------------------------------------------------------------------------------------------------------------------------------------------------------------------------------------------------------------------------------------------------------------------------------------------------------------------------------------------------------------------------------------------------------------------------------------------------------------------------------------------------------------------------------------------------------------------------------------------------------------------------------------------------------------------------------------------------------------------------------------------------------------------------------------------------------------------------------------------------------------------------------------------------------------------------------------------------------------------------------------------------------------------------------------------------------------------------------------------------------------------------------------------------------------------------------------------------------------------------------------------------------------------------------------------------------------------------------------------------------------------------------------------------------------------------------------------------------------------------------------------------------------------------------------------------------------------------------------------------------------------------------------------------------------------------------------------------------------------------------------------------------------------------------------------------------------------------------------------------------------------------------------------------------------------------------------------------------------------------------------------------------ | ----------------------------------------------------------------------------------------------------------------------------------------------------------------------------------------------------------------------------------------------------------------------------------------------------------------------------------------------------------------------------------------------------------------------------------------------------------------------------------------------------------------------------------------------------------------------------------------------------------------------------------------------------------------------------------------------------------------------------------------------------------------------------------------------------------------------------------------------------------------------------------------------------------------------------------------------------------------------------------------------------------------------------------------------------------------------------------------------------------------------------------------------------------------------------------------------------------------------------------------------------------------------------------------------------------------------------------------------------------------------------------------------------------------------------------------------------------------------------------------------------------------------------------------------------------------------------------------------------------------------------------------------------------------------------------------------------------------------------------------------------------------------------------------------------------------------------------------------------------------------------------------------------------------------------------------------------------------------------------------------------------------------------------------------------------------------------------------------------------------------------------------------------------------------------------------------------------------------------------------------------------------------------------------------------------------------------------------------------------------------------------------------------------------------------------------------------------------------------------------------------------------------------------------------------------------------------------------------------------------------------------------------------------------------------------------------------------------------------------------------------------------------------------------------------------------------------------------------------------------------------------------------------------------------------------------------------------------------------------------------------------------------------------------------------------------------------------------------------------------------------------------------------------------------------------------------------------------------------------------------------------------------------------------------------------------------------------------------------------------------------------------------------------------------------------------------------------------------------------------------------------------------------------------------------------------------------------------------------------------------------------------------------------------------------------------------------------------------------------------------------------------------------------------------------------------------------------------------------------------------------------------------------------------------------------------------------------------------------------------------------------------------------------------------------------------------------------------------------------------------------------------------------------------------------------------------------------------------------------------------------------------------------------------------------------------------------------------------------------------------------------------------------------------------------------------------------------------------------------------------------------------------------------------------------------------------------------------------------------------------------------------------------------------------------------------------------------------------------------------------------------------------------------------------------------------------------------------------------------------------------------------------------------------------------------------------------------------------------------------------------------------------------------------------------------------------------------------------------------------------------------------------------------------------------------------------------------------------------------------------------------------------------------------------------------------------------------------------------------------------------------------------------------------------------------------- |
| 
Sharp Collision
Precision enhancer | 
Sharp State Change
Progress indicator | 
Knock
Incoming events |
| 
Damp Collision
Precision enhancer | 
Mad
Progress indicator | 
Ringing
Incoming events |
| 
Subtle Collision
Precision enhancer | 
Completed
Progress indicator | 
Jingle
Incoming events |
| 
Damp State Change
Precision enhancer | 
Firework
Progress indicator | |
| | 
Happy Alert
Progress indicator
Incoming events | |
| | 
Wave
Progress indicator
Incoming events | |
| | 
Angry Alert
Progress indicator | |
| | 
Square
Progress indicator | |
## Logging[](#logging "Direct link to Logging")
To enable logs, see [Logi Plugin Service Logging](/actions-sdk-docs/csharp/plugin-features/logging.md#logi-plugin-service-logging).
Log files are located in the `Logs` subdirectory of the Logi Plugin Service data directory:
* **Windows**:
* `C:\Users\\AppData\Local\Logi\LogiPluginService\Logs\messages\eventSources`
* `C:\Users\\AppData\Local\Logi\LogiPluginService\Logs\testing\event_sources.txt`
* **macOS**:
* `~/Users//Library/Application Support/Logi/LogiPluginService/Logs/messages/eventSources`
* `~/Users//Library/Application Support/Logi/LogiPluginService/Logs/testing/event_sources.txt`
## Troubleshooting[](#troubleshooting "Direct link to Troubleshooting")
### Common Issues[](#common-issues "Direct link to Common Issues")
* **Event Not Triggering**
* Verify event registration and raising
* Check event name consistency between code and YAML files
* Ensure plugin is properly loaded (check logs)
* Verify event appears in the event logs
* **Event Source Not Found**
* Check that YAML files are correctly placed in `events` directory
* Ensure file naming follows conventions (e.g., default event source file name should be `DefaultEventSource.yaml`)
* Verify YAML syntax is valid
* **Event Name Conflicts**
* Ensure event names are unique within the event source
* Verify [event naming rules](#event-naming-rules) are followed
* **No Haptic Feedback**
* Verify that the haptic device is shown in Logi Options+
* Check that the `/events/extra/eventMapping.yaml` file exists and contains haptic mappings
* Ensure the haptic device is properly connected and recognized
* Verify device supports haptic feedback (see [Supported Devices](/actions-sdk-docs/csharp/haptics/haptics-overview.md#supported-devices))
* **Incorrect Waveform**
* Verify the waveform name is correctly spelled in the `/events/extra/eventMapping.yaml` file
* Check the device-specific mappings are properly configured
* Ensure `DEFAULT` mapping is present as fallback in the `/events/extra/eventMapping.yaml` file
* Confirm the waveform exists in [Waveform Groups](#waveform-groups)
* **Weak or Inconsistent Haptic Response**
* Try different waveforms to find optimal feedback for your use case
* Check device-specific mappings for better hardware optimization
* Ensure device battery level is sufficient for haptic feedback
---
# Overview
*New in Plugin API 6.2.1 (Logi Options+ 1.95).*
The Logi Actions SDK provides haptic feedback capabilities for plugins through the plugin events system. Haptic feedback enables tactile responses to user actions and system events through device vibrations and force feedback.
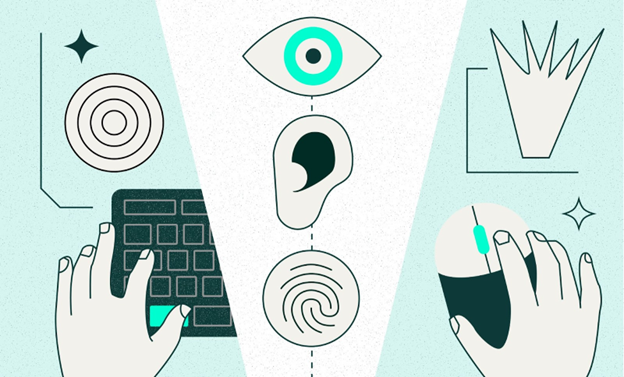
What are haptics? Each interaction object is a multi-sensory experience, and in the vast majority of cases, three modalities are involved, each with a different amount of information consciously perceived: 1. Sight - Visual feedback; 2. Hearing - Auditory feedback; 3. Touch - Haptic feedback.
## Features[](#features "Direct link to Features")
* **Configurable waveforms**: Select from predefined vibration patterns for different interaction types
* **Device-specific mapping support**: Map waveforms to specific hardware capabilities
* **Easy integration with existing plugins**: Use the existing plugin event infrastructure to trigger haptic feedback
## Supported Devices[](#supported-devices "Direct link to Supported Devices")
* Logitech MX Master 4 mouse with Logi Options+ software installed
---
# Haptics Tutorial
## Overview[](#overview "Direct link to Overview")
This guide will walk you through adding haptics to your plugin using the Logi Actions SDK. You'll learn how to use the Logi Plugin Tool to generate a plugin skeleton, register and trigger haptic events, debug your plugin, and package it for distribution on the Logi Marketplace. By the end of this tutorial, you'll have a working plugin that provides tactile feedback through Logitech devices with haptic support.
### Video Tutorial[](#video-tutorial "Direct link to Video Tutorial")
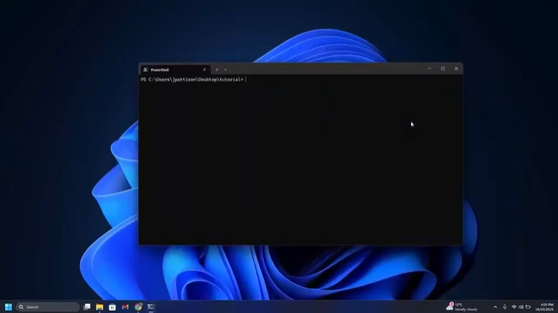
[WATCH ON YOUTUBE](https://www.youtube.com/watch?v=DIL31DZr5ik)
## Prerequisites[](#prerequisites "Direct link to Prerequisites")
Before starting this tutorial, make sure you have the required software and tools installed. See the [Prerequisites section](/actions-sdk-docs/csharp/plugin-development/introduction.md#prerequisites) for complete setup instructions.
## Creating a Plugin Using Haptics[](#creating-a-plugin-using-haptics "Direct link to Creating a Plugin Using Haptics")
### Step 1: Install the Logi Plugin Tool[](#step-1-install-the-logi-plugin-tool "Direct link to Step 1: Install the Logi Plugin Tool")
First, we need to install the Logi Plugin Tool, which will help us generate a plugin skeleton project.
Open a terminal in any folder and install the tool:
```shell
dotnet tool install --global LogiPluginTool
```
Check that the tool is installed correctly:
```shell
LogiPluginTool --help
```
You should see available commands, with `generate` being the one we're interested in for now.
### Step 2: Generate Your Plugin Project[](#step-2-generate-your-plugin-project "Direct link to Step 2: Generate Your Plugin Project")
Use the Logi Plugin Tool to generate a basic plugin skeleton:
```shell
LogiPluginTool generate Tutorial
```
This will create a new folder called `TutorialPlugin` containing a complete project structure with all necessary files.
### Step 3: Open the Project[](#step-3-open-the-project "Direct link to Step 3: Open the Project")
Navigate to your new `TutorialPlugin` folder and open the solution file (`.sln`) in Visual Studio.
You'll be greeted with a basic project template ready for customization.
### Step 4: Configure Plugin Capabilities[](#step-4-configure-plugin-capabilities "Direct link to Step 4: Configure Plugin Capabilities")
Open the plugin configuration file at `src/package/metadata/LoupedeckPackage.yaml`.
This file defines your plugin's metadata, including properties such as display name, description, and version.
Find the `pluginCapabilities` section and add the `HasHapticMapping` capability:
```yaml
pluginCapabilities:
- HasHapticMapping
```
This tells Logi Options+ that your plugin wants to utilize haptics.
**Note:** For the full plugin configuration file structure and capabilities, see [Plugin Configuration File Structure](/actions-sdk-docs/csharp/tutorial/plugin-structure.md#plugin-configuration-file-structure).
### Step 5: Create Event Configuration Files[](#step-5-create-event-configuration-files "Direct link to Step 5: Create Event Configuration Files")
You need to create two new files for event configuration:
#### a) Create DefaultEventSource.yaml File[](#a-create-defaulteventsourceyaml-file "Direct link to a) Create DefaultEventSource.yaml File")
Create the default event source file at `src/package/events/DefaultEventSource.yaml` with this content:
```yaml
events:
- name: buttonPress
displayName: Button Press
description: Triggered when the button is pressed
```
**Note:** For the full event source structure and capabilities, see [Defining Event Sources in YAML Files](/actions-sdk-docs/csharp/haptics/haptics-getting-started.md#defining-event-sources-in-yaml-files).
#### b) Create eventMapping.yaml File[](#b-create-eventmappingyaml-file "Direct link to b) Create eventMapping.yaml File")
The event mapping file maps your events to specific device functionality (haptics in our case).
Create the event mapping file at `src/package/events/extra/eventMapping.yaml` with the following content:
```yaml
haptics:
buttonPress:
DEFAULT: sharp_state_change
MX Master 4: sharp_collision # Optional: device-specific mappings
```
**Note:** The event name `buttonPress` must match exactly between these files and your code.
For the full waveform mapping structure and capabilities, see [Waveform Mapping](/actions-sdk-docs/csharp/haptics/haptics-getting-started.md#waveform-mapping).
### Step 6: Register the Event in Your Action[](#step-6-register-the-event-in-your-action "Direct link to Step 6: Register the Event in Your Action")
Open the `CounterAdjustment.cs` example action class in the `src/Actions` folder, which was generated with your project.
Now let's register and raise the event in our action code:
#### a) Override OnLoad Method[](#a-override-onload-method "Direct link to a) Override OnLoad Method")
Override the `OnLoad` method to register your event.
```csharp
protected override Boolean OnLoad()
{
this.Plugin.PluginEvents.AddEvent(
"buttonPress", // Event name (must match YAML files)
"Play Haptic", // Display name
"Plays a haptic" // Description
);
return true;
}
```
**Note:** The event name string must match exactly what you defined in `DefaultEventSource.yaml`.
#### b) Raise the Event[](#b-raise-the-event "Direct link to b) Raise the Event")
Raise the event in your `RunCommand` method. This is executed when the user binds and triggers your action:
```csharp
protected override void RunCommand(String actionParameter)
{
this.Plugin.PluginEvents.RaiseEvent(
"buttonPress" // Event name (must match YAML files)
);
}
```
### Step 7: Build and Test Your Plugin[](#step-7-build-and-test-your-plugin "Direct link to Step 7: Build and Test Your Plugin")
Build your plugin in Visual Studio or use `dotnet build` in your command line. The build process will automatically create a link for Logi Options+ to load your plugin from the build directory.
After building, the `Tutorial` plugin should appear in Logi Options+ with your other installed plugins.
#### a) Rename Your Action (Optional)[](#a-rename-your-action-optional "Direct link to a) Rename Your Action (Optional)")
To test hot reloading, we can rename the action to something more appropriate like "Trigger Haptic". After changing the name in code and rebuilding, the plugin should automatically reload and the name will update dynamically in Logi Options+.
#### b) Bind and Test[](#b-bind-and-test "Direct link to b) Bind and Test")
1. In Logi Options+, bind your action to any button on your device
2. Trigger the action
3. You should feel the haptic feedback on your device
If you're not feeling the haptic feedback, continue to the debugging section below.
## Debugging: Troubleshooting Haptic Events[](#debugging-troubleshooting-haptic-events "Direct link to Debugging: Troubleshooting Haptic Events")
If haptic events aren't working at this point, you should follow debug steps outlined in [Haptics Getting Started troubleshooting](/actions-sdk-docs/csharp/haptics/haptics-getting-started.md#troubleshooting).
Logging can be enabled for more detailed information. To enable logging, follow the steps outlined in [Haptics Getting Started logging](/actions-sdk-docs/csharp/haptics/haptics-getting-started.md#logging).
## Packaging and Distribution[](#packaging-and-distribution "Direct link to Packaging and Distribution")
Once your plugin is working as expected and you're ready to share it with others, you can package it for distribution as described in [Distributing the Plugin](/actions-sdk-docs/csharp/plugin-development/distributing-the-plugin.md).
---
# Action Symbols
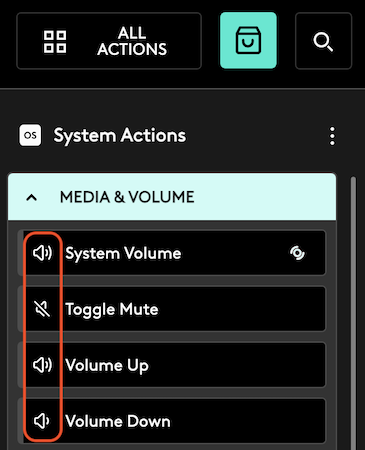
Plugin action symbols are small icons that represent the actions. The symbols are located next to the action names in the action picker of the configuration UI:
## How to Add Symbols[](#how-to-add-symbols "Direct link to How to Add Symbols")
1. **Prepare your symbol files**: Create vector images in [SVG](https://en.wikipedia.org/wiki/SVG) format for your plugin actions.
2. **Create one symbol per action**: Ensure there is one symbol for each action that your plugin implements. Missing symbols will be replaced with a generic one.
3. **Place symbols in the correct directory**: Locate the symbols in the `actionsymbols` directory of your [plugin package](/actions-sdk-docs/csharp/tutorial/plugin-structure.md).
4. **Add parameter-specific symbols (optional)**: If your action has a fixed (compile time) number of parameters, you can create one symbol per parameter for more specific representation.
5. **Restart the service**: After adding action symbols, restart Logi Plugin Service to apply the changes.
## Image Requirements[](#image-requirements "Direct link to Image Requirements")
### File Format[](#file-format "Direct link to File Format")
* Symbols must be in SVG format.
* Symbols must have a transparent background.
* Symbols must have a single color (black) strokes and fills.
### File Naming[](#file-naming "Direct link to File Naming")
* Symbol files must have `.svg` file extension.
* Symbol files must have full name of the action they represent:
* `Loupedeck.DemoPlugin.ToggleMuteCommand.svg` if action is defined in `ToggleMuteCommand` class located in `Loupedeck.DemoPlugin` namespace.
* If action has a fixed (compile time) number of parameters:
* Symbols can be specified for each parameter.
* If symbol is not found for this parameter, then symbol for the action itself is used.
* File name consists of full name of the action (as above), three underscores as a separator and parameter name:
* `Loupedeck.DemoPlugin.ButtonSwitchesCommand___1.svg` for the parameter `1` of action implemented in `ButtonSwitchesCommand` class located in `Loupedeck.DemoPlugin` namespace.
* If this file is not found, then `Loupedeck.DemoPlugin.ButtonSwitchesCommand.svg` file can be used.
---
# Icon Editor
Icon Editor is a part of the Options+ and Loupedeck user interfaces that lets users customize action icons. It provides navigation controls and tools, allowing you to select an icon and modify its appearance or associated text.
## Developer Mode[](#developer-mode "Direct link to Developer Mode")
For additional capability, developers can export Icon Templates via Icon Editor in developer mode:
1. Enable developer mode:
* Stop Logi Plugin Service.
* Open the `LoupedeckSettings.ini` configuration file located in the Logi Plugin Service directory:
* Path (Windows): `C:\Users\\AppData\Local\Logi\LogiPluginService`
* Path (macOS): `~/Library/Application Support/Logi/LogiPluginService`
* Add the following line:
```ini
Loupedeck/DeveloperMode=True
```
* Start Logi Plugin Service.
2. Open Icon Editor.
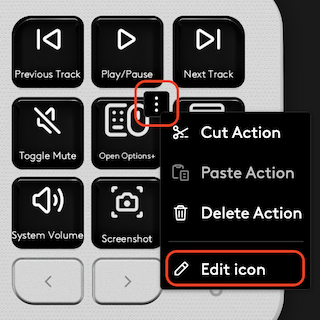
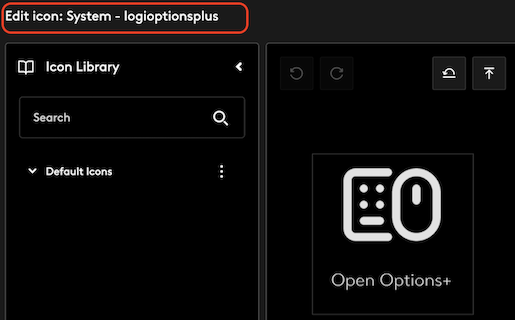
3. Switch to developer mode by clicking on the "Edit Icon: ..." title in the Icon Editor interface.
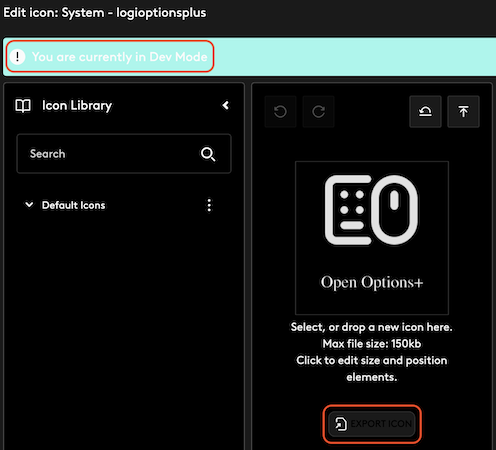
4. Perform needed updates and use "Export Icon" button to export the Icon Template.
---
# Icon Templates
Icon Templates define button appearance by specifying its image and text layout. These templates improve customization and maintain clarity when handling button designs. Icon Template files have the `.ict` extension and can be used across various precedence levels.
## Icon Templates Levels[](#icon-templates-levels "Direct link to Icon Templates Levels")
Icon Templates operate on several levels of precedence (from high to low), which guide their application in different contexts:
1. User Level:
* Scope: Can be updated directly by users in the [Icon Editor](/actions-sdk-docs/csharp/icons/icon-editor.md). Reset icon to default in the Icon Editor to remove the updates.
* Location: Stored in the `ActionIcons` folder within the user profile directory.
* Purpose: Allows personalized updates for icon designs unique to user-specific workflows.
2. Plugin Action Level (see [ToggleMuteCommand.cs](https://github.com/Logitech/actions-sdk/tree/master/DemoPlugin/DemoPlugin/ToggleMuteCommand.cs) and [its Icon Template](https://github.com/Logitech/actions-sdk/tree/master/DemoPlugin/DemoPlugin/package/icontemplates/Loupedeck.DemoPlugin.ToggleMuteCommand.ict) as an example):
* Scope: Template configurations for an individual action. Icon Template can be created and exported using the [Icon Editor developer mode](/actions-sdk-docs/csharp/icons/icon-editor.md#developer-mode).
* Location: Stored in the `icontemplates` folder of plugin packages. Action class full name should be used as the Icon Template file name.
* Purpose: Provides plugin-specific customization and greater control over button appearance.
3. Plugin Level:
* Scope: Default template configurations for individual plugins.
* Location: `DefaultIconTemplate.ict` stored in the `metadata` folder of plugin packages.
* Purpose: Ensures consistent plugin branding where specific configurations aren't defined.
4. Global Level:
* Scope: The global default settings.
* Location: Built into Logi Plugin Service and not editable by plugin developers.
* Purpose: Acts as a fallback configuration to standardize appearance globally across plugins.
## Sample Icon Template[](#sample-icon-template "Direct link to Sample Icon Template")
Here's a fully annotated example of an Icon Template:
```json
{
"backgroundColor": 4278869247, // Background color in ARGB format
"items": [
{
"$type": "Loupedeck.Service.ActionIconImageItem, LoupedeckShared", // Is being used for proper deserialization and is optional
"image": "", // Encoded image string if applicable
"imageFileName": null, // Reference to image file, if available
"imageColor": 4294967295, // Tint color for the image in ARGB format
"imageRotation": "None", // Image rotation
"isVisible": true, // Indicates whether the item is visible
"itemType": "Image", // Specifies that this item is an image
"area": {
"x": 15,
"y": 0,
"width": 70,
"height": 70,
"isFullScreen": true
} // Defines placement and size of the image
},
{
"$type": "Loupedeck.Service.ActionIconTextItem, LoupedeckShared", // Is being used for proper deserialization and is optional
"text": "Some text", // Default text display
"textColor": 4294967295, // Text color in ARGB format
"fontSize": 5, // Font size
"fontName": "Brown Logitech Pan Light", // Font type
"isVisible": true, // Indicates whether the item is visible
"itemType": "Text", // Specifies that this item is a text component
"area": {
"x": 0,
"y": 70,
"width": 100,
"height": 30,
"isFullScreen": false
} // Defines placement and dimensions for the text
}
]
}
```
Key Notes
1. Icon Templates contain two optional items:
* `"ItemType": "Image"` for visual buttons.
* `"ItemType": "Text"` for text overlays on buttons.
2. `image` property is optional and can include encoded image data.
3. Visibility and placement are controlled with:
* `area` properties (`x`, `y`, `width`, `height`) for positioning and sizing.
* `isVisible` flags to determine whether an item is displayed.
4. Other properties such as `fontSize`, `imageRotation`, and `imageColor` enable additional customization.
---
# Plugin Icon
A plugin icon is a graphical image that represents your plugin in user interfaces. The plugin icon is displayed in the Options+ and Loupedeck applications, as well as in the Logitech Marketplace.
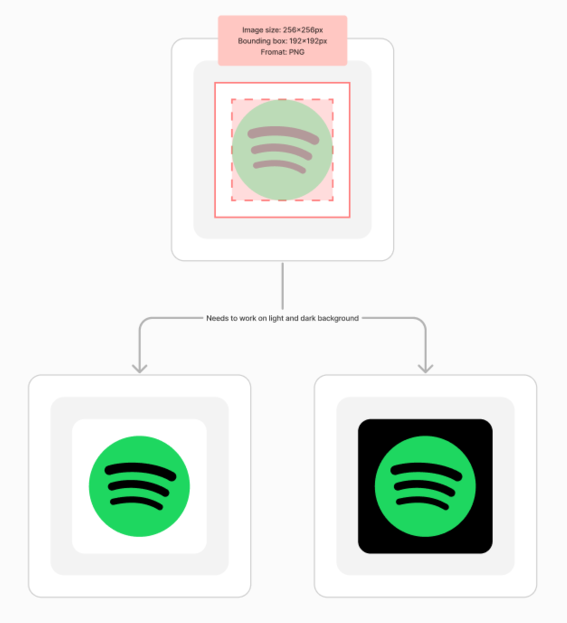
Options+ supports both black and white backgrounds for icons. To ensure that the plugin icon displays correctly on different backgrounds, please follow these guidelines:
* Image resolution must be 256x256 px in PNG format.
* The actual icon graphic must fit within a 192x192 px area centered in the icon.
* The remaining area around the icon graphic must be transparent.
To add an icon for the plugin, add it to the plugin lplug4 package under the folder named "metadata":
* `metadata/Icon256x256.png`
---
# Vector Images
Logi Plugin Service can use vector images instead of raster images when drawing action icons on device.
Currently only [SVG](https://en.wikipedia.org/wiki/SVG) format is supported as a vector format.
Icon templates (`.ict` files) or other plugin color settings can overwrite the SVG image file colors in the plugin only in case the SVG image file is monochrome, otherwise the SVG image file colors will be preserved. At the same time for both, the monochrome and multicolor SVG image files, icon background and text colors will be changed according to the settings.
## How to Use Vector Images in Plugins[](#how-to-use-vector-images-in-plugins "Direct link to How to Use Vector Images in Plugins")
### GetCommandImage and GetAdjustmentImage[](#getcommandimage-and-getadjustmentimage "Direct link to GetCommandImage and GetAdjustmentImage")
* Images returned by `PluginDynamicCommand.GetCommandImage()` and `PluginDynamicAdjustment.GetAdjustmentImage()` methods can either have raster (PNG) or vector (SVG) format.
Below is an example of a plugin command that reads an SVG file from plugin assembly embedded resources and returns it as command image.
```csharp
namespace Loupedeck.TestPlugin
{
using System;
internal class VectorGraphicsDynamicCommand : PluginDynamicCommand
{
public VectorGraphicsDynamicCommand()
: base("Vector graphics", "Command that has an SVG image", "Test Group")
{
}
protected override BitmapImage GetCommandImage(String actionParameter, PluginImageSize imageSize)
=> BitmapImage.FromResource(this.Plugin.Assembly, "Loupedeck.TestPlugin.VectorGraphicsDynamicCommand.svg");
}
}
```
### "actionicons" folder in LPLUG4 package[](#actionicons-folder-in-lplug4-package "Direct link to \"actionicons\" folder in LPLUG4 package")
* If .LPLUG4 package has an `actionicons` folder in its root, then Logi Plugin Service first searches this folder for plugin action images.
* In this case no changes are required in plugin code.
* Images can either have raster (PNG) or vector (SVG) format.
* Image file name should consist of action class full name as its name and corresponding file extension, e.g. in the above example it should be "Loupedeck.TestPlugin.VectorGraphicsDynamicCommand.svg" ("Loupedeck.TestPlugin" from namespace name and `VectorGraphicsDynamicCommand` from class name).
* This is the preferred method.
---
# Distributing the Plugin
Plugins can be distributed via the Logitech Marketplace and Loupedeck Marketplace to all other users.
## Submitting a Plugin to the Marketplace:[](#submitting-a-plugin-to-the-marketplace "Direct link to Submitting a Plugin to the Marketplace:")
* Please ensure you have tested the plugin properly with the supported hardware and software.
* Ensure that your plugin complies with the [Marketplace Approval Guidelines](/actions-sdk-docs/marketplace-approval-guidelines.md).
* Ensure that the plugin icon is in the metadata/ -subfolder under the plugin folder.
* Pack the plugin to the .lplug4 file. The instructions can be found below.
* Deliver the plugin using the submission form at .
## Packaging Plugin to a .lplug4 File[](#packaging-plugin-to-a-lplug4-file "Direct link to Packaging Plugin to a .lplug4 File")
`.lplug4` file is essentially a zip file with a specific directory structure and a plugin configuration file. The file format is registered with Logi Plugin Service and can be installed by double-clicking the file.
To create a plugin package, use the Logi Plugin Tool with the pack command:
```bash
logiplugintool pack ./bin/Release/ ./Example.lplug4
```
To validate a package use Logi Plugin Tool with the verify command:
```bash
logiplugintool verify ./Example.lplug4
```
**.lplug4 packaging information:**
* Please check that the metadata file matches the claimed operating system support.
* Logi Plugin Service includes a package installer that does all the needed work to install the plugin to the Service Plugin directory and run all needed installation methods.
* Recommended name for the .lplug4 package: `pluginName_version.lplug4` example: `SpotifyPremium_1_0.lplug4`.
* The `.lplug4` package must include a plugin configuration file named `LoupedeckPackage.yaml` in the metadata folder (see [Plugin Configuration File Structure](/actions-sdk-docs/csharp/tutorial/plugin-structure.md#plugin-configuration-file-structure)).
---
# C# SDK Introduction
The C# SDK leverages the power of .NET to help you create robust and feature-rich plugins for Logitech devices. This guide walks you through setting up your development environment and building your first plugin using the *Logi Actions SDK for C#*.
tip
New to the Logi Actions SDK? Start with the [Getting Started](/actions-sdk-docs/getting-started.md) guide to learn about supported devices, choose between C# and Node.js SDKs, and understand the ecosystem.
## Prerequisites[](#prerequisites "Direct link to Prerequisites")
Before you begin, ensure you have:
* Basic knowledge of .NET and C# development
* A code editor or IDE supporting .NET development (e.g., Visual Studio Code, Visual Studio 2022 Community Edition or higher, or JetBrains Rider)
For general prerequisites including host applications and supported devices, see the [Getting Started](/actions-sdk-docs/getting-started.md#prerequisites) guide.
## Installation and First Build[](#installation-and-first-build "Direct link to Installation and First Build")
The following steps guide you through installing the required tools and creating a working C# plugin project.
1. **Install the host application.** Ensure you have the latest Logitech Options+ or Loupedeck software installed:
* Logitech Options+:
* Loupedeck:
note
Installing a host application also installs the *Logi Plugin Service* application, which manages and runs plugins.
2. **Install the .NET 8 SDK.** Download it from
3. **Install Logi Plugin Tool.** Open a terminal and run the following command to install the `LogiPluginTool` package as a .NET tool:
```bash
dotnet tool install --global LogiPluginTool
```
note
*Logi Plugin Tool* is a command-line tool that allows you to create C# plugin projects, package plugins for distribution, and verify plugin packages.
4. **Generate a plugin project.** Use the *Logi Plugin Tool* to create a new plugin project:
```bash
logiplugintool generate Example
```
where "Example" is the name of the plugin. The command creates a folder named `ExamplePlugin` in the current directory.
5. **Build the plugin.** Navigate to the generated folder and build the solution:
```bash
cd ExamplePlugin
dotnet build
```
6. **Verify the build output.** Confirm that the build produces a `.link` file in the *Logi Plugin Service* Plugins directory:
* Windows
* macOS
```powershell
C:\Users\USERNAME\AppData\Local\Logi\LogiPluginService\Plugins\ExamplePlugin.link
```
```bash
/Users/USERNAME/Library/Application Support/Logi/LogiPluginService/Plugins/ExamplePlugin.link
```
note
The `.link` file tells the *Logi Plugin Service* where to find your plugin during development. When the plugin project is built, this file is updated to point to the build output directory. When the `.link` file exists, the plugin is loaded from the location specified in the file.
7. **Test the plugin.** Launch Logitech Options+ or Loupedeck software and wait for the configuration UI to appear.
* In the Logitech Options+ software, open the customization view for Actions Ring, MX Creative Keypad, or MX Creative Dialpad device. Then navigate to "All Actions" and verify that the "Example" plugin appears under the "Installed Plugins" section. If the plugin is not shown on the list, go to the Options+ settings and select "Restart Logi Plugin Service".
* In the Loupedeck software, unhide the "Example" plugin on the "Show and hide plugins" tab of the Action Panel. The plugin should be now shown in the UI.
## Hot Reloading[](#hot-reloading "Direct link to Hot Reloading")
You can optionally use the .NET Hot Reload feature to automatically rebuild the plugin project and reload the plugin in the host application whenever a source code file is saved.
To start hot reloading, first navigate to the plugin project's `src` directory, then run the watch command:
* Windows
* macOS
```powershell
cd ExamplePlugin\src\
dotnet watch build
```
```bash
cd ExamplePlugin/src/
dotnet watch build
```
More information about .NET Hot Reload:
---
# Testing and Debugging the Plugin
You can test your plugin by using it with the Logi Plugin Service.
The build task in the template project creates a .link file to the plugin installation folder. During the service startup, if this link file is found, the plugin is automatically loaded.
The plugin project generated with the Logi Plugin Tool has all the necessary settings in place. When you start debugging the generated plugin project in Visual Studio, the Logi Plugin Service is launched.
To debug your plugin, start the Logi Plugin Service using the built-in Visual Studio debugger. It is pre-configured in the project file.
1. To start debugging the plugin, switch the plugin solution to the Debug configuration.
2. Select Debug > Start Debugging, or click Start on the toolbar.
You can set breakpoints, navigate code, inspect data, and do any other usual debugging activity.
You can debug the plugin in the same way as you [debug any other C# project](https://docs.microsoft.com/en-us/visualstudio/get-started/csharp/tutorial-debugger).
---
# Action Editor Actions
Action Editor actions allow plugin developers to create custom controls with configurable user interfaces. These controls appear when users assign a plugin action to a device button or dial, enabling users to configure the action's behavior through a simple interface.
Use Action Editor actions when your plugin needs user configuration:
* **Text Input**: Actions that send custom text or commands.
* **File Selection**: Actions that work with specific files or folders.
* **Option Selection**: Actions with multiple behavior modes.
* **Device Configuration**: Actions that control external devices with settings.
* **Dynamic Content**: Actions that adapt based on available data sources.
### Basic Structure[](#basic-structure "Direct link to Basic Structure")
Action Editor actions follow this pattern:
```csharp
public class MyActionEditorCommand : ActionEditorCommand
{
public MyActionEditorCommand()
{
// Set basic properties
this.Name = "UniqueActionName";
this.DisplayName = "User-friendly name";
this.GroupName = "Category";
this.Description = "Brief description of functionality";
// Add controls for user configuration
this.ActionEditor.AddControlEx(
new ActionEditorTextbox("TextControl", "Enter text:"));
this.ActionEditor.AddControlEx(
new ActionEditorCheckbox("CheckboxControl", "Enable feature:"));
// Subscribe to events
this.ActionEditor.ListboxItemsRequested += this.OnListboxItemsRequested;
this.ActionEditor.ControlValueChanged += this.OnControlValueChanged;
}
protected override Boolean RunCommand(ActionEditorActionParameters actionParameters)
{
// Use the configured values when the action executes
if (actionParameters.TryGetString("TextControl", out var text))
{
// Perform action with user's configured text
return true;
}
return false;
}
}
```
## Action Types[](#action-types "Direct link to Action Types")
### ActionEditorCommand[](#actioneditorcommand "Direct link to ActionEditorCommand")
Use `ActionEditorCommand` for button actions that execute when pressed. These are ideal for operations like sending text, opening files, or triggering system commands.
```csharp
public class SendTextCommand : ActionEditorCommand
{
private const String TextControlName = "Text";
public SendTextCommand()
{
this.Name = "SendText";
this.DisplayName = "Send Text";
this.GroupName = "Action Editor";
this.Description = "Place text into an active text field";
this.ActionEditor.AddControlEx(new ActionEditorTextbox(TextControlName, "Text:"));
}
protected override Boolean RunCommand(ActionEditorActionParameters actionParameters)
{
if (actionParameters.TryGetString(TextControlName, out var text))
{
// Implement text sending functionality
return true;
}
return false;
}
}
```
### ActionEditorAdjustment[](#actioneditoradjustment "Direct link to ActionEditorAdjustment")
Use `ActionEditorAdjustment` for rotary control actions that respond to continuous input. These are perfect for adjustments like volume control, mouse movement, or scrolling.
```csharp
public class MouseScrollAdjustment : ActionEditorAdjustment
{
private const String IsInvertedControlName = "IsInverted";
public MouseScrollAdjustment() : base(false)
{
this.Name = "MouseScroll";
this.DisplayName = "Mouse Scroll";
this.GroupName = "Action Editor";
this.Description = "Control mouse scroll wheel";
this.ActionEditor.AddControlEx(new ActionEditorCheckbox(IsInvertedControlName, "Invert Direction"));
}
protected override Boolean ApplyAdjustment(ActionEditorActionParameters actionParameters, Int32 diff)
{
if (actionParameters.TryGetBoolean(IsInvertedControlName, out var isInverted))
{
if (isInverted)
{
diff = -diff;
}
// Implement mouse wheel scrolling functionality
return true;
}
return false;
}
}
```
## Controls[](#controls "Direct link to Controls")
There are different control types. Each action can have one or more controls. Controls can have configuration options like `SetRequired`, `SetDefaultValue`, `SetValues`, `SetFormatString`.
### ActionEditorTextbox[](#actioneditortextbox "Direct link to ActionEditorTextbox")
Text input control for text entry.
```csharp
this.ActionEditor.AddControlEx(
new ActionEditorTextbox(name: "TextControl", labelText: "Enter text:")
.SetRequired()
.SetPlaceholder("Type here..."));
```
### ActionEditorListbox[](#actioneditorlistbox "Direct link to ActionEditorListbox")
Dropdown selection control with dynamic item population.
```csharp
this.ActionEditor.AddControlEx(
new ActionEditorListbox(name: "ListControl", labelText: "Select option:"));
```
### ActionEditorCheckbox[](#actioneditorcheckbox "Direct link to ActionEditorCheckbox")
Boolean toggle control for true/false options.
```csharp
this.ActionEditor.AddControlEx(
new ActionEditorCheckbox(name: "CheckboxControl", labelText: "Enable feature:")
.SetDefaultValue(false));
```
### ActionEditorFileSelector[](#actioneditorfileselector "Direct link to ActionEditorFileSelector")
File browser control for selecting files.
```csharp
this.ActionEditor.AddControlEx(
new ActionEditorFileSelector(name: "FileControl", labelText: "Select file:")
.SetInitialDirectory(Environment.GetFolderPath(Environment.SpecialFolder.Desktop)));
```
### ActionEditorDirectorySelector[](#actioneditordirectoryselector "Direct link to ActionEditorDirectorySelector")
Directory browser control for selecting folders.
```csharp
this.ActionEditor.AddControlEx(
new ActionEditorDirectorySelector(name: "DirectoryControl", labelText: "Select directory:"));
```
### ActionEditorKeyboardKey[](#actioneditorkeyboardkey "Direct link to ActionEditorKeyboardKey")
Keyboard shortcut capture control.
```csharp
this.ActionEditor.AddControlEx(
new ActionEditorKeyboardKey(name: "KeyControl", labelText: "Shortcut:")
.SetBehavior(ActionEditorKeyboardKeyBehavior.KeyboardKey));
```
### ActionEditorButton[](#actioneditorbutton "Direct link to ActionEditorButton")
Interactive button control for triggering actions within the editor.
```csharp
this.ActionEditor.AddControlEx(
new ActionEditorButton(name: "ButtonControl", labelText: "Click me"));
```
### ActionEditorSlider[](#actioneditorslider "Direct link to ActionEditorSlider")
Numeric slider control for value selection within a range.
```csharp
this.ActionEditor.AddControlEx(
new ActionEditorSlider(name: "SliderControl", labelText: "Volume:", description: "Adjust volume level")
.SetValues(minimumValue: 0, maximumValue: 100, defaultValue: 50, step: 5)
.SetFormatString("{0}%"));
```
## Event Handling[](#event-handling "Direct link to Event Handling")
### Control Value Changes[](#control-value-changes "Direct link to Control Value Changes")
React to user input changes in real-time:
```csharp
// ...
public MyActionEditorCommand()
{
// Add controls those will trigger value change events
this.ActionEditor.AddControlEx(
new ActionEditorTextbox(name: "TextControl", labelText: "Enter text:"));
this.ActionEditor.AddControlEx(
new ActionEditorButton(name: "ButtonControl", labelText: "Click me"));
// Subscribe to value change events
this.ActionEditor.ControlValueChanged += this.OnControlValueChanged;
}
private void OnControlValueChanged(Object sender, ActionEditorControlValueChangedEventArgs e)
{
if (e.ControlName.EqualsNoCase("TextControl"))
{
var controlValue = e.ActionEditorState.GetControlValue("TextControl");
// Update display name based on user input
e.ActionEditorState.SetDisplayName($"Action: {controlValue}");
}
if (e.ControlName.EqualsNoCase("ButtonControl"))
{
// Handle button click
}
}
```
### Listbox Items Population[](#listbox-items-population "Direct link to Listbox Items Population")
Handle dynamic population of listbox items:
```csharp
// ...
public MyActionEditorCommand()
{
// Add listbox controls that need dynamic population
this.ActionEditor.AddControlEx(
new ActionEditorListbox(name: "ListControl", labelText: "Select option:"));
// Subscribe to event that fires when listbox needs items
this.ActionEditor.ListboxItemsRequested += this.OnListboxItemsRequested;
}
private void OnListboxItemsRequested(Object sender, ActionEditorListboxItemsRequestedEventArgs e)
{
if (e.ControlName.EqualsNoCase("ListControl"))
{
// Add items to the listbox
e.AddItem(name: "option1", displayName: "Option 1", description: "First option");
e.AddItem(name: "option2", displayName: "Option 2", description: "Second option");
// Optionally set default selection
e.SetSelectedItemName("option1");
}
}
```
### Action Editor Lifecycle[](#action-editor-lifecycle "Direct link to Action Editor Lifecycle")
Handle Action Editor start and finish lifecycle events:
```csharp
// ...
public MyActionEditorCommand()
{
// ...
// Subscribe to Action Editor lifecycle events
this.ActionEditor.Started += this.OnActionEditorStarted;
this.ActionEditor.Finished += this.OnActionEditorFinished;
}
private void OnActionEditorStarted(Object sender, ActionEditorStartedEventArgs e)
{
// Called when user opens the Action Editor
// Initialize any resources, start monitoring external data, etc.
}
private void OnActionEditorFinished(Object sender, ActionEditorFinishedEventArgs e)
{
// Called when user closes the Action Editor
// Clean up resources, stop monitoring external data, save temporary data, etc.
}
```
---
# Default Application Profiles
Default application profiles should be used only with application plugins.
There are two cases where default application profiles are used:
* When a user installs the application plugin with the default profile for the first time
* When a user wants to create a new profile for the application
When Logi Plugin Service creates the application profile:
* First the service tries to use the default profile from the Logi Plugin Service application plugin
* If a default application profile is not available, Logi Plugin Service creates an empty profile
If the application plugin is updated and has a new version of the default profile:
* It's not automatically updated to the existing application profile
* The updated default profile acts as a template for new application profiles
* When the user creates a new application profile after the update, a new default application profile is used
## Creating Default Profiles[](#creating-default-profiles "Direct link to Creating Default Profiles")
To create `DefaultProfileXX.lp5` files, create the regular profile in the UI and use the export feature to save it as a DefaultProfile file:
* Create a new application profile in Logitech software (Logi Options+ or Loupedeck).
* From the profile dropdown, select the application and click the three dots next to it, then click "Add profile". Add actions from the plugin to the profile and create the layout.
* From the profile dropdown in the Logitech software, select the three dots next to the selected profile and select the profile you want to export. Then select the three dots next to it to select "Export profile".
Note: It is not recommended to edit the zip profile folders manually, as personal information, such as your account name, may remain visible.
## Naming[](#naming "Direct link to Naming")
In most cases, we recommend using the default profile that extends to all devices, which name is:
* `DefaultProfile20.lp5`
If customization is wanted per device, you can use the following names:
* `DefaultProfile20.lp5` - for Loupedeck CT
* `DefaultProfile30.lp5` - for Loupedeck Live
* `DefaultProfile50.lp5` - for Loupedeck Live S
* `DefaultProfile70.lp5` - for Logitech MX Creative Keypad
* `DefaultProfile71.lp5` - for Logitech MX Creative Dialpad
* `DefaultProfile72.lp5` - for Logitech Actions Ring
To make different default profiles for Windows and Mac, use the `win` and `mac` postfixes after the profile name. Example:
* `DefaultProfile20win.lp5` - for Loupedeck CT on Windows
* `DefaultProfile20mac.lp5` - for Loupedeck CT on Mac
## Location[](#location "Direct link to Location")
### Plugin Package[](#plugin-package "Direct link to Plugin Package")
Recommended location for default profiles is [plugin package](/actions-sdk-docs/csharp/tutorial/plugin-structure.md).
Put default profile files in the `profiles` subdirectory of plugin package root directory.
### Embedded Resources[](#embedded-resources "Direct link to Embedded Resources")
Legacy way to store default profiles is to put them as embedded resources in native plugin binary. Visual Studio or another IDE can be used.
We recommend adding the default profiles under `DefaultProfiles` folder, but it's not required.
[More information about embedding a resource to a project.](https://learn.microsoft.com/en-us/visualstudio/ide/build-actions)
---
# External Service Login
Plugin account handling is managed through plugin preferences, where the plugin account is one of the available preference types. This system enables integration with external services that require user authentication.
Account preference should be created in the plugin constructor.
## Login and Logout[](#login-and-logout "Direct link to Login and Logout")
When a user clicks login or logout button in configuration UI, plugin gets `PluginPreferenceAccount.LoginRequested` or `PluginPreferenceAccount.LogoutRequested` event correspondingly.
Good practice is to subscribe to these events in `Plugin.Load()` method and to unsubscribe from these events in `Plugin.Unload()` method.
When login or logout is done, plugin should call `PluginPreferenceAccount.ReportLogin()` or `PluginPreferenceAccount.ReportLogout()` method correspondingly.
## Handling *Access Denied* Errors[](#handling-access-denied-errors "Direct link to handling-access-denied-errors")
If on any attempt to call an online service the plugin receives an *Access Denied* response, the plugin should call `PluginPreferenceAccount.ReportLogout()` method.
## Access and Refresh Tokens[](#access-and-refresh-tokens "Direct link to Access and Refresh Tokens")
**Access Token**: A short-lived credential that provides immediate authorization to access external service APIs. This token is used for authenticating API requests and typically expires after a limited time period for security purposes.
**Refresh Token**: A long-lived credential used to obtain new access tokens when they expire. This token allows the plugin to maintain authentication without requiring the user to log in again.
`PluginPreferenceAccount` class has `AccessToken` and `RefreshToken` properties that plugin can use to store access and refresh tokens.
* These properties are persistently stored between Logitech software sessions.
* These properties are set in the `PluginPreferenceAccount.ReportLogin()` method call and cleared in `PluginPreferenceAccount.ReportLogout()` method call.
## Example[](#example "Direct link to Example")
```csharp
public class MyPlugin : Plugin
{
private readonly PluginPreferenceAccount _myAccount;
public MyPlugin()
{
// Create an account preference
this._myAccount = new PluginPreferenceAccount("my-account")
{
DisplayName = "My account",
IsRequired = true,
LoginUrlTitle = "Sign in",
LogoutUrlTitle = "Sign out"
};
// Add the preference to the list
this.PluginPreferences.Add(this._myAccount);
}
public override void Load()
{
// Subscribe to login/logout requests
this._myAccount.LoginRequested += this.OnMyAccountLoginRequested;
this._myAccount.LogoutRequested += this.OnMyAccountLogoutRequested;
}
public override void Unload()
{
// Unsubscribe from login/logout requests
this._myAccount.LoginRequested -= this.OnMyAccountLoginRequested;
this._myAccount.LogoutRequested -= this.OnMyAccountLogoutRequested;
}
private void OnMyAccountLoginRequested(Object sender, EventArgs e)
{
// Login to external service to get access token and refresh token (if it exists)
// ...
// Set user name, access token and refresh token
this._myAccount.ReportLogin("ExternalServiceUserName", "ExternalServiceAccessToken", "ExternalServiceRefreshToken");
}
private void OnMyAccountLogoutRequested(Object sender, EventArgs e)
{
// Logout from external service
// ...
// Clear user name, access token and refresh token
this._myAccount.ReportLogout();
}
}
```
---
# Dynamic Folders
A dynamic folder (also known as "Control center") is a dynamic workspace that is fully controlled by a plugin.
* Like a normal workspace, a dynamic folder contains touch pages, encoder pages and wheel tools.
* Unlike a normal workspace, users cannot add any items to it, the whole content is defined by a plugin.
A dynamic folder is represented in the UI by a command that can be assigned to any touch or physical button. A dynamic folder can be opened by pressing this button on the device.
A dynamic folder can be closed:
* by pressing a special "Back" button,
* by pressing the device Home button,
* by executing any change workspace or change page command, or
* when the active application is changed.
## Implementation[](#implementation "Direct link to Implementation")
### Add Command Folder to Plugin[](#add-command-folder-to-plugin "Direct link to Add Command Folder to Plugin")
To add a command folder to a plugin, the developer needs to:
1. Add a class inherited from `PluginDynamicFolder` class to the plugin project:
```csharp
public class TaskSwitcherDynamicFolder : PluginDynamicFolder
```
2. Set folder parameters in the constructor:
```csharp
public TaskSwitcherDynamicFolder()
{
this.DisplayName = "Alt+Tab";
this.GroupName = "System";
}
```
3. Override the `GetNavigationArea` method to change the default `ButtonArea` navigation mode:
```csharp
public override PluginDynamicFolderNavigation GetNavigationArea(DeviceType _)
{
return PluginDynamicFolderNavigation.EncoderArea;
}
```
4. Define commands, adjustments and wheel tools that this workspace will contain.
5. Optionally, define actions display names, images and action behavior.
### Loading and Unloading[](#loading-and-unloading "Direct link to Loading and Unloading")
* To execute some code at folder loading, override `Load` method (is called during plugin load).
* To execute some code at folder unloading, override `Unload` method (is called during plugin unload).
Do not execute any code in the dynamic folder constructor, except setting folder parameters.
### Activation and Deactivation[](#activation-and-deactivation "Direct link to Activation and Deactivation")
* To execute some code at folder activation, override `Activate` method (the method is called when the first instance of the folder is open on the connected devices).
* To execute some code at folder deactivation, override `Deactivate` method (the method is called when the last instance of the folder is closed on the connected devices).
As an example, in `Activate` method you may want to subscribe to application events, and in `Deactivate` method to unsubscribe from those. The plugin does not need to process application events if the dynamic folder is not visible on the device.
### Folder Button Display Name and Image[](#folder-button-display-name-and-image "Direct link to Folder Button Display Name and Image")
By default, the button that opens a dynamic folder shows the dynamic folder display name defined in the constructor:
```csharp
public NumpadDynamicFolder()
{
this.DisplayName = "Numeric Pad";
}
```

However, it is possible to change the display name runtime by overriding `GetButtonDisplayName` method:
```csharp
public override String GetButtonDisplayName(PluginImageSize imageSize) => $"{this.ChannelCount} Channels";
```
It is also possible to use an image instead of text in this button by overriding `GetButtonImage` method, for example:
```csharp
protected override BitmapImage GetButtonImage(PluginImageSize imageSize)
{
var bitmapImage = PluginResources.ReadImage("Loupedeck.DemoPlugin.Images.ButtonImage.png");
return bitmapImage;
}
```
These methods should return `null` if the display name or the image is not available.
See [Accessing plugin resource files](/actions-sdk-docs/csharp/tutorial/change-a-button-image.md#accessing-plugin-resource-files) for more information about using `PluginResources` class.
### Navigation Modes[](#navigation-modes "Direct link to Navigation Modes")
The following modes are available:
* `None` - navigation is fully done by the plugin developer.
* `ButtonArea` - "Back" button is automatically inserted on every touch page in the left top corner. This is the default mode.
* `EncodeArea` - "Back" button is automatically inserted at the top of the left encoder page area. This is possible only if the dynamic folder does not define any encoder actions (neither rotation nor reset ones).
Navigation mode can be changed by overriding the `GetNavigationArea` method.
### Adding Navigation Buttons in the Code[](#adding-navigation-buttons-in-the-code "Direct link to Adding Navigation Buttons in the Code")
If the navigation mode is set to `None`, then navigation buttons can be inserted in the code.
The following action names should be used:
* `PluginDynamicFolder.NavigateUpActionName` - for "Back" button;
* `PluginDynamicFolder.NavigateLeftActionName` - for "Previous Touch Page" button;
* `PluginDynamicFolder.NavigateRightActionName` - for "Next Touch Page" button;
### Define Commands, Adjustments and Wheel Tools[](#define-commands-adjustments-and-wheel-tools "Direct link to Define Commands, Adjustments and Wheel Tools")
Use the following methods:
* `GetButtonPressActionNames` - to define touch button commands;
* `GetEncoderRotateActionNames` - to define encoder adjustments;
* `GetEncoderPressActionNames` - to define encoder "reset" commands;
* `GetWheelToolNames` - to define wheel tools.
The plugin developer should use these methods to create action names:
* `CreateCommandName` - for commands;
* `CreateAdjustmentName` - for adjustments.
A dynamic folder will automatically create more pages if the actions do not fit on one page.
A dynamic folder will automatically add navigation actions depending on the selected navigation mode.
```csharp
public override IEnumerable GetButtonPressActionNames(DeviceType _)
{
return new[]
{
PluginDynamicFolder.NavigateUpActionName,
this.CreateCommandName("7"),
this.CreateCommandName("8"),
this.CreateCommandName("9"),
this.CreateCommandName("."),
this.CreateCommandName("4"),
this.CreateCommandName("5"),
this.CreateCommandName("6"),
this.CreateCommandName("0"),
this.CreateCommandName("1"),
this.CreateCommandName("2"),
this.CreateCommandName("3")
};
}
```
A dynamic page can inform the Logi Plugin Service that the list of actions or wheel tools has changed by calling these methods:
* `ButtonActionNamesChanged` - for commands (including "reset" commands of encoders)
* `EncoderActionNamesChanged` - for adjustments
### Define Action Display Names and Images[](#define-action-display-names-and-images "Direct link to Define Action Display Names and Images")
A dynamic folder can define display names and images for commands and adjustments by overriding the following methods:
* `GetCommandDisplayName`
* `GetCommandImage`
* `GetAdjustmentDisplayName`
* `GetAdjustmentImage`
These methods should return `null` if the display name or the image is not available.
The Logi Plugin Service first tries to get the image and then, if no image is available, uses the display name as the button image.
```csharp
public override String GetCommandDisplayName(String actionParameter, PluginImageSize imageSize) =>
this.TryGetNativeApplication(actionParameter, out var app) ? app.DisplayName : "Unknown";
public override BitmapImage GetCommandImage(String actionParameter, PluginImageSize imageSize) =>
this.TryGetNativeApplication(actionParameter, out var app) ? app.Icon?.ToImage() : null;
```
### Define Adjustment Values[](#define-adjustment-values "Direct link to Define Adjustment Values")
To return the adjustment value, override the `GetAdjustmentValue` method:
```csharp
public override String GetAdjustmentValue(String actionParameter) =>
this.TryGetVolume(actionParameter, out var volume) ? volume.ToString("D") : null;
```
To inform the Logi Plugin Service that the adjustment value has changed, call the `AdjustmentValueChanged` method:
```csharp
private void OnVolumeChanged(Object sender, VolumeMixerItemEventArgs e) =>
this.AdjustmentValueChanged(e.Id);
```
### Execute Commands and Apply Adjustments[](#execute-commands-and-apply-adjustments "Direct link to Execute Commands and Apply Adjustments")
* `RunCommand` - override this method to execute commands
* `ApplyAdjustment` - override this method to apply adjustments
```csharp
public override void RunCommand(String actionParameter)
{
if (Int32.TryParse(actionParameter, out var processId))
{
// Implement process activation logic with the given processId
}
}
```
## Closing the Dynamic Folder[](#closing-the-dynamic-folder "Direct link to Closing the Dynamic Folder")
The folder can also be closed programmatically with `this.Close();`.
This might be useful when the dynamic folder is used to switch between several options. But please be consistent with the use. The recommendation is to either close the folder after each command or don't close it at all and let the user navigate out of it.
```csharp
public override void RunCommand(String actionParameter)
{
# execute the selected command here
# close the folder after the command
this.Close();
}
```
There's no programmatic way to open the folder but the Logi Plugin Service controls this.
## Low Level Events[](#low-level-events "Direct link to Low Level Events")
As an alternative to reacting to actions, the plugin developer might choose to react to low-level commands:
* `ProcessButtonEvent` - override to process physical button presses;
* `ProcessEncoderEvent` - override to process encoder rotations;
* `ProcessTouchEvent` - override to process touch events.
* TouchDown
* TouchUp
* LongPress
* LongRelease
* Tap
* DoubleTap
* Move
* HorizontalSwipe
* VerticalSwipe
* TwoFingerTap
If the dynamic folder handles a low-level event, it should return `true`.
```csharp
public override Boolean ProcessButtonEvent(String actionParameter, DeviceButtonEvent buttonEvent)
{
if (buttonEvent.IsPressed)
{
this.SendKeyboardShortcut(actionParameter);
return true;
}
return false;
}
```
---
# Installation and Uninstallation
## Plugin Installation[](#plugin-installation "Direct link to Plugin Installation")
When a plugin is installed, Logi Plugin Service extracts the contents of the .lplug4 plugin package into the `Plugins` directory:
* Windows
* macOS
```text
%LOCALAPPDATA%\Logi\LogiPluginService\Plugins\
```
```text
~/Library/Application Support/Logi/LogiPluginService/Plugins/
```
You can install plugins with [Logi Plugin Tool](/actions-sdk-docs/csharp/plugin-development/introduction.md) using the following command:
```bash
logiplugintool install Example.lplug4
```
When a plugin is uninstalled, Logi Plugin Service removes the plugin files from the Logi Plugin Service data directory. Logi Plugin Tool can be used to uninstall plugins:
```bash
logiplugintool uninstall Example
```
where "Example" is the name of the plugin to uninstall.
## Customizing Installation[](#customizing-installation "Direct link to Customizing Installation")
A plugin can override the `Plugin.Install()` and `Plugin.Uninstall()` methods to customize the installation and uninstallation process:
* `Install()` is called immediately after the plugin is installed (copied to the Logi Plugin Service data directory).
* `Uninstall()` is called just before the plugin is uninstalled (deleted from the Logi Plugin Service data directory).
The `Install()` method can:
* Install application-side extension files into a target application's directory.
* Copy presets or other resources required by the target application.
* Allow specific TCP/IP ports in the firewall.
The `Uninstall()` method can:
* Delete files installed by the `Install()` method.
* Delete caching files.
* Remove additional files.
If your plugin needs to install additional files (application-side extensions, presets, etc.), it can do so in the `Install()` method:
* Additional files are added to the plugin as an embedded resource.
* In the `Install()` method, a plugin can call the following helper methods to extract these files to the required directory:
* `Assembly.ExtractFile(String resourceFileName, String pathName)` - extracts an embedded resource file to a specified location on the local drive.
* `Assembly.FindFile(String resourceFileName)` - returns the full path to an embedded resource by file name.
* `Assembly.GetFilesInFolder(String resourceFolderName)` - returns an array of full paths to embedded resources located in the given folder.
* `Assembly.ReadTextFile(String resourceName)` - reads text from an embedded resource text file.
Your plugin has access to its `Assembly` instance via the `this.Assembly` field:
```text
var pluginFileName = Path.Combine(gimpDirectory, "plug-ins", "logi_plugin.py");
this.Assembly.ExtractFile("Loupedeck.Payload.plugin.logi_plugin.py", pluginFileName);
```
## Plugin Dependencies[](#plugin-dependencies "Direct link to Plugin Dependencies")
If your plugin requires additional class libraries, include the dependency DLLs alongside your plugin DLL in the .lplug4 package. The Logi Plugin Service will load them automatically when the plugin starts.
## See Also[](#see-also "Direct link to See Also")
* [Distributing the plugin](/actions-sdk-docs/csharp/plugin-development/distributing-the-plugin.md)
---
# Logging
Logging provides essential debugging and monitoring capabilities for both the Logi Plugin Service itself and individual plugins. The logging system helps developers troubleshoot issues, monitor plugin behavior, and track system events during development and production use.
## Log Files Location[](#log-files-location "Direct link to Log Files Location")
Log files are located in the "Logs" subdirectory of the Logi Plugin Service data directory:
* Windows: `C:\Users\\AppData\Local\Logi\LogiPluginService\Logs`
* macOS: `~/Users//Library/Application Support/Logi/LogiPluginService/Logs`
## Plugin Logging[](#plugin-logging "Direct link to Plugin Logging")
Logi Plugin Service provides logging possibilities also for plugins. The log messages from a plugin are written both to the Logi Plugin Service log file (when enabled) and to a plugin-specific log file. The plugin logging is always enabled, even if the Logi Plugin Service logging is disabled. The plugin log file is located in the `Logs\plugin_logs` subdirectory of the Logi Plugin Service data directory.
### PluginLog class[](#pluginlog-class "Direct link to PluginLog class")
The `PluginLog` class provides helper methods to log messages easily everywhere in the plugin code.
You can find the source code here: [PluginLog.cs](https://github.com/Logitech/actions-sdk/blob/master/DemoPlugin/DemoPlugin/PluginLog.cs).
The demo plugin contains an example of plugin logging by using `PluginLog` class: [DemoPlugin](https://github.com/Logitech/actions-sdk/blob/master/DemoPlugin/DemoPlugin/).
The following log levels are supported by the plugin logs: `Verbose`, `Info`, `Warning`, `Error`.
For each log level the `PluginLog` class has two methods:
* For logging a message only:
```csharp
public static void Info(String text) => PluginLog._pluginLogFile?.Info(text);
```
* For logging an exception and a message:
```csharp
public static void Info(Exception ex, String text) => PluginLog._pluginLogFile?.Info(ex, text);
```
### Setting up Logging for New Plugins[](#setting-up-logging-for-new-plugins "Direct link to Setting up Logging for New Plugins")
For a new plugin, the easiest way to take the plugin logging into use is to generate the plugin project with the [Logi Plugin Tool](/actions-sdk-docs/csharp/plugin-development/introduction.md). The Logi Plugin Tool version must be 5.6 or newer. The generated skeleton project contains the enabler code for plugin logging and an example of how to log messages from the plugin code.
### Setting up Logging for Existing Plugins[](#setting-up-logging-for-existing-plugins "Direct link to Setting up Logging for Existing Plugins")
For an existing plugin, you can take the plugin logging into use as follows:
1. Download the [PluginLog.cs](https://github.com/Logitech/actions-sdk/blob/master/DemoPlugin/DemoPlugin/PluginLog.cs) file and include it in your plugin project.
2. In the `PluginLog.cs` file, change the namespace to the same one that your plugin project uses:
```csharp
namespace Loupedeck.DemoPlugin
```
3. Initialize the `PluginLog` class in the constructor of your plugin class (replace the plugin class name `DemoPlugin` with your plugin class):
```csharp
public DemoPlugin() => PluginLog.Init(this.Log);
```
After this, you can log messages in your plugin code:
```csharp
PluginLog.Info("Counter was reset");
```
## Logi Plugin Service Logging[](#logi-plugin-service-logging "Direct link to Logi Plugin Service Logging")
Logi Plugin Service logging is an advanced feature that plugin developers usually do not need. Plugin developers should generally use only plugin logging (described above), which provides comprehensive debugging capabilities for plugin-specific development. Logi Plugin Service logging is typically only required for deep system-level debugging or when working on complex issues.
### Enabling Traces and Logs[](#enabling-traces-and-logs "Direct link to Enabling Traces and Logs")
**Note:** Enabling logging might slow down the Logi Plugin Service considerably. Remember to turn off logging when you don't need it.
Enabling traces and logs for the Logi Plugin Service is done by creating empty files with specific names, without the file extension in the Logi Plugin Service data directory (same place where the LoupedeckSettings.ini file is located):
* `enablelogs` - enables writing traces to log file.
Note: File name should not include a file extension. For example, enablelogs.txt will not work.
---
# Managing Plugin Settings
For each plugin, Logi Plugin Service stores a collection of setting names and values. Here are some characteristics of plugin settings:
* Both setting names and values are of `String` type.
* The setting names are case-insensitive.
* Plugin settings are persistent and are stored encrypted.
* Any setting can be marked to be backed up in the cloud for the logged-in Logi user.
## Usage[](#usage "Direct link to Usage")
The following methods are available in the `Plugin` class.
### Read Setting[](#read-setting "Direct link to Read Setting")
```csharp
protected Boolean TryGetPluginSetting(String settingName, out String settingValue);
```
Returns a plugin setting.
Returns `true` if the setting exists and `false` otherwise.
If the setting does not exist, then `settingValue` is set to `null`.
### Write Setting[](#write-setting "Direct link to Write Setting")
```csharp
protected void SetPluginSetting(String settingName, String settingValue, Boolean backupOnline);
```
Saves a plugin setting.
Set `backupOnline` to `true` to backup this setting in the cloud and `false` to keep it only locally.
### Delete Setting[](#delete-setting "Direct link to Delete Setting")
```csharp
protected void DeletePluginSetting(String settingName);
```
Deletes a plugin setting.
### List All Settings[](#list-all-settings "Direct link to List All Settings")
```csharp
protected String[] ListPluginSettings();
```
Returns a list of plugin setting names.
## Example[](#example "Direct link to Example")
```csharp
private String GetUserId()
{
const String SettingName = "UserId";
// first try to get existing user ID
if (this.TryGetPluginSetting(SettingName, out var existingUserId))
{
return existingUserId;
}
// if it does not exist, generate a new one and save it
var newUserId = Guid.NewGuid().ToString("N");
this.SetPluginSetting(SettingName, newUserId, false);
return newUserId;
}
```
Note: The way you access plugin settings methods depends on the context of your code:
* **Plugin-level code:** When your code is inside a class that inherits from `Plugin` class (such as your main plugin class), you can call the settings methods directly using `this`, e.g. `this.TryGetPluginSetting(settingName, out var settingValue)`.
* **Action-level code:** When your code is inside a class that inherits from classes such as `PluginDynamicCommand`, you need to access the settings methods through the `Plugin` property, e.g. `this.Plugin.TryGetPluginSetting(settingName, out var settingValue)`. This is because action classes have a reference to the plugin instance through their `Plugin` property, rather than inheriting from the `Plugin` class directly.
## See Also[](#see-also "Direct link to See Also")
* [Storing Plugin Data](/actions-sdk-docs/csharp/plugin-features/storing-plugin-data.md)
---
# Multistate Plugin Actions
By default, plugin actions have one state.
The plugin can define more than one state for any dynamic action.
States are identified by a 0-based index.
Once set, the number of states cannot be changed.
Each state has its own:
* display name;
* description;
* button image;
* LED color.
## Plugin API[](#plugin-api "Direct link to Plugin API")
### Dynamic Command[](#dynamic-command "Direct link to Dynamic Command")
Create a class inherited from `PluginMultistateDynamicCommand` abstract class.
### Define Multiple States[](#define-multiple-states "Direct link to Define Multiple States")
```csharp
protected Int32 AddState(String displayName, String description)
```
In the dynamic action class constructor, the plugin calls `AddState()` method for every action state.
E.g. if the command has "on" and "off" states:
```csharp
public LampSwitchDynamicCommand()
{
this.AddState("On", "Lamp is turned on");
this.AddState("Off", "Lamp is turned off");
}
```
### Get Action States[](#get-action-states "Direct link to Get Action States")
```csharp
public IReadOnlyList States { get; }
```
Is `null` by default and is created during the first call of the `AddState()` method.
### Get Current Action State[](#get-current-action-state "Direct link to Get Current Action State")
All methods that work with the current state have two overloads: without and with the `actionParameter` parameter.
```csharp
public Boolean TryGetCurrentState(out Int32 currentState);
public Boolean TryGetCurrentState(String actionParameter, out Int32 currentState);
```
### Change the Current Action State[](#change-the-current-action-state "Direct link to Change the Current Action State")
Plugin calls `SetCurrentState()` method to change the current state.
```csharp
protected void SetCurrentState(Int32 newStateIndex);
protected void SetCurrentState(String actionParameter, Int32 newStateIndex);
```
### Increment and Decrement Current Action State[](#increment-and-decrement-current-action-state "Direct link to Increment and Decrement Current Action State")
```csharp
protected void IncrementCurrentState(String actionParameter);
protected void IncrementCurrentState();
protected void DecrementCurrentState(String actionParameter);
protected void DecrementCurrentState();
```
The plugin calls these methods to increment and decrement the current state.
Incrementing the last state activates the first state. Decrementing the first state activates the last state.
### Toggle the Current Action State[](#toggle-the-current-action-state "Direct link to Toggle the Current Action State")
```csharp
protected void ToggleCurrentState(String actionParameter);
protected void ToggleCurrentState();
```
Plugin calls `ToggleCurrentState()` method to toggle the current state.
Works only actions with two states. In other cases throws `InvalidOperationException` exception.
E.g. if the command has "on" and "off" states:
```csharp
protected override void RunCommand(String actionParameter) => this.ToggleCurrentState(actionParameter);
```
### Get the State Display Name[](#get-the-state-display-name "Direct link to Get the State Display Name")
```csharp
protected virtual String GetCommandDisplayName(String actionParameter, Int32 deviceState, PluginImageSize imageSize);
```
Overload `GetCommandDisplayName` method with an additional `deviceState` parameter is called for actions with more than one state.
### Get State Image[](#get-state-image "Direct link to Get State Image")
```csharp
protected virtual BitmapImage GetCommandImage(String actionParameter, Int32 deviceState, PluginImageSize imageSize);
```
Overload `GetCommandImage` method with an additional `deviceState` parameter is called for actions with more than one state.
## Minimal Example[](#minimal-example "Direct link to Minimal Example")
```csharp
namespace Loupedeck.Test4Plugin
{
using System;
public class ToggleMultistateDynamicCommand : PluginMultistateDynamicCommand
{
public ToggleMultistateDynamicCommand()
: base("Toggle Multistate", null, "Test")
{
this.AddState("On", "Turn me on");
this.AddState("Off", "Turn me off");
}
protected override void RunCommand(String actionParameter) => this.ToggleCurrentState();
}
}
```
---
# Plugin Capabilities
## Application and Universal Plugins[](#application-and-universal-plugins "Direct link to Application and Universal Plugins")
In terms of using applications, plugins are divided into two classes:
* The first class is the plugins for applications. These plugins are visible in the application section. They generally require an application to be in the foreground to execute commands.
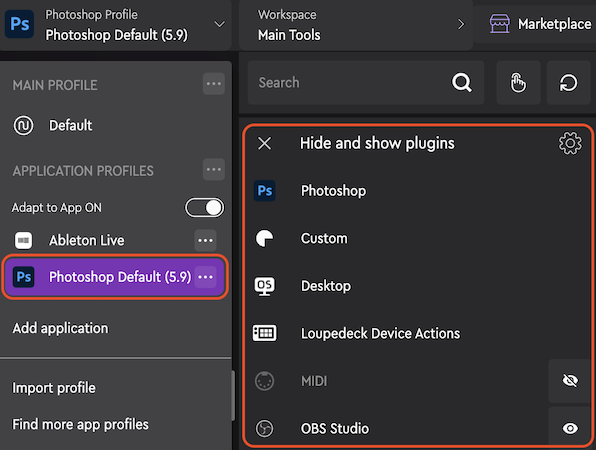
Application plugins in Loupedeck Application
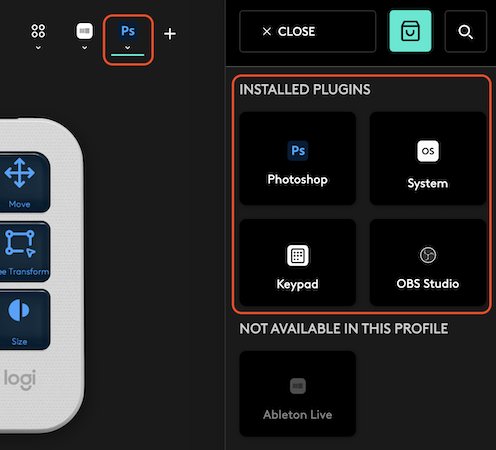
Application plugins in Logi Options+ Application
* The other type of plugins do not require an application to be in the foreground or any application to be running locally at all. For example, Twitch and Philips Hue plugins are using remote services directly.
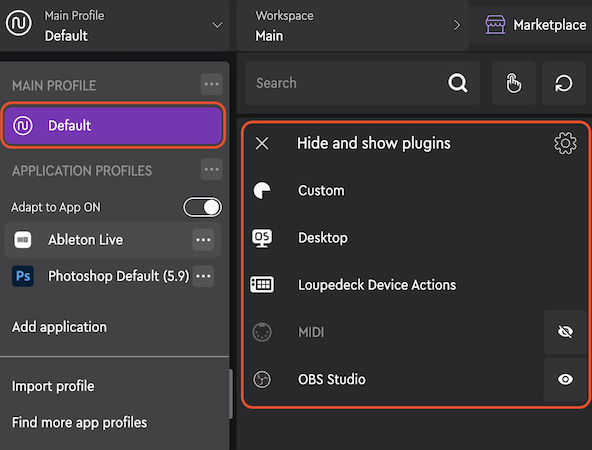
Universal plugins in Loupedeck Application
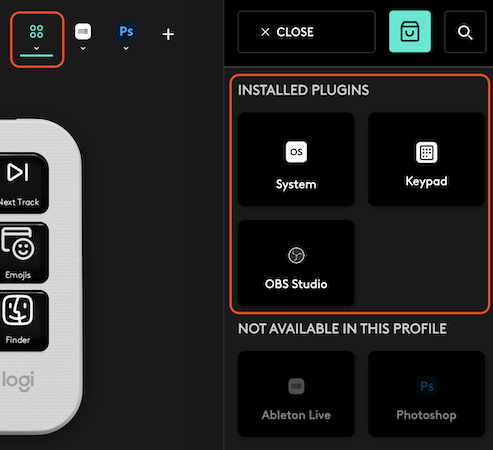
Universal plugins in Logi Options+ Application
You can specify whether your plugin requires an associated application by changing the following flag in your Plugin class:
```csharp
public override Boolean HasNoApplication => true;
```
## Plugins With Shortcuts and API-Only Plugins[](#plugins-with-shortcuts-and-api-only-plugins "Direct link to Plugins With Shortcuts and API-Only Plugins")
There are two distinct types of actions:
* Shortcuts, which essentially are key combinations that Logi Plugin Service sends on behalf of the user and
* API-based actions, those that are controlling target application/service using dedicated API (for example, OBS can be controlled via WebSocket using [obs-websocket plugin](https://github.com/Palakis/obs-websocket) )
To indicate if a plugin is having API-only actions, set the following flag in the Plugin class:
```csharp
public override Boolean UsesApplicationApiOnly => true;
```
Plugins with this flag set to true can be connected to any profile and are accessible from the Action Panel.
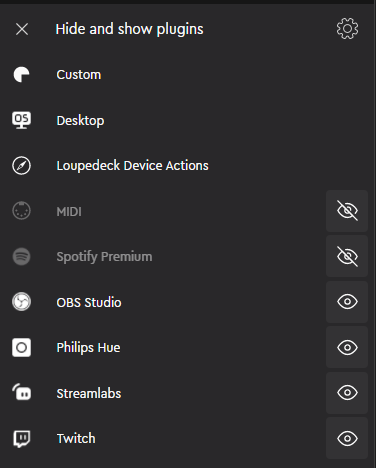
"Hide and show plugins" dialog in Loupedeck Application
## Plugin Configuration File[](#plugin-configuration-file "Direct link to Plugin Configuration File")
The plugin configuration file `LoupedeckPackage.yaml` can contain additional fields related to plugin capabilities.
### Plugin Capabilities Field[](#plugin-capabilities-field "Direct link to Plugin Capabilities Field")
The `pluginCapabilities` field in `LoupedeckPackage.yaml` defines special installation and runtime requirements:
```yaml
pluginCapabilities:
- RequiresAdminInstallation
- RequiresAdminUninstallation
- RequireApplicationCloseOnInstallWin
- RequireApplicationCloseOnInstallMac
```
**Available Capabilities:**
* `RequiresAdminInstallation` - Plugin requires installation with elevated rights
* `RequiresAdminUninstallation` - Plugin requires uninstallation with elevated rights
* `RequireApplicationCloseOnInstallWin` - Plugin requires application to be closed during installation and uninstallation (Windows). If it is defined, then `applicationPatterns` field is required
* `RequireApplicationCloseOnInstallMac` - Plugin requires application to be closed during installation and uninstallation (macOS). If it is defined, then `applicationPatterns` field is required
### Application Patterns Field[](#application-patterns-field "Direct link to Application Patterns Field")
The `applicationPatterns` field defines regex expressions to identify supported applications (required when using application close capabilities):
```yaml
applicationPatterns:
processNamePattern: ^lightroom$
bundleNamePattern: ^com.adobe.LightroomClassicCC7$
displayNamePattern: ^Adobe Lightroom Classic$
executablePathPattern: Adobe Lightroom Classic\\lightroom.exe$
```
**Pattern Types:**
* `processNamePattern` - Application process names (Windows)
* `bundleNamePattern` - Application bundle IDs (macOS)
* `displayNamePattern` - Application display name
* `executablePathPattern` - Application executable file path (Windows)
Uses .NET regex syntax: [Quick Reference](https://learn.microsoft.com/en-us/dotnet/standard/base-types/regular-expression-language-quick-reference)
---
# Plugin Localization
Plugin can be localized to any language, even if this language is not supported by Logi Options+ or Loupedeck.
Normally plugin language follows the language of Logitech software (Logi Options+ or Loupedeck), but that can be changed by user in plugin properties or by plugin code (e.g. to match the language of the target application).
## Selecting Plugin Language[](#selecting-plugin-language "Direct link to Selecting Plugin Language")
### Priority Order[](#priority-order "Direct link to Priority Order")
1. Forced plugin language (see [below](#forced-plugin-language)).
2. Plugin language set by plugin code, e.g. to match the connected application's language.
3. Current Logitech software language, if supported.
4. English (default) language.
### Using Client Application Language[](#using-client-application-language "Direct link to Using Client Application Language")
The plugin language can be defined by the language of the client application.
If it is not possible to get the language of the client application, the plugin language defaults to the same as the Logitech software language.
The plugin must set the current language as early as possible (for example, after establishing a connection with an application via the application API) using the `Plugin.Localization.SetCurrentLanguage()` method:
```csharp
var applicationLanguageId = this._applicationApi.GetLanguage();
if (!this.Localization.SetCurrentLanguage(applicationLanguageId))
{
this.Localization.SetCurrentLanguage(LocalizationEngine.DefaultLanguage);
}
```
### Forced Plugin Language[](#forced-plugin-language "Direct link to Forced Plugin Language")
Forced plugin language can be used for testing plugin localization. Applying the setting requires Logi Plugin Service restart.
Add the following setting to `LoupedeckSettings.ini` file to force language for all plugins (except the default one):
```ini
Test/PluginLanguage=de-DE
```
### Language ID[](#language-id "Direct link to Language ID")
Language ID is a string in the format `languagecode-countrycode`, where `languagecode` is a lowercase 2-letter language code derived from [ISO 639-1](https://en.wikipedia.org/wiki/List_of_ISO_639-1_codes) and `countrycode` is derived from [ISO 3166-1 alpha-2](https://en.wikipedia.org/wiki/ISO_3166-1_alpha-2) and usually consists of two uppercase letters.
Examples are `en-US`, `en-GB` and `fi-FI`.
More information: [System.Globalization.CultureInfo.Name Property](https://learn.microsoft.com/en-us/dotnet/api/system.globalization.cultureinfo.name).
## Localization Files (XLIFF)[](#localization-files-xliff "Direct link to Localization Files (XLIFF)")
This section explains how to localize your plugin in any language. Note that the `en-US` language is a single source reference for the translations.
1. Generate XLIFF files with a deep link or [LogiPluginTool](/actions-sdk-docs/csharp/plugin-development/introduction.md). Note that in both cases Logi Plugin Service should be running.
* Using deep link: XLIFF files will be generated in the `localization.generated` subfolder of the plugin package.
```powershell
loupedeck://plugin//xliff
```
Example:
```powershell
loupedeck://plugin/spotify/xliff
```
* Using LogiPluginTool: XLIFF files will be generated to the specified directory.
```powershell
LogiPluginTool xliff
```
Example:
```powershell
LogiPluginTool xliff Spotify ./
```
2. Translate XLIFF files.
3. Put translated XLIFF files in `localization` subfolder of plugin package.
* We recommend that file name consists of plugin name and language, e.g. `Spotify_de-DE.xliff` for German translation.
* Check that `target-language` attribute of `` tag contains the right language, e.g. `de-DE` for German translation.
4. Reload plugin:
```powershell
loupedeck://plugin//reload
```
Example:
```powershell
loupedeck://plugin/Spotify/reload
```
5. To verify translation, set required language, e.g. see [Forced plugin language](#forced-plugin-language).
### String IDs[](#string-ids "Direct link to String IDs")
String IDs are unique identifiers for localization that link text across different language files. In the Logi Actions SDK, English text strings automatically become their own string IDs and should not be changed once used in translations.
**Why this matters**: Once you have translation files, changing English text in your code will break the connection to existing translations. If you need to modify English text, you must create an English-to-English translation file instead.
**Example**: To change "Volume Up" to "Increase Volume", keep the original code unchanged (e.g. `this.DisplayName = "Volume Up";`) and add a translation entry that maps `"Volume Up"` → `"Increase Volume"` in your English XLIFF file.
This approach preserves existing translations in other languages while updating the displayed English text.
## Advanced Topics[](#advanced-topics "Direct link to Advanced Topics")
### Mark Action as Non-Localizable[](#mark-action-as-non-localizable "Direct link to Mark Action as Non-Localizable")
Sometimes display names and descriptions of some commands and adjustments should not be localized (should not end up in generated XLIFF file).
In this case use the `SetLocalize(Boolean)` method:
```csharp
public class ButtonSwitchesCommand : PluginDynamicCommand
{
public ButtonSwitchesCommand() : base()
{
this.SetLocalize(false);
}
}
```
Same applies to action parameters:
```csharp
public class ButtonSwitchesCommand : PluginDynamicCommand
{
public ButtonSwitchesCommand() : base()
{
this.AddParameter(actionParameter, $"Switch {i}", "Switches").SetLocalize(false);
}
}
```
### Mark All Action Parameters as Non-Localizable[](#mark-all-action-parameters-as-non-localizable "Direct link to Mark All Action Parameters as Non-Localizable")
Sometimes action parameters are added at runtime, and their display names should not be localized (should not end up in generated XLIFF file). However it is still needed to localize the action itself.
In this case use the `SetLocalizeParameters(Boolean)` method:
```csharp
public class ButtonSwitchesCommand : PluginDynamicCommand
{
public ButtonSwitchesCommand() : base()
{
this.SetLocalizeParameters(false);
}
}
```
---
# Plugin Status
Each plugin can be in one of the following states:
* "Normal" - plugin is working properly.
* "Warning" - plugin is partially working:
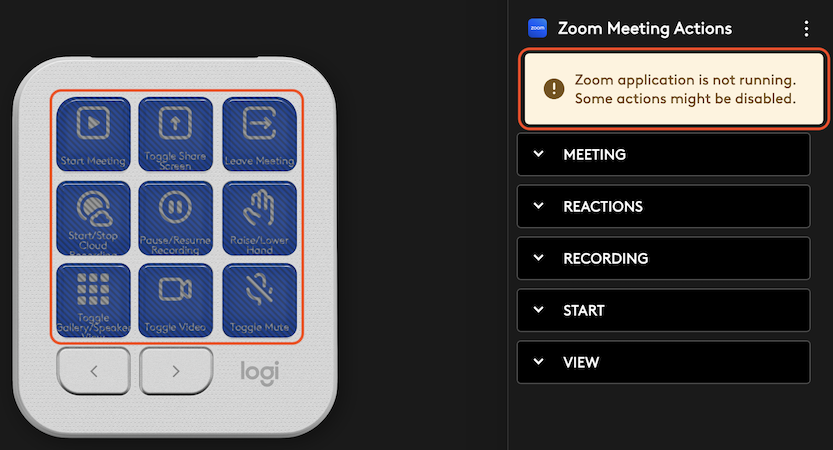
* "Error" - plugin is not working, e.g.:
* Application is not installed.
* Cannot connect to cloud service.
* Login or authentication required.
* Cannot connect to application plugin.
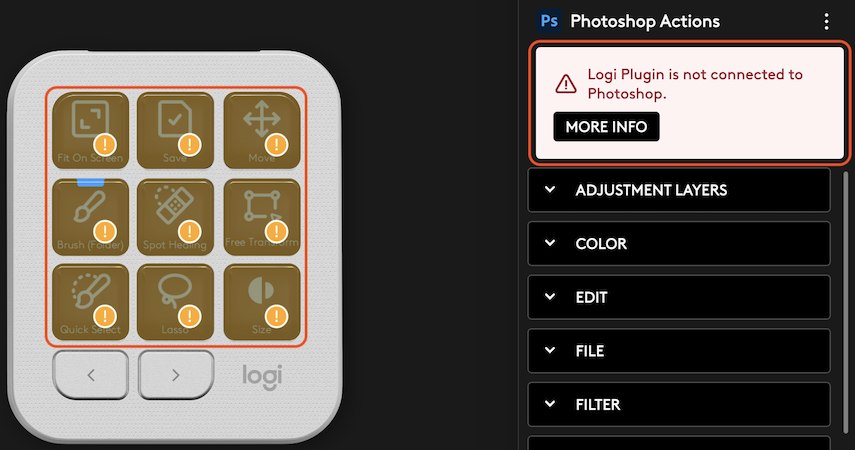
By default plugin is in "Normal" state.
Plugin developer should call `OnPluginStatusChanged` method to change plugin state.
## Plugin API[](#plugin-api "Direct link to Plugin API")
The following methods are available:
```csharp
public void OnPluginStatusChanged(PluginStatus status, String message);
public void OnPluginStatusChanged(PluginStatus status, String message, String supportUrl, String supportUrlTitle);
```
* To set "normal" state:
```csharp
this.OnPluginStatusChanged(PluginStatus.Normal, null);
```
* To set "warning" state:
```csharp
this.OnPluginStatusChanged(PluginStatus.Warning, "Open the application.");
```
* To set "error" state:
```csharp
this.OnPluginStatusChanged(PluginStatus.Error, "Cannot connect to the application.", "https://support.loupedeck.com", "Details");
```
Example:
```csharp
protected override void RunCommand(String actionParameter)
{
if (actionParameter.TryGetEnumValue(out var pluginStatus))
{
this.Plugin.OnPluginStatusChanged(pluginStatus, $"Plugin status changed to {pluginStatus}.");
}
}
```
---
# Profile Actions
Profile action is a special type of [actions with parameters](/actions-sdk-docs/csharp/tutorial/add-a-command-with-a-parameter.md), but there are some key differences.
With profile actions:
* UI does not show all possible parameter values in the actions list;
* in most cases it is not possible to predict the parameter list;
* parameters are entered by users in UI;
* profile actions with actual parameters are stored in application profiles.
They are called *profile* actions because the actual profile actions are stored in application *profiles*.
Existing [actions with parameters](/actions-sdk-docs/csharp/tutorial/add-a-command-with-a-parameter.md) can be easily converted to profile actions by calling the `MakeProfileAction()` method in the dynamic action constructor.
## Profile Action Types[](#profile-action-types "Direct link to Profile Action Types")
* `"text"` - any text, is represented in UI as a label and a text box.
* `"execute"` - path to the executable file to run.
* `"list"` - an item from the list, is represented in the UI as a label and a combo box.
* `"tree"` - multi-level selection; currently only 2-level combo boxes are supported.
The plugin can provide data for "list" and "tree" actions by overriding the `GetProfileActionData()` method of dynamic action.
### Labels[](#labels "Direct link to Labels")
The profile action type can be complemented with a label to show in UI, e.g.:
* `"text;Enter chat message to send:"`
* `"list;Select album to play:"`
## Usage[](#usage "Direct link to Usage")
### Create Profile Action ("text")[](#create-profile-action-text "Direct link to Create Profile Action (\"text\")")
As an example, we will implement a profile action that sends a user-defined chat message.
1. In the plugin project, create a class based on either `PluginDynamicCommand` or `PluginDynamicAdjustment` base class.
2. Call the `MakeProfileAction` method in the class constructor:
```csharp
this.MakeProfileAction("text;Enter chat message to send:");
```
3. Add code to execute the command. In this example, it is as simple as starting the application URI:
```csharp
protected override void RunCommand(String actionParameter) => Chat.SendMessage(actionParameter);
```
### Create Profile Action ("list")[](#create-profile-action-list "Direct link to Create Profile Action (\"list\")")
As an example, we will implement a profile action that shows selected parameter.
1. In the plugin project, create a class based on either `PluginDynamicCommand` or `PluginDynamicAdjustment` base class:
```csharp
public class DynamicListProfileAction : PluginDynamicCommand
{
public DynamicListProfileAction()
{
this.DisplayName = "Dynamic List";
this.GroupName = "Profile Actions";
for (var i = 0; i < 5; i++)
{
this.AddParameter($"item{i}", $"Item {i}", this.GroupName);
}
}
}
```
2. Call the `MakeProfileAction` method in the class constructor:
```csharp
this.MakeProfileAction("list;Select parameter:");
```
3. Add code to execute the command. In this example, it is as simple as changing the plugin status to show the selected parameter:
```csharp
protected override void RunCommand(String actionParameter) => this.Plugin.OnPluginStatusChanged(PluginStatus.Warning, actionParameter);
```
### Create Profile Action ("tree")[](#create-profile-action-tree "Direct link to Create Profile Action (\"tree\")")
As an example, we will implement a profile action that starts Windows Settings applications.
Windows Settings applications are grouped in categories, so UI should show two levels of combo boxes: for categories and for applications within a selected category.
1. In the plugin project, create a class based on either `PluginDynamicCommand` or `PluginDynamicAdjustment` base class.
2. Call the `MakeProfileAction` method in the class constructor:
```csharp
this.MakeProfileAction("tree");
```
3. Override `GetProfileActionData` method to return tree data.
```csharp
protected override PluginProfileActionData GetProfileActionData()
{
// create tree data
var tree = new PluginProfileActionTree("Select Windows Settings Application");
// describe levels
tree.AddLevel("Category");
tree.AddLevel("Application");
// add data tree
var categoryNames = this._applications.Values.Select(a => a.CategoryName).Distinct();
foreach (var categoryName in categoryNames)
{
var node = tree.Root.AddNode(categoryName);
var items = this._applications.Values.Where(a => a.CategoryName.EqualsNoCase(categoryName));
foreach (var item in items)
{
node.AddItem(item.ApplicationUri, item.ApplicationName, null);
}
}
// return tree data
return tree;
}
```
4. Define display names for each parameter:
```csharp
protected override String GetCommandDisplayName(String actionParameter, PluginImageSize imageSize) =>
this._applications.TryGetValue(actionParameter, out var application) ? application.ApplicationName : null;
```
5. Add code to execute the command. In this example, it is as simple as starting the application URI:
```csharp
protected override void RunCommand(String actionParameter) => Process.Start(actionParameter);
```
---
# Storing Plugin Data Locally
Logi Plugin Service provides a possibility for plugins to store data locally.
Use `Plugin.GetPluginDataDirectory()` method to get plugin data folder path.
Call `IoHelpers.EnsureDirectoryExists(String path)` method to ensure the given directory exists.
## Example[](#example "Direct link to Example")
```csharp
var pluginDataDirectory = this.GetPluginDataDirectory();
if (IoHelpers.EnsureDirectoryExists(pluginDataDirectory))
{
var filePath = Path.Combine(pluginDataDirectory, "MyData.bin");
using (var streamWriter = new StreamWriter(filePath))
{
// Write data
}
}
```
## See Also[](#see-also "Direct link to See Also")
* [Managing Plugin Settings](/actions-sdk-docs/csharp/plugin-features/managing-plugin-settings.md)
---
# Add a Command With a Parameter
Commands and adjustments can contain parameters. As an example, the "apply develop profile" command in the Lightroom plugin takes the preset file name as a parameter.
Parameters are especially useful when you cannot determine the number of similar commands or adjustments at the development stage. Consider Windows 10/11 Volume Mixer - you cannot predict how many channels it will have on different PCs. However, a plugin can implement a single "toggle mute" command (or "change volume" adjustment) that takes the channel name as a parameter - and serve them all.
The plugin needs to indicate that the action has a parameter, and provide a list of available parameters.
The list of parameters can change at any moment (for example if a user started Spotify that added a channel to Volume Mixer), and there is a way to notify the console about the change.
A command or adjustment can have only one string parameter. If the plugin needs to store more data associated with a parameter, it should treat the parameter as an ID and keep an internal dictionary that links this ID to any related data.
Plugin service treats a parameter as a random string. It is the plugin's responsibility to keep these parameters unique for every action.
To create a command with a parameter, add to the plugin project a class inherited from the `PluginDynamicCommand` class (same as for a simple command). However, commands with parameters use a different base constructor.
As an example, let's add a simple command to the Demo plugin that toggles four switches.
You can find the `ButtonSwitchesCommand` class here: [ButtonSwitchesCommand.cs](https://github.com/Logitech/actions-sdk/blob/master/DemoPlugin/DemoPlugin/ButtonSwitchesCommand.cs)
## Steps[](#steps "Direct link to Steps")
1. Open the Demo plugin solution in Visual Studio.
2. In the Solution Explorer, right-click on the DemoPlugin project and select Add > Class.
3. Enter ButtonSwitchesCommand.cs as the file name and click Add. The `ButtonSwitchesCommand` class opens for editing.
4. Inherit the `ButtonSwitchesCommand` class from the `PluginDynamicCommand` class:
```csharp
class ButtonSwitchesCommand : PluginDynamicCommand
```
5. Create an empty, parameterless constructor that calls the parameterless constructor of the base class. You need to define the display name, description, and group name separately for each parameter.
```csharp
public ButtonSwitchesCommand() : base()
{
}
```
6. Add four parameters in the constructor using the `AddParameter` method:
```csharp
public ButtonSwitchesCommand() : base()
{
for (var i = 0; i < 4; i++)
{
// parameter is the switch index
var actionParameter = i.ToString();
// add parameter
this.AddParameter(actionParameter, $"Switch {i}", "Switches");
}
}
```
7. Add `_switches` Boolean array that keeps the current state of switches:
```csharp
private readonly Boolean[] _switches = new Boolean[4];
```
8. Overwrite the `RunCommand` method that is called every time a user presses the touch or the physical button to which this command is assigned:
```csharp
protected override void RunCommand(String actionParameter)
{
if (Int32.TryParse(actionParameter, out var i))
{
// turn the switch
this._switches[i] = !this._switches[i];
// inform service that command display name and/or image has changed
this.ActionImageChanged(actionParameter);
}
}
```
9. Overwrite the `GetCommandDisplayName` method that is called every time Plugin Service needs to show a command on the console or the configuration UI.
Note that if your command does not change the display name during runtime, you don't need to override this method. Plugin Service uses display names that the plugin specifies with the `ActionImageChanged` method in the class constructor.
```csharp
protected override String GetCommandDisplayName(String actionParameter, PluginImageSize imageSize)
{
if (Int32.TryParse(actionParameter, out var i))
{
return $"Switch {i}: {this._switches[i]}";
}
else
{
return null;
}
}
```
10. Start debugging and wait until the software is loaded.
11. Open the configuration UI.
12. Turn off the *Adapt to App*.
13. From the applications dropdown list, select Demo.
14. On the right pane, under Press Actions, expand the Demo node, then expand the Switches group and ensure that it contains four Switch commands.
15. Drag and drop more than one Switch command to any touch button.
16. Connect a console to your computer.
17. Check that the console shows the Switch commands on the touch screen.
18. Press the buttons and check how their text changes.
---
# Add a Simple Adjustment
To create a simple adjustment, add to the plugin project a class inherited from the `PluginDynamicAdjustment` class. To alter the command appearance and behavior, change the properties and overwrite the virtual methods of this class.
As an example, let's add a simple adjustment to the Demo plugin that increases or decreases the counter based on the number of ticks with which the encoder is rotated.
You can find the `CounterAdjustment` class here: [CounterAdjustment.cs](https://github.com/Logitech/actions-sdk/blob/master/DemoPlugin/DemoPlugin/CounterAdjustment.cs)
## Steps[](#steps "Direct link to Steps")
1. Open the Demo plugin solution in Visual Studio.
2. In the Solution Explorer, right-click on the DemoPlugin project and select Add > Class.
3. Enter CounterAdjustment.cs as the file name and click Add. The `CounterAdjustment` class opens for editing.
4. Inherit the `CounterAdjustment` class from the `PluginDynamicAdjustment` class:
```csharp
public class CounterAdjustment : PluginDynamicAdjustment
```
5. Add a private counter field and set it to `0`:
```csharp
private Int32 _counter = 0;
```
6. Create an empty, parameterless constructor and set the command display name, description, and group name in the parent constructor parameters. To indicate that the adjustment has a reset functionality, set the parameter `hasReset` to `true`:
```csharp
public CounterAdjustment()
: base(displayName: "Counter", description: "Counts rotation ticks", groupName: "Adjustments", hasReset: true)
{
}
```
7. Overwrite the `ApplyAdjustment` method that is called every time a user rotates the encoder to which this adjustment is assigned:
```csharp
protected override void ApplyAdjustment(String actionParameter, Int32 diff)
{
this._counter += diff; // Increase or decrease the counter by the number of ticks.
}
```
8. Overwrite the `RunCommand` method that is called every time a user presses the encoder to which this command is assigned:
```csharp
protected override void RunCommand(String actionParameter)
{
this._counter = 0; // Reset the counter.
}
```
9. Plugin Service can draw the current adjustment value near the encoder. To enable that functionality, overwrite the `GetAdjustmentValue` method:
```csharp
protected override String GetAdjustmentValue(String actionParameter) => this._counter.ToString();
```
10. To inform Plugin Service that the adjustment value has changed, call the `AdjustmentValueChanged` method:
```csharp
protected override void ApplyAdjustment(String actionParameter, Int32 diff)
{
this._counter += diff; // Increase or decrease the counter by the number of ticks.
this.AdjustmentValueChanged(); // Notify the Plugin service that the adjustment value has changed.
}
protected override void RunCommand(String actionParameter)
{
this._counter = 0; // Reset the counter.
this.AdjustmentValueChanged(); // Notify the Plugin service that the adjustment value has changed.
}
```
11. Start debugging and wait until the Software is loaded.
12. Open the configuration UI.
13. Turn off the *Adapt to App*.
14. In the applications dropdown list, select Demo.
15. On the left pane, under Rotation Adjustments, expand the Demo node, then expand the `Adjustments` group and ensure that the Counter adjustment is there.
16. Drag and drop the Counter command to any encoder.
17. Connect a console to your computer. The console shows the Counter command on the encoder screen.
18. Rotate the encoder to change the counter value.
19. Press the encoder to reset the counter value to `0`.
---
# Add a Simple Command
To create a simple command, add to your plugin project a class inherited from the `PluginDynamicCommand` class. To alter the command appearance and behavior, change the properties and overwrite the virtual methods of this class.
As an example, let's add a simple command to the Demo plugin that mutes and unmutes the system sound. You can assign this command to a touch or a physical button on a console.
To toggle between mute and unmute, we send the `VK_VOLUME_MUTE` [virtual-key code](https://docs.microsoft.com/en-us/windows/win32/inputdev/virtual-key-codes) using one of the native methods provided by the Logi Actions Plugin API that works on both Windows and macOS.
You can find the `ToggleMuteCommand` class here: [ToggleMuteCommand.cs](https://github.com/Logitech/actions-sdk/blob/master/DemoPlugin/DemoPlugin/ToggleMuteCommand.cs)
## Steps[](#steps "Direct link to Steps")
1. Open the Demo plugin solution in Visual Studio.
2. In the Solution Explorer, right-click on the DemoPlugin project and select Add > Class.
3. Enter ToggleMuteCommand.cs as the file name and click Add. The `ToggleMuteCommand` class opens for editing.
4. Inherit the `ToggleMuteCommand` class from the `PluginDynamicCommand` class:
```csharp
class ToggleMuteCommand : PluginDynamicCommand
```
5. Create an empty, parameterless constructor and set the command display name, description, and group name in the parent constructor parameters:
```csharp
public ToggleMuteCommand()
: base(displayName: "Toggle Mute", description: "Toggles audio mute state", groupName: "Audio")
{
}
```
6. Overwrite the `RunCommand` method that is called every time a user presses the touch or the physical button to which this command is assigned:
```csharp
protected override void RunCommand(String actionParameter)
{
this.Plugin.ClientApplication.SendKeyboardShortcut(VirtualKeyCode.VolumeMute);
}
```
7. Start debugging and wait until the software is loaded.
8. Open the configuration UI.
9. Turn off the *Adapt to App*.
10. In the applications dropdown list, select Demo.
11. On the left pane, under Press Actions, expand the Demo node, then expand the Audio group and ensure that the Toggle Mute command is there.
12. Drag and drop the Toggle Mute command to any touch button.
13. Connect a console to your computer.
14. Check that the console shows the Toggle Mute command on the touch screen.
15. Press this button to mute and unmute your computer's audio.
Note: Actions can be grouped in the configuration UI:
* To add sub-groups, use three hash symbols `###` as a separator in the `groupName` parameter.
```csharp
public ToggleMuteCommand()
: base(displayName: "Toggle Mute", description: "Toggles audio mute state", groupName: "Level1###Level2###Level3")
{
}
```
* This approach can be used for different types of actions.
* Maximum number of group levels is 3.

---
# Change a Button Image
By default, when the Logi Plugin Service needs to draw a button image, it uses the display name of the command that is assigned to the button.
However, the plugin can change this behavior so that an image is shown instead of the command name. To inform Logi Plugin Service that a custom image should be used, the `GetCommandImage` method of the `PluginDynamicCommand` class must be overridden.
Moreover, if the plugin wants to change a button image at runtime when the command state changes, the plugin can call the `ActionImageChanged` method to inform Logi Plugin Service that the image should be redrawn.
In the example below, we will create a simple dynamic command that changes its state when the user presses the button. When the command state changes, the command requests redrawing the button image.
You can find the `ThumbUpDownCommand` class here: [ThumbUpDownCommand.cs](https://github.com/Logitech/actions-sdk/blob/master/DemoPlugin/DemoPlugin/ThumbUpDownCommand.cs)
## Steps[](#steps "Direct link to Steps")
1. First, create a `ThumbUpDownCommand` dynamic command that toggles the internal boolean `_isThumbDown` variable on every button press. See [Add a simple command](/actions-sdk-docs/csharp/tutorial/add-a-simple-command.md) for more information about creating dynamic commands.
```csharp
namespace Loupedeck.DemoPlugin
{
using System;
public class ThumbUpDownCommand : PluginDynamicCommand
{
private Boolean _isThumbDown = false;
public ThumbUpDownCommand() : base(displayName: "Thumb up/down", description: null, groupName: "Switches")
{
}
protected override void RunCommand(String actionParameter)
{
this._isThumbDown = !this._isThumbDown;
}
}
}
```
2. Add two images for "Thumb up" and "Thumb down" states to the plugin project. Build action for these files must be set to "Embedded Resource". The images "ThumbUp.png" and "ThumbDown.png" can be fetched from: [DemoPlugin/images](https://github.com/Logitech/actions-sdk/tree/master/DemoPlugin/DemoPlugin/images)
Note that the buttonimages must be in PNG format and have a size of 80x80 pixels.
3. Add two string class members that will hold the image resource paths. In the constructor, set these members to the full path of these files. Note that call to `PluginResources.FindFile()` method eliminates the need to know the exact path to these files (see [Accessing plugin resource files](#accessing-plugin-resource-files)).
```csharp
private readonly String _imageResourcePathThumbUp;
private readonly String _imageResourcePathThumbDown;
public ThumbUpDownCommand() : base(displayName: "Thumb up/down", description: null, groupName: "Switches")
{
this._imageResourcePathThumbUp = PluginResources.FindFile("ThumbUp.png");
this._imageResourcePathThumbDown = PluginResources.FindFile("ThumbDown.png");
}
```
4. Override the `GetCommandImage` method to return the right image based on the command state:
```csharp
protected override BitmapImage GetCommandImage(String actionParameter, PluginImageSize imageSize)
{
var resourcePath = this._isThumbDown ? this._imageResourcePathThumbDown : this._imageResourcePathThumbUp;
return PluginResources.ReadImage(resourcePath);
}
```
5. Call the `ActionImageChanged` method when the command state changes:
```csharp
protected override void RunCommand(String actionParameter)
{
this._isThumbDown = !this._isThumbDown;
this.ActionImageChanged();
}
```
Note that calling `this.ActionImageChanged(null)` will redraw all the buttons currently shown on the device.
## Adding Background Image and Text to Button[](#adding-background-image-and-text-to-button "Direct link to Adding Background Image and Text to Button")
Example:
* The image file must be added to the plugin project as an embedded resource.
```csharp
protected override BitmapImage GetCommandImage(String actionParameter, PluginImageSize imageSize)
{
using (var bitmapBuilder = new BitmapBuilder(imageSize))
{
bitmapBuilder.SetBackgroundImage(PluginResources.ReadImage("MyPlugin.EmbeddedResources.MyImage.png"));
bitmapBuilder.DrawText("My text");
return bitmapBuilder.ToImage();
}
}
```
Note: Don't use optional `fontSize` parameter of the `DrawText` method when drawing text. Logi Plugin Service will define the best font size per device.
## Accessing Plugin Resource Files[](#accessing-plugin-resource-files "Direct link to Accessing Plugin Resource Files")
The `PluginResources` class provides helper methods to get plugin resources easily everywhere in the plugin code.
You can find the source code here: [PluginResources.cs](https://github.com/Logitech/actions-sdk/blob/master/DemoPlugin/DemoPlugin/PluginResources.cs).
For instance, the following methods can be used for finding and getting images:
```csharp
public static String FindFile(String fileName) => PluginResources._assembly.FindFileOrThrow(fileName);
public static BitmapImage ReadImage(String resourceName) => PluginResources._assembly.ReadImage(PluginResources.FindFile(resourceName));
```
### Setting up for New Plugins[](#setting-up-for-new-plugins "Direct link to Setting up for New Plugins")
For a new plugin, the easiest way to take the plugin resources into use is to generate the plugin project with the [Logi Plugin Tool](/actions-sdk-docs/csharp/plugin-development/introduction.md). The generated skeleton project contains the enabler code and an example of how to get plugin resources from the plugin code.
### Setting up for Existing Plugins[](#setting-up-for-existing-plugins "Direct link to Setting up for Existing Plugins")
For an existing plugin, you can take the getting images into use as follows:
1. Download the [PluginResources.cs](https://github.com/Logitech/actions-sdk/blob/master/DemoPlugin/DemoPlugin/PluginResources.cs) file and include it in your plugin project.
2. In the `PluginResources.cs` file, change the namespace to the same one that your plugin project uses:
```csharp
namespace Loupedeck.DemoPlugin
```
3. Initialize the `PluginResources` class in the constructor of your plugin class (replace the plugin class name `DemoPlugin` with your plugin class):
```csharp
public DemoPlugin() => PluginResources.Init(this.Assembly);
```
After this, you can get image resources in your plugin code:
```csharp
String resourceName = PluginResources.FindFile("MyImage.png");
BitmapImage myImage = PluginResources.ReadImage(resourceName);
```
---
# Link the Plugin to an Application
You can link your plugin to an application so that the plugin is activated when the application comes to the foreground.
You can find the `DemoApplication` class here: [DemoApplication.cs](https://github.com/Logitech/actions-sdk/blob/master/DemoPlugin/DemoPlugin/DemoApplication.cs)
## Steps[](#steps "Direct link to Steps")
1. Open the Demo plugin solution in Visual Studio.
2. In the Solution Explorer, double-click the DemoApplication.cs file.
3. Modify the `GetProcessName` method that returns the process name of the supported application. Replace `DemoApplication` with the name of the application you want to link to the plugin:
```csharp
protected override String GetProcessName() => "DemoApplication";
```
4. Start debugging and wait until the Options+ or Loupedeck software is loaded.
5. Open the configuration UI.
6. Turn on the *Adapt to App*.
7. Connect a console to your computer. The console shows the default profile on the screen. This is the default profile when no supported application is in the foreground.
8. Start the application you linked with the plugin.
9. The device shows the Demo profile on the screen.
10. Change the active applications with `Alt+Tab` to see how the device switches between them.
## Notes[](#notes "Direct link to Notes")
1. It is possible to define several process names for the supported applications. In this case, override the `GetProcessNames` method instead of `GetProcessName`:
```csharp
protected override String[] GetProcessNames() => new[] { "Ableton Live 10 Lite", "Ableton Live 10 Standard" };
```
2. You can set a process name filter instead of fixed application names. In this case, override the `IsProcessNameSupported` method instead of `GetProcessName`:
```csharp
protected override Boolean IsProcessNameSupported(String processName) => processName.ContainsNoCase("CaptureOne");
```
---
# Plugin Structure
Plugin consists of core implementation classes and an organized package structure that defines functionality, appearance, and localization.
## Core Classes[](#core-classes "Direct link to Core Classes")
Plugin must implement both of these classes:
* `{PluginName}Plugin` class (inherited from the `Plugin` abstract class) contains the plugin-level logic.
* `{PluginName}Application` class (inherited from the `ClientApplication` abstract class) contains the logic related to the client application.
## Plugin Package Structure[](#plugin-package-structure "Direct link to Plugin Package Structure")
Plugin can consist of several folders that provide different functionality. These folders should become a part of .lplug4 plugin installation package file.
### Required Folders[](#required-folders "Direct link to Required Folders")
#### `metadata`[](#metadata "Direct link to metadata")
Contains essential plugin configuration and assets:
* `LoupedeckPackage.yaml` - Plugin configuration file (see [Plugin Configuration File Structure](#plugin-configuration-file-structure)).
* `Icon256x256.png` - see [Plugin icon](/actions-sdk-docs/csharp/icons/plugin-icon.md).
* `DefaultIconTemplate.ict` - Optional default icon template for plugin-level branding (see [Icon Templates](/actions-sdk-docs/csharp/icons/icon-templates.md) for detailed information).
### Optional Folders[](#optional-folders "Direct link to Optional Folders")
#### `win`[](#win "Direct link to win")
Binaries for Windows version of plugin. Add only if Windows is supported.
#### `mac`[](#mac "Direct link to mac")
Binaries for Mac version of plugin. Add only if Mac is supported.
#### `actionicons`[](#actionicons "Direct link to actionicons")
Plugins automatically retrieve icon image files from this folder using a predefined naming convention. The system searches for appropriately named image files that correspond to specific actions, eliminating the need for manual icon registration or configuration. This approach allows plugins to personalize the device experience with custom visual representations for each action.
Supported Formats:
* Raster images support: `.png` files with transparent backgrounds. Resolution should be optimized for device-specific button sizes.
* Vector images support: `.svg` files for scalable vector graphics.
See [Vector Images](/actions-sdk-docs/csharp/icons/vector-images.md) for additional implementation details.
#### `icontemplates`[](#icontemplates "Direct link to icontemplates")
Contains action-specific icon templates (`.ict` files) that define button appearance and layout:
* Files should be named using the action class full name (e.g. `Loupedeck.DemoPlugin.ToggleMuteCommand.ict`).
* Templates can be created and exported using the [Icon Editor developer mode](/actions-sdk-docs/csharp/icons/icon-editor.md#developer-mode).
See [Icon Templates](/actions-sdk-docs/csharp/icons/icon-templates.md) for detailed information.
#### `actionsymbols`[](#actionsymbols "Direct link to actionsymbols")
Plugin action symbols are small SVG icons appear to the left of action names in the action picker of the configuration UI that provide visual identification for plugin actions in the configuration interface. They enhance user experience by making actions easily recognizable and distinguishable from one another.
The system automatically discovers and loads symbols from the `actionsymbols` folder using a predefined naming convention, eliminating the need for manual registration.
#### `profiles`[](#profiles "Direct link to profiles")
Contains default application profiles (`.lp5` files) that define the initial button layouts, actions, and configurations for your plugin when users first install it or create new profiles.
Profiles contain:
* Button mappings - which actions are assigned to which physical buttons.
* Action configurations - parameters and settings for each action.
* Layout definitions - visual arrangement and grouping of controls.
* Device-specific adaptations - optimized layouts for different devices.
Profiles are automatically applied in the following scenarios:
* First Installation: When a user installs your application plugin for the first time.
* New Profile Creation: When a user creates a new profile for your application.
* Profile Reset: When a user resets their profile to defaults.
* Device Addition: When a user adds a new device to their setup.
See [Default Application Profiles](/actions-sdk-docs/csharp/plugin-features/default-application-profiles.md) for complete device-specific naming and implementation details.
#### `localization`[](#localization "Direct link to localization")
Contains translation files in XLIFF format for comprehensive multi-language support, enabling plugins to provide localized user interfaces across multiple languages.
Uses standard language ID format `languagecode-countrycode` (e.g. `en-US`, `en-GB`, `fi-FI`).
Localization files can be generated from your plugin using either method:
* Deep link: `loupedeck://plugin//xliff`.
* LogiPluginTool: `LogiPluginTool xliff `.
Translation Workflow:
1. Generate XLIFF files from your plugin.
2. Translate the generated files for target languages.
3. Place translated files in the `localization` folder with naming convention: `_.xliff`.
4. Ensure `target-language` attribute matches the language ID.
5. Reload plugin: `loupedeck://plugin//reload`.
See [Plugin Localization](/actions-sdk-docs/csharp/plugin-features/plugin-localization.md) for complete implementation details.
#### `events`[](#events "Direct link to events")
Contains event definition files that enable plugins to define custom events that can trigger actions and workflows within the Logitech software. Events allow plugins to notify the system and other components when specific conditions or state changes occur.
See [Haptics Getting Started](/actions-sdk-docs/csharp/haptics/haptics-getting-started.md) for additional implementation details.
## Plugin Configuration File Structure[](#plugin-configuration-file-structure "Direct link to Plugin Configuration File Structure")
The plugin configuration file `LoupedeckPackage.yaml` has the following format (the user-modifiable fields are in `<>` brackets)
```yaml
type: plugin4
name:
displayName:
version:
author:
copyright:
supportedDevices:
- LoupedeckCt
- LoupedeckLive
pluginFileName:
pluginFolderWin:
pluginFolderMac:
```
Mandatory fields:
* **type**: use "plugin4" for plugins.
* **name**: This is the unique ID for the plugin and cannot be changed after it's published in the marketplace. The field is limited to Latin small and capital letters, digits, underscore, and dash (regex: "\[a-zA-Z0-9\_-]+"). Note! the name cannot contain "Plugin" at the end.
* **displayName**: Name that is shown in the Marketplace and in Options+ or Loupedeck software.
* **version**: is major.minor\[.build] Every part must be a decimal number. Examples: "1.0", "1.0.0", If you're delivering an updated version of the plugin, please ensure the version number is increased accordingly.
* **author**: Name of the author that will be displayed in Marketplace.
* **supportPageUrl**: Could be an URL of a support page or a "mailto:" link of an email address. For example, GitHub issues can be used here for getting feedback on the plugin. Examples: or mailto
:foo
@bar.com
* **license**: Select a license under which you want to share the plugin. Please ensure that the selected license is compatible with Marketplace Developer License Agreement. One compatible option with the Marketplace is the MIT license: [The MIT License | Open Source Initiative](https://opensource.org/licenses/MIT). **Note:** GPL licenses are not compatible with the Marketplace.
* **licenseUrl**: URL to license.
Optional fields:
* **copyright**: Author copyright.
* **backgroundColor**: Icon background color in ARGB format.
* **foregroundColor**: Icon foreground color in ARGB format.
* **textColor**: Icon text color in ARGB format.
* **supportedDevices**: Devices supported by the plugin. Use `- LoupedeckCt` for Loupedeck CT, `- LoupedeckLive` for Loupedeck Live, or both.
* **homePageUrl**: A link to a webpage, which has more information about the plugin.
* **icon256x256**: optional custom path and name to an icon file in the package. By default, the icon is searched from the 'metadata/Icon256x256.png' file.
* **minimumLoupedeckVersion**: Minimum Logi Plugin Service version that is required to run the plugin. The version is major.minor\[.build] Every part must be a decimal number. Examples: "4.0", "4.0.0".
Here is an example `LoupedeckPackage.yaml` file for Spotify Premium plugin, which supports both Windows and Mac:
```yaml
type: plugin4
name: SpotifyPremium
displayName: Spotify Premium
version: 1.0
author: Logitech
copyright: Logitech
backgroundColor: 4278869247
foregroundColor: 4294967295
textColor: 4294967295
supportedDevices:
- LoupedeckCt
- LoupedeckLive
pluginFileName: SpotifyPremiumPlugin.dll
pluginFolderWin: bin/win/
pluginFolderMac: bin/mac/
license: MIT
licenseUrl: https://opensource.org/licenses/MIT
homePageUrl: https://logitech.com
supportPageUrl: https://support.logitech.com/f-a-q-support
```
---
# Getting Started
Welcome to the Logi Actions SDK! This guide will help you get started with developing plugins and actions for Logitech devices. Follow the steps below to initiate your development journey and unlock the full potential of the Actions SDK.
Follow these steps to start developing your own plugin:
Familiarize Yourself with Logi Actions SDK
Study the features of Logi Actions SDK and compare the [C# and Node.js SDKs](#choosing-between-c-and-nodejs-sdks) to choose yours.
Set Up Your Development Environment and Connect Your AI Tools
Choose your preferred SDK and follow the installation guide: [C# SDK](/actions-sdk-docs/csharp/plugin-development/introduction.md) or [Node.js SDK](/actions-sdk-docs/nodejs/introduction.md). Connect your AI tools to our [AI-friendly documentation](/actions-sdk-docs/ai-friendly-documentation-setup.md), which is always kept up to date.
Create Your First Plugin
Generate a ready-to-use plugin project with a single SDK command. Then implement your custom actions to extend Logitech devices with new features.
Test with Supported Devices
Test your plugin with one of the [supported devices](/actions-sdk-docs/supported-devices.md): devices with physical screens (MX Creative Console, Loupedeck), or MX mice/keyboards using the on-screen Actions Ring overlay.
Submit Your Plugin to the Marketplace
Once your plugin is developed and tested, you can share it with a broader audience by submitting it to the [Logi Marketplace](https://marketplace.logi.com). This allows users to seamlessly discover, download, and install your plugin on their Logitech devices.
## Prerequisites[](#prerequisites "Direct link to Prerequisites")
To get started, make sure you have the following:
* A computer with a Windows or macOS operating system
* Logi Options+ or Loupedeck software installed
* A compatible device for controlling the plugin (see [Supported Devices](/actions-sdk-docs/supported-devices.md))
## System Overview[](#system-overview "Direct link to System Overview")
The following diagram provides a high-level overview of the SDK runtime environment and involved software:
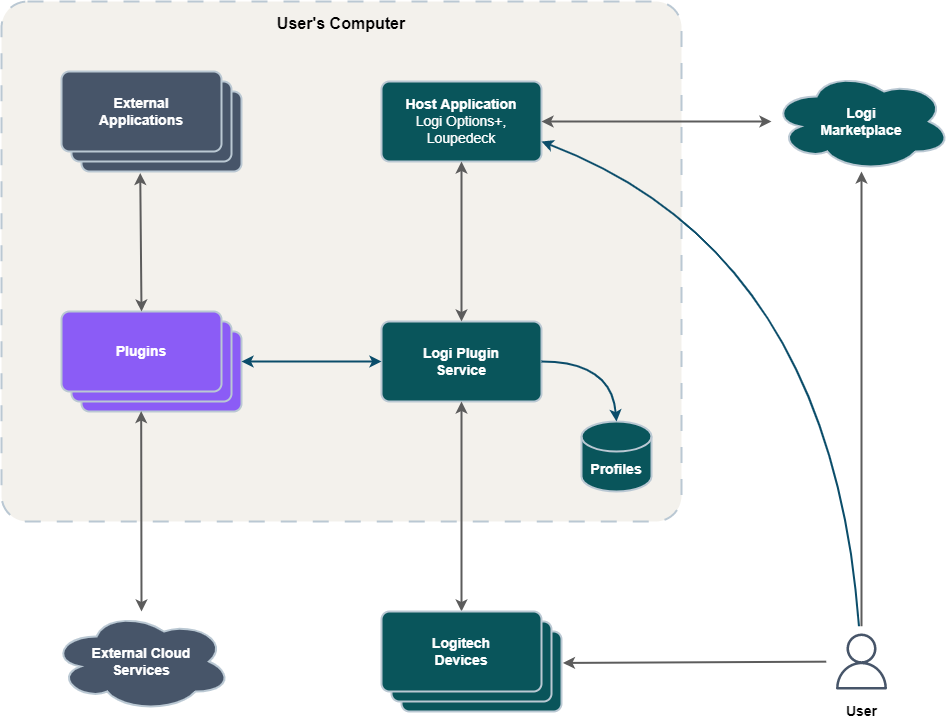
* **Host Application:** Desktop software where users install plugins, configure actions, and map them to device controls. Supported applications are Logi Options+ and Loupedeck, with G HUB support planned for 2026.
* **Logi Plugin Service:** Facilitates communication between the Host Application and plugins, managing plugin lifecycle, action execution, profile storage, and device control mapping.
* **Plugins:** Software extensions that provide custom actions for Logitech devices. Plugins typically integrate with external applications or cloud services.
* **External Applications and Cloud Services:** Third-party desktop applications and web services that plugins interact with. Examples include Adobe Photoshop and Spotify.
* **Logitech Devices:** The supported hardware and virtual devices that users interact with to execute plugin actions. Examples include MX Creative Console, Loupedeck CT, and Actions Ring.
* **Profiles:** A profile maps actions to device controls for a specific application or workflow. Profiles are stored locally and can be customized to fit user needs.
* **Marketplace:** The official platform for discovering, downloading, and installing plugins, profiles, and other extensions for Logitech and Loupedeck devices. The Marketplace provides developers with a distribution channel and users with a central hub for expanding device functionality.
## Choosing Between C# and Node.js SDKs[](#choosing-between-c-and-nodejs-sdks "Direct link to Choosing Between C# and Node.js SDKs")
The Logi Actions SDK offers two development paths: C# SDK and Node.js SDK (beta). Each SDK is designed for different developer preferences and plugin development needs.
**At a Glance:**
* **C# SDK**: Established, full feature set, C# language, intermediate+ experience required
* **Node.js SDK**: Simpler implementation, TypeScript/JavaScript, beginner-friendly, limited features (expanding)
**When to Choose C# SDK:**
* You have experience with C# and .NET development
* Your plugin requires advanced features
* You have intermediate or advanced programming experience
**When to Choose Node.js SDK:**
* You prefer TypeScript or JavaScript over C#
* Basic functionality is sufficient for your plugin
* You want simpler implementation with less code
* You have little programming experience or are getting started
The main differences between the two SDKs are summarized in the table below:
| Comparison | C# SDK | Node.js SDK (beta) |
| ------------------------- | ----------------------------------------------------------------------------------------------------------------------------------------------------------------------------------------------------------------------------- | ------------------------------------------------------------------------------------------------------------------------------------------------------------------------------------------------------------------------- |
| **Language and Runtime** | C# (.NET) | TypeScript/JavaScript (Node.js) |
| **Platform Support** | Windows and macOS | Windows and macOS |
| **Maturity** | Original, established SDK | Beta version available |
| **Required Experience** | Intermediate coding skills | Minimal programming experience |
| **Available Features** | Full Plugin API feature set | [Limited feature set (expanding)](/actions-sdk-docs/nodejs/api-documentation.md) |
| **Plugin Implementation** | More boilerplate code required, but offers greater control and flexibility | Less code, simpler to implement |
| **Plugin Architecture** | Plugin is a C# assembly (DLL) that runs within Logi Plugin Service; developers implement plugins using a C# class library interface provided by Logi Plugin Service | Each plugin runs as a separate Node.js process and communicates with Logi Plugin Service using IPC; developers use the Node.js SDK library to implement plugins |
| | Get started with C# SDK[C#](/actions-sdk-docs/csharp/plugin-development/introduction.md) | Get started with Node.js SDK[Node.js](/actions-sdk-docs/nodejs/introduction.md) |
## Tips, Tutorials, and More[](#tips-tutorials-and-more "Direct link to Tips, Tutorials, and More")
Eager to learn more? Here's some content and tips to guide you forward.

### Plugin Basics
Learn the core concepts for plugin development including actions, profiles, and the Logi Plugin Service.
[](/actions-sdk-docs/plugin-basics.md)

### Free Codecademy Course
Learn to build custom plugins for Logitech MX Devices using C# and the Logi Actions SDK by creating a Git automation workflow.
[](https://www.codecademy.com/learn/build-plugins-for-logitech-devices)

### C# SDK Tutorials
Dive into plugin structure and creating your first actions.
[C#](/actions-sdk-docs/csharp/tutorial/)
## Need help getting started?
Reach out to us in Discord.
[CHECK ON GITHUB](https://github.com/Logitech/actions-sdk)[JOIN ON DISCORD](https://discord.gg/ptV2BfHCmm)
---
# Glossary
This glossary defines key terms as used throughout the Logi Actions SDK documentation.
| Term | Description |
| ------------------------------------------- | ----------------------------------------------------------------------------------------------------------------------------------------------------------------------------------------------------------------------------------------------------------------------------------------------------------------------------------------------------------------------------------------------- |
| **Action** | A command or an adjustment that executes an operation when triggered. Users can assign actions to device controls (such as buttons and dials) through profiles. |
| **Action Icon** | An icon that represents the action on the device screen. An action icon consists of an icon image, icon text, and icon background. Users can edit action icons using the Icon Editor. |
| **Action Editor** | Allows end users to customize actions through parameters. |
| **Action Symbol** | An icon that represents the action on the user interface. An action symbol is located next to the action name in the Action Picker of the configuration UI. |
| **Action Picker** | Same as **Action Editor** |
| **Adjustment** | A type of action that performs a continuous or incremental change. Adjustments are typically assigned to dials or scroll wheels. Examples include `System Volume` and `Screen Brightness`. |
| **Adapt To App** | A software mode that automatically tracks which application is active and switches profiles and device layouts accordingly to match the foreground application or service. |
| **API (Application Programming Interface)** | A set of rules and protocols that allows software to interact with other software components, libraries, or services, enabling programmatic access. |
| **Application Plugin** | A type of plugin that is tightly integrated with a specific application. These plugins typically require that the target application is in the foreground to execute actions. Application Plugins have profiles, and actions of an Application Plugin can only be assigned to that plugin's own profile. Examples include Adobe Photoshop and Lightroom plugins. See also **Universal Plugin**. |
| **Application Profile** | Same as **Profile** |
| **Client Application** | The external software or process that a plugin controls. In the `Adapt to App` mode, a client application is an executable whose state changes are tracked and reported to the plugin. |
| **Command** | A type of action that can be performed when the user presses a button (for example, `Toggle Mute` or `Reset Screen Brightness`). |
| **Control Center** | Same as **Dynamic Folder** |
| **Default Application Profile** | A template profile that provides the initial configuration and layout for an Application Plugin. |
| **Dial** | The rotary knobs on Loupedeck devices that can be turned to adjust values incrementally or pressed to trigger actions. |
| **Dial Page** | A page configuration for assigning dial adjustment actions to the available dials on a device. Applicable only for Loupedeck devices having displays. |
| **Dynamic Folder** | A special folder that can contain a dynamic set of pages and actions. A Dynamic Folder can automatically update its layout and actions according to the plugin’s implementation. |
| **Encoder (Rotary Encoder)** | A dial or rotary input device on a console or controller that can be turned to adjust values incrementally, commonly used for continuous or fine-grained control. |
| **Embedded Resource** | A file that is compiled into a .NET assembly and stored as part of the binary file. Embedded resources (such as images, configuration files, or data sets) can be accessed programmatically at runtime using the assembly’s resource APIs, rather than being distributed as external files. |
| **Host Application** | Desktop software where users install plugins, configure actions, and map them to device controls. Examples: Logi Options+ and Loupedeck. |
| **Icon Editor** | A tool within the host application that allows users to create and customize Action Icons for their device controls. Icon Editor is part of the Action Editor. |
| **Icon Template** | A definable template that controls the appearance and layout of Action Icons. |
| **Logi Actions SDK** | The toolkit for building plugins for compatible Logitech and Loupedeck devices. |
| **Logi Plugin Service** | The software component that manages plugins and facilitates communication between plugins, the host application, and devices. The Logi Plugin Service is part of the Logi Options+ and Loupedeck desktop applications. |
| **Marketplace** | The official platform for discovering, downloading, and installing plugins, profiles, and other extensions for Logitech and Loupedeck devices. The Marketplace provides developers with a distribution channel and users with a central hub for expanding device functionality. |
| **MX Creative Console** | A Logitech hardware device supported by the Logi Actions SDK. |
| **Overlay** | Action confirmation text or visual feedback displayed on the top layer of the device screen after performing an action. |
| **Plugin** | An add-on that extends the device's functionality with new actions, controls, and integrations. |
| **Plugin API** | An API that the Logi Plugin Service provides for plugins to interact with Logitech devices and the host application UI. |
| **Plugin Icon** | An icon that represents the plugin in user interfaces. The plugin icon is displayed in the Options+ and Loupedeck configuration UIs, as well as in the Logitech Marketplace web UI. |
| **Press Action** | Same as **Command** |
| **Profile** | A set of data that maps actions to device controls for a specific application or workflow. Profiles are stored locally and can be customized to fit user needs. A plugin can have one or more profiles for each supported device. |
| **Universal Plugin** | A type of plugin that provides general-purpose functionality (such as system controls) or functionality for specific applications using remote APIs (such as Spotify or Philips Hue). Universal Plugins do not have their own profiles, and actions of a Universal Plugin can be assigned to the System Plugin profile or to profiles of Application Plugins. See also **Application Plugin**. |
| **Profile Action** | A parameterized action that needs to be supplied with a parameter and is stored to the profile. |
| **Raster Image** | A graphic made up of a grid of colored pixels, such as PNG files, which has a fixed resolution and may lose quality when scaled. |
| **Rotate Action** | Same as **Adjustment** |
| **Target Application** | Same as **Client Application** |
| **Touch Button** | A tactile button with a customizable screen for displaying action icons and names, allowing for personalized visual feedback. |
| **Touch Page** | A page configuration for assigning touch actions to the available touch buttons on a device. |
| **UI (User Interface)** | The part of the software that the user sees and interacts with. In the SDK context, UI usually refers to the Graphical User Interface of a host application (for example, Options+). |
| **Vector Image** | A type of graphic (commonly SVG) that can be scaled to any size without losing quality. |
| **Wheel** | The large wheel dial controller on Loupedeck CT devices, used for continuous input and navigation. |
| **Wheel Page** | A page configuration for assigning wheel actions to the wheel controller on compatible devices. Applicable for the Loupedeck CT device. |
| **Wheel Tool** | A customizable control in a dynamic folder workspace, designed for continuous or circular input such as volume or other parameters, typically operated with a device's wheel interface. Applicable for the Loupedeck CT device. |
---
# Need immediate assistance or have a question?
Join our Discord community! Our team and fellow developers are ready to help.
[Join the Discussion](https://discord.gg/ptV2BfHCmm)
## Tutorials and Guides[](#tutorials-and-guides "Direct link to Tutorials and Guides")
Explore our tutorials for step-by-step guidance on integrating and utilizing the SDK features.
**Free CodeAcademy course**: Build Plugins for Logitech Devices with Actions SDK
[Explore course](https://www.codecademy.com/learn/build-plugins-for-logitech-devices)
**Haptics Tutorial:** This guide teaches you to add haptic feedback to your plugin
[View tutorial](/actions-sdk-docs/csharp/haptics/haptics-tutorial.md)
---
# Marketplace Approval Guidelines
The capitalized terms used in this document have the same meaning as those defined in the [Logitech Marketplace Developer Agreement](https://www.logitech.com/en-us/software/marketplace/developer-agreement.html).
## Approval Process[](#approval-process "Direct link to Approval Process")
Every new Digital Product and all new Digital Product versions (also known as updates), are subject to a verification and approval process performed by and at the sole discretion of the Logitech Marketplace team.
All new Digital Products and their subsequent updates are reviewed according to Logitech's availability at the time the Digital Product or its update is uploaded using this [form](https://marketplace.logitech.com/contribute), but Logitech doesn't guarantee the time frame for the review as it can take longer due to various factors.
Along with automated checks, we manually review each Digital Product and Digital Product update one-by-one, before it becomes publicly available on Logitech Marketplace or Loupedeck Martketplace. The Digital Product Developer will receive a notification as soon as the status of the review changes, or if there are any questions regarding the Digital Product or Digital Product update.
If you haven't heard from us within the next ten (10) working days after the Digital Product upload, please reach out to us at .
Logitech reserves the right to repeat the review of Digital Products and Digital Product updates from time to time and withdraw approval for a Digital Product or Digital Product update if new information on their conformity with the approval criteria comes to Logitech's attention after such a review.
## Digital Product Approval Criteria[](#digital-product-approval-criteria "Direct link to Digital Product Approval Criteria")
All Digital Products for Logitech Marketplace must meet these general approval criteria:
### Submission[](#submission "Direct link to Submission")
* Please ensure you have tested the plugin properly with the supported hardware and software.
* Ensure that the plugin icon is in the plugin `metadata` folder.
* Pack the plugin to the `.lplug4` file. The instructions can be found here: [C#](/actions-sdk-docs/csharp/plugin-development/distributing-the-plugin.md), [Node.js](/actions-sdk-docs/nodejs/introduction.md).
* Deliver the plugin using the submission form at .
### General / Other[](#general--other "Direct link to General / Other")
* Metadata file matches the claimed operating system support.
* Logi Plugin Service software includes a specific package installer that does all the needed work to install the plugin to the Logitech Plugin directory and run all needed installation methods. The input for Logi Plugin Package Installer is a ZIP archive with a `.lplug4` extension. To build it, use the Logi Plugin Tool. With the Plugin Tool you can both package and validate the plugin.
* Recommended name for the .lplug4 package: `pluginName_version.lplug4` example: `SpotifyPremium_1_0.lplug4`.
* The .lplug4 package must contain a plugin configuration file named `LoupedeckPackage.yaml` in the metadata folder.
* Please check your Digital Product complies with all the other requirements stated in the SDK Documentation around prerequisites, testing, debugging and distribution.
* All of the external links on your Digital Product page are valid, reachable from the internet, and relate to the Digital Product or Digital Product author.
* The Digital Product is compatible with Logitech Plugin Service and can be installed.
* During each upload of a Digital Product (or new version of such Digital Product), compatibility must be verified.
## Legal Agreements and Privacy[](#legal-agreements-and-privacy "Direct link to Legal Agreements and Privacy")
* The Digital Product Developer must accept the Logitech Marketplace Developer Agreement before submitting the Digital Product.
* The Digital Product Developer must provide their own end user license agreement (known as a Developer EULA) with any Digital Product.
* In case your Developer Created Content contains any open source software, this open source software is licensed under one of the following open-source licenses: (i) Apache 2.0 or (ii) the MIT License and duly complies at all times with their terms. The Developer Created Content should not be GPL2 or GPL3 licensed. (the “Open Source Requirements”).
* The Digital Product Developer must have in place adequate privacy agreements if the Digital Products collect any personal data, must comply with them and must have an adequate Privacy Policy in place in accordance with applicable legislation.
Logitech may establish additional criteria on a case-by-case basis. Logitech reserves the right to remove any Digital Product from Logitech Marketplace or Loupedeck Marketplace at any time and at its sole discretion.
## Approval Criteria for Features Implemented by Digital Products[](#approval-criteria-for-features-implemented-by-digital-products "Direct link to Approval Criteria for Features Implemented by Digital Products")
Features implemented by the Digital Product are subject to review and approval by Logitech, and must conform to the following criteria:
* The Digital Product does not implement features which are not related to its major functionality.
* The Digital Product does not implement any malicious features or features for additional promotion that would give it an unfair advantage.
* Logitech may establish additional criteria on a case-by-case basis.
* If you have any questions about the approval process, please email us at .
© 2026 Logitech Europe S.A. All Rights Reserved.
---
# API Documentation
The Node.js SDK provides comprehensive API documentation to help you understand and use all available classes, methods, and types in your plugin development.
## API Reference[](#api-reference "Direct link to API Reference")
For detailed API documentation with complete type information, visit our comprehensive API reference:
**[View Full API Documentation](/actions-sdk-docs/nodejs/api/classes/Action.md)**
This documentation includes:
* **Classes**: Complete documentation for `PluginSDK`, `Action`, `CommandAction`, `AdjustmentAction`, and more
* **Types**: Detailed type definitions and interfaces
* **Enums**: Available enumeration values like `ActionType` and `LoggerLevel`
* **Variables**: Global constants and utilities like `ASSETS_PATH`
---
# Action
Abstract base class for Plugin Actions.
## Remarks[](#remarks "Direct link to Remarks")
Do not extend this class directly. Extend [CommandAction](/actions-sdk-docs/nodejs/api/classes/CommandAction.md) or [AdjustmentAction](/actions-sdk-docs/nodejs/api/classes/AdjustmentAction.md) instead.
## Constructors[](#constructors "Direct link to Constructors")
### Constructor[](#constructor "Direct link to Constructor")
```ts
new Action(): Action;
```
#### Returns[](#returns "Direct link to Returns")
`Action`
## Properties[](#properties "Direct link to Properties")
### description[](#description "Direct link to description")
```ts
abstract description: string;
```
Action Description shown in the UI.
***
### displayName[](#displayname "Direct link to displayName")
```ts
abstract displayName: string;
```
Display Name (or title) shown in the UI.
***
### groupName[](#groupname "Direct link to groupName")
```ts
readonly groupName: string = '';
```
Optional group/folder under which this action is listed in the UI. Leave empty to place the action at the top level.
***
### name[](#name "Direct link to name")
```ts
abstract readonly name: string;
```
Unique name for the action. Used for identification in the system.
---
# AdjustmentAction
Abstract base class for adjustment actions
Adjustment actions handle continuous input devices that can be turned or moved to adjust values incrementally. These actions can optionally support reset functionality.
## Example[](#example "Direct link to Example")
```typescript
class VolumeAdjustment extends AdjustmentAction {
name = "volume-adjustment";
displayName = "Volume Control";
description = "Adjust system volume";
hasReset = true;
execute(event: AdjustmentActionExecuteEvent) {
// Adjust volume based on event.tick
console.log(`Adjusting volume by ${event.tick}`);
}
}
```
## See[](#see "Direct link to See")
* [Action](/actions-sdk-docs/nodejs/api/classes/Action.md) - Base action class
* [CommandAction](/actions-sdk-docs/nodejs/api/classes/CommandAction.md) - For button-like actions
* [AdjustmentActionExecuteEvent](/actions-sdk-docs/nodejs/api/type-aliases/AdjustmentActionExecuteEvent.md) - Event data structure
## Extends[](#extends "Direct link to Extends")
* `ManageAction`
## Constructors[](#constructors "Direct link to Constructors")
### Constructor[](#constructor "Direct link to Constructor")
```ts
new AdjustmentAction(): AdjustmentAction;
```
#### Returns[](#returns "Direct link to Returns")
`AdjustmentAction`
#### Inherited from[](#inherited-from "Direct link to Inherited from")
```ts
ManageAction.constructor;
```
## Methods[](#methods "Direct link to Methods")
### execute()[](#execute "Direct link to execute()")
```ts
abstract execute(event: AdjustmentActionExecuteEvent): void | Promise;
```
Handles the user interaction with assigned key.
#### Parameters[](#parameters "Direct link to Parameters")
##### event[](#event "Direct link to event")
[`AdjustmentActionExecuteEvent`](/actions-sdk-docs/nodejs/api/type-aliases/AdjustmentActionExecuteEvent.md)
#### Returns[](#returns-1 "Direct link to Returns")
`void` | `Promise`<`void`>
## Properties[](#properties "Direct link to Properties")
### description[](#description "Direct link to description")
```ts
abstract description: string;
```
Action Description shown in the UI.
#### Inherited from[](#inherited-from-1 "Direct link to Inherited from")
```ts
ManageAction.description;
```
***
### displayName[](#displayname "Direct link to displayName")
```ts
abstract displayName: string;
```
Display Name (or title) shown in the UI.
#### Inherited from[](#inherited-from-2 "Direct link to Inherited from")
```ts
ManageAction.displayName;
```
***
### groupName[](#groupname "Direct link to groupName")
```ts
readonly groupName: string = '';
```
Optional group/folder under which this action is listed in the UI. Leave empty to place the action at the top level.
#### Inherited from[](#inherited-from-3 "Direct link to Inherited from")
```ts
ManageAction.groupName;
```
***
### hasReset[](#hasreset "Direct link to hasReset")
```ts
abstract readonly hasReset: boolean;
```
Defines if action has reset command.
***
### name[](#name "Direct link to name")
```ts
abstract readonly name: string;
```
Unique name for the action. Used for identification in the system.
#### Inherited from[](#inherited-from-4 "Direct link to Inherited from")
```ts
ManageAction.name;
```
---
# CommandAction
Abstract base class for command actions (buttons, keys, etc.).
Command actions handle discrete input events like button presses from Logi devices. They execute a single action when triggered.
## Example[](#example "Direct link to Example")
```typescript
class PlayPauseAction extends CommandAction {
name = "play-pause";
displayName = "Play/Pause";
description = "Toggle media playback";
onKeyDown() {
// Handle the button press
console.log("Play/Pause button pressed");
}
}
```
## See[](#see "Direct link to See")
* [Action](/actions-sdk-docs/nodejs/api/classes/Action.md) - Base action class
* [AdjustmentAction](/actions-sdk-docs/nodejs/api/classes/AdjustmentAction.md) - For continuous adjustment actions
## Extends[](#extends "Direct link to Extends")
* `ManageAction`
## Constructors[](#constructors "Direct link to Constructors")
### Constructor[](#constructor "Direct link to Constructor")
```ts
new CommandAction(): CommandAction;
```
#### Returns[](#returns "Direct link to Returns")
`CommandAction`
#### Inherited from[](#inherited-from "Direct link to Inherited from")
```ts
ManageAction.constructor;
```
## Methods[](#methods "Direct link to Methods")
### onKeyDown()[](#onkeydown "Direct link to onKeyDown()")
```ts
onKeyDown(): void | Promise;
```
Handles the user pressing assigned key. Override this method to implement your command action behavior.
#### Returns[](#returns-1 "Direct link to Returns")
`void` | `Promise`<`void`>
## Properties[](#properties "Direct link to Properties")
### description[](#description "Direct link to description")
```ts
abstract description: string;
```
Action Description shown in the UI.
#### Inherited from[](#inherited-from-1 "Direct link to Inherited from")
```ts
ManageAction.description;
```
***
### displayName[](#displayname "Direct link to displayName")
```ts
abstract displayName: string;
```
Display Name (or title) shown in the UI.
#### Inherited from[](#inherited-from-2 "Direct link to Inherited from")
```ts
ManageAction.displayName;
```
***
### groupName[](#groupname "Direct link to groupName")
```ts
readonly groupName: string = '';
```
Optional group/folder under which this action is listed in the UI. Leave empty to place the action at the top level.
#### Inherited from[](#inherited-from-3 "Direct link to Inherited from")
```ts
ManageAction.groupName;
```
***
### name[](#name "Direct link to name")
```ts
abstract readonly name: string;
```
Unique name for the action. Used for identification in the system.
#### Inherited from[](#inherited-from-4 "Direct link to Inherited from")
```ts
ManageAction.name;
```
---
# PluginSDK
The PluginSDK provides the core functionality for building plugins that communicate with the Logi Plugin Service. It handles WebSocket communication, action registration, message dispatching, and connection management.
## Example[](#example "Direct link to Example")
```typescript
import { PluginSDK } from "@logitech/plugin-sdk";
import { MyCustomAction } from "./actions/my-custom-action";
const sdk = new PluginSDK();
// Register your custom actions
const myAction = new MyCustomAction();
sdk.registerAction(myAction);
// Connect to the Logi Plugin Service
await sdk.connect();
```
## See[](#see "Direct link to See")
* [CommandAction](/actions-sdk-docs/nodejs/api/classes/CommandAction.md) - For button-like actions
* [AdjustmentAction](/actions-sdk-docs/nodejs/api/classes/AdjustmentAction.md) - For rotary/slider actions
## Constructors[](#constructors "Direct link to Constructors")
### Constructor[](#constructor "Direct link to Constructor")
```ts
new PluginSDK(options: PluginSDKOptions): PluginSDK;
```
Creates a new PluginSDK instance with the specified configuration options.
Initializes the WebSocket client for communication with the Logi Plugin Service, sets up the message dispatcher for handling incoming messages, configures the logger with the specified log level, and establishes connection event handlers.
#### Parameters[](#parameters "Direct link to Parameters")
##### options[](#options "Direct link to options")
[`PluginSDKOptions`](/actions-sdk-docs/nodejs/api/type-aliases/PluginSDKOptions.md) = `...`
Configuration options for the SDK. If not provided, defaults to WARN log level.
#### Returns[](#returns "Direct link to Returns")
`PluginSDK`
#### Example[](#example-1 "Direct link to Example")
```typescript
import { PluginSDK, LoggerLevel } from "@logitech/plugin-sdk";
// Create SDK with default options (WARN log level)
const sdk = new PluginSDK();
// Create SDK with custom log level
const debugSdk = new PluginSDK({ logLevel: LoggerLevel.DEBUG });
// Create SDK with minimal logging
const quietSdk = new PluginSDK({ logLevel: LoggerLevel.ERROR });
```
#### See[](#see-1 "Direct link to See")
* [PluginSDKOptions](/actions-sdk-docs/nodejs/api/type-aliases/PluginSDKOptions.md) - Available configuration options
* [LoggerLevel](/actions-sdk-docs/nodejs/api/enumerations/LoggerLevel.md) - Available logging levels
## Methods[](#methods "Direct link to Methods")
### connect()[](#connect "Direct link to connect()")
```ts
connect(): Promise;
```
Establishes connection to the Logi Plugin Service.
This method connects the plugin to the Logi Plugin Service via WebSocket, enables communication, and sets up graceful shutdown handling. Must be called after registering all actions.
#### Returns[](#returns-1 "Direct link to Returns")
`Promise`<`void`>
Promise that resolves when the connection is established
#### Throws[](#throws "Direct link to Throws")
Will log errors if connection fails
#### Example[](#example-2 "Direct link to Example")
```typescript
const sdk = new PluginSDK();
// Register actions first
sdk.registerAction(new MyAction());
// Then connect
try {
await sdk.connect();
console.log("Plugin connected successfully");
} catch (error) {
console.error("Failed to connect:", error);
}
```
***
### registerAction()[](#registeraction "Direct link to registerAction()")
```ts
registerAction(action: Action): void;
```
Registers an action with the plugin.
Actions must be registered before connecting to the Logi Plugin Service to be available for assignment to controls.
#### Parameters[](#parameters-1 "Direct link to Parameters")
##### action[](#action "Direct link to action")
[`Action`](/actions-sdk-docs/nodejs/api/classes/Action.md)
The action instance to register
#### Returns[](#returns-2 "Direct link to Returns")
`void`
#### Example[](#example-3 "Direct link to Example")
```typescript
import { CommandAction } from "@logitech/plugin-sdk";
class MyAction extends CommandAction {
readonly name = "my-action";
displayName = "My Action";
description = "Does something useful";
onKeyDown() {
console.log("Action executed!");
}
}
const myAction = new MyAction();
sdk.registerAction(myAction);
```
#### See[](#see-2 "Direct link to See")
* [Action](/actions-sdk-docs/nodejs/api/classes/Action.md) - Base action class
* [CommandAction](/actions-sdk-docs/nodejs/api/classes/CommandAction.md) - For button actions
* [AdjustmentAction](/actions-sdk-docs/nodejs/api/classes/AdjustmentAction.md) - For rotary/slider actions
---
# LoggerLevel
Logging verbosity levels for the SDK. Pass one to [PluginSDKOptions](/actions-sdk-docs/nodejs/api/type-aliases/PluginSDKOptions.md) when constructing the [PluginSDK](/actions-sdk-docs/nodejs/api/classes/PluginSDK.md).
## Example[](#example "Direct link to Example")
```typescript
import { PluginSDK, LoggerLevel } from "@logitech/plugin-sdk";
const sdk = new PluginSDK({ logLevel: LoggerLevel.WARN });
```
## Enumeration Members[](#enumeration-members "Direct link to Enumeration Members")
### DEBUG[](#debug "Direct link to DEBUG")
```ts
DEBUG: 3;
```
Detailed debugging information
***
### ERROR[](#error "Direct link to ERROR")
```ts
ERROR: 0;
```
Critical errors that may cause the plugin to malfunction
***
### INFO[](#info "Direct link to INFO")
```ts
INFO: 2;
```
General informational messages
***
### WARN[](#warn "Direct link to WARN")
```ts
WARN: 1;
```
Warning messages for non-critical issues
---
# AdjustmentActionExecuteEvent
```ts
type AdjustmentActionExecuteEvent = {
tick: number;
};
```
Event data passed to adjustment actions when executed.
## Properties[](#properties "Direct link to Properties")
### tick[](#tick "Direct link to tick")
```ts
tick: number;
```
The tick/delta value indicating the direction and magnitude of the adjustment
---
# PluginSDKOptions
```ts
type PluginSDKOptions = {
logLevel: LoggerLevel;
};
```
Configuration options for the PluginSDK constructor.
## Example[](#example "Direct link to Example")
```typescript
import { PluginSDK, LoggerLevel } from "@logitech/plugin-sdk";
// With custom log level
const sdk = new PluginSDK({ logLevel: LoggerLevel.DEBUG });
// Using default options
const sdk = new PluginSDK();
```
## Properties[](#properties "Direct link to Properties")
### logLevel[](#loglevel "Direct link to logLevel")
```ts
logLevel: LoggerLevel;
```
The logging level for the SDK. Controls the verbosity of log output. Defaults to LoggerLevel.WARN if not specified.
#### See[](#see "Direct link to See")
[LoggerLevel](/actions-sdk-docs/nodejs/api/enumerations/LoggerLevel.md) - Available logging levels
---
# ASSETS\_PATH
```ts
const ASSETS_PATH: string;
```
Runtime path to the plugin's `assets` folder. Use this to build absolute paths to files bundled with your plugin.
## Example[](#example "Direct link to Example")
```typescript
import * as path from "path";
import { ASSETS_PATH } from "@logitech/plugin-sdk";
const filePath = path.join(ASSETS_PATH, "files", "sample-text.txt");
```
---
# Creating an Action
Actions are how Logitech devices interact with your plugin. There are two types of actions:
* Commands
* Adjustments
## Command Action[](#command-action "Direct link to Command Action")
A command action is designed to be executed once a device button is pressed. To create a command action, extend the `CommandAction` class and implement the class properties and functions
```javascript
import { CommandAction } from '@logitech/plugin-sdk';
import { exec } from 'child_process';
function sendMessage(message) {
exec(`start cmd.exe /K echo ${message}`);
}
export class MyTestAction extends CommandAction {
name = 'My_Test_Action';
displayName = 'My Test Action';
description = 'My custom action';
groupName = 'My Actions';
onKeyDown() {
sendMessage(`${this.name} is called by key clicking!`);
}
}
```
This action will open a command prompt window with the message you have specified. The action also needs to be registered with the PluginSDK. This needs to be done before calling the connect function:
```javascript
import { PluginSDK } from '@logitech/plugin-sdk';
import { MyTestAction } from './src/test-actions.js';
const pluginSDK = new PluginSDK();
// Register plugin actions
pluginSDK.registerAction(new MyTestAction());
await pluginSDK.connect();
```
## Adjustment Action[](#adjustment-action "Direct link to Adjustment Action")
An adjustment action is an action that responds to a rotation adjustment from a Logitech device, such as a scroll wheel or a knob. To create an adjustment action, extend the `AdjustmentAction` class and implement the class properties and functions:
```javascript
import { AdjustmentAction } from '@logitech/plugin-sdk';
import { exec } from 'child_process';
function sendMessage(message) {
exec(`start cmd.exe /K echo ${message}`);
}
export class MyTestAdjustment extends AdjustmentAction {
name = 'My_Test_Adjustment';
displayName = 'My Test Adjustment';
description = 'My Test Adjustment';
execute(event) {
const message = `${this.name} is called. event.tick: ${event.tick}`;
sendMessage(message);
}
}
```
This action will open a command prompt and display in ticks, how much the dial has been rotated. Use `event.tick` to measure how much the dial has turned. The action also needs to be registered with the PluginSDK. This needs to be done before calling the connect function:
```javascript
import { PluginSDK } from '@logitech/plugin-sdk';
import { MyTestAdjustment } from './src/test-actions.js';
const pluginSDK = new PluginSDK();
// Register plugin actions
pluginSDK.registerAction(new MyTestAdjustment());
await pluginSDK.connect();
```
---
# Debugging
Console output from the plugin can be accessed by enabling developer mode in Logi Plugin Service.
## Enabling developer mode[](#enabling-developer-mode "Direct link to Enabling developer mode")
1. Stop the Logi Plugin Service
2. Open the `LoupedeckSettings.ini` configuration file located in the Logi Plugin Service directory:
* Path (Windows): `C:\Users\\AppData\Local\Logi\LogiPluginService`
3. Add the following line:
* `Loupedeck/DeveloperMode=True`
4. Start Logi Plugin Service
When the Logi Plugin Service starts it will show a console terminal for each NodeJS plugin started by the service.
---
# Node.js SDK Introduction (Beta)
info
* *New in Plugin API 6.2.3 (Logi Options+ 1.97, Loupedeck 6.2.4)*
* *macOS support added in Plugin API 6.3 (Logi Options+ 2.2, Loupedeck 6.3)*
Introducing the Node.js version of our powerful Logi Actions SDK – now available in beta for early adopters and innovative developers! The Node.js SDK harnesses JavaScript's flexibility and the vast npm ecosystem to help you create dynamic plugins. Whether you're a web developer looking to extend into hardware integration or seeking to leverage your JavaScript expertise for creative workflow solutions, this beta release opens new possibilities for plugin development.
tip
New to the Logi Actions SDK? Start with the [Getting Started](/actions-sdk-docs/getting-started.md) guide to learn about supported devices, choose between C# and Node.js SDKs, and understand the ecosystem.
## What You Can Do with Node.js SDK[](#what-you-can-do-with-nodejs-sdk "Direct link to What You Can Do with Node.js SDK")
With the Node.js SDK, you can:
* **Test and iterate rapidly**: Take advantage of Node.js's fast development cycle with automatic hot reloading
* **Leverage the JavaScript ecosystem**: Integrate with npm packages and JavaScript libraries
* **Provide valuable feedback**: Help shape the SDK's evolution and influence the developer experience
Beta Program Notes
This is a beta release for developers building Node.js plugins.
**Get involved:**
Ready to help us improve the SDK? Join our [Discord server](https://discord.gg/ptV2BfHCmm) to share feedback and get support.
## Prerequisites[](#prerequisites "Direct link to Prerequisites")
Before you begin, ensure you have:
* **Operating system**: Windows or macOS
* **Node.js**: Install the latest LTS version from [nodejs.org](https://nodejs.org/)
* **Basic JavaScript/TypeScript knowledge**
For general prerequisites including host applications and supported devices, see the [Getting Started](/actions-sdk-docs/getting-started.md#prerequisites) guide.
## Installation[](#installation "Direct link to Installation")
### Creating a plugin[](#creating-a-plugin "Direct link to Creating a plugin")
To create a sample plugin, open a command prompt in the directory you wish to manage the plugin code. From here, run the following command with your desired name of the plugin in place of the templated name:
```shell
npx @logitech/plugin-toolkit create
```
Use [kebab-case](https://developer.mozilla.org/en-US/docs/Glossary/Kebab_case) notation for the plugin name. A new directory should be created with the name you gave the plugin in the create command. The sample plugin will use Typescript by default. If JavaScript is preferred, add the `--javascript` option to the end of the command.
### Building the sample plugin[](#building-the-sample-plugin "Direct link to Building the sample plugin")
Navigate to the plugin directory created in the previous step. Install the plugin dependencies by running:
```shell
npm install
```
After the dependencies are installed, build plugin and link it to Logi Plugin Service using the `watch` script:
```shell
npm run watch
```
The plugin should now be available to use in Logi Options+. Once the build completes, it will watch for any file changes and rebuild the plugin. It will also tell Logi Plugin Service to reload the changes. When the `watch` script is stopped, the plugin will be unloaded from Logi Plugin Service also. To build the plugin without watching the source files for changes, the `build` script can be run directly:
```shell
npm run build
```
The compiled plugin is available from the newly created `dist` directory.
### Running the plugin in Logi Plugin Service[](#running-the-plugin-in-logi-plugin-service "Direct link to Running the plugin in Logi Plugin Service")
The `watch` script will automatically load the plugin in Logi Plugin Service. If the `build` script is used to create a build of the plugin, it can be loaded into Logi Plugin Service using the following command:
```shell
npm run link
```
This will create a symlink from the `dist` folder to the Logi Plugin Service installed plugins folder. Once Logi Plugin Service detects the new plugin, it will create a new node process to run the plugin. Once the plugin has started, it should display in the installed plugin list in Logi Options+. From here, you can use the plugin like any other plugin. You can assign and run actions on devices, customize actions, create profiles, etc.
If you wish to remove the linked plugin from Logi Plugin Service, run the following command:
```shell
npm run unlink
```
The plugin should disappear from Logi Options+.
## Building a distributable package[](#building-a-distributable-package "Direct link to Building a distributable package")
To run a minified build and package the plugin to a `.lplug4` format that can be installed on any device running the Logi Plugin Service, run the following command
```shell
npm run build:pack
```
---
# Using the SDK
The sample plugin will already have the following code added to the `index.js` file. Here we will describe the functionality of the SDK class, but it is not required to run the sample plugin.
The SDK is available as a class called `PluginSDK`. It is imported through the `@logitech/plugin-sdk` library:
```javascript
import { PluginSDK } from '@logitech/plugin-sdk';
```
Create an instance of the PluginSDK class:
```javascript
const pluginSDK = new PluginSDK();
```
Register actions in the plugin using:
```javascript
pluginSDK.registerAction(new MyTestAction());
```
All actions must be registered before connecting to LPS:
```javascript
pluginSDK.registerAction(new MyTestAction());
pluginSDK.registerAction(new MyTestAction2());
await pluginSDK.connect();
```
The connect function will open a WebSocket client and connect to the Logi Plugin Service WebSocket server. The connect function is awaitable. If you wish to execute any code after the WebSocket has connected, you can await the function call:
```javascript
await pluginSDK.connect();
myFunctionToRunAfterConnection();
```
---
# Working with Assets
Plugins may require external non-source files as part of their functionality. These can be text files, executables, databases, images, etc. The JS SDK provides the “assets.yml” file to allow users to specify files which are to be included as part of the plugin build process.
## Example: Reading data from a file included in the `assets.yml`[](#example-reading-data-from-a-file-included-in-the-assetsyml "Direct link to example-reading-data-from-a-file-included-in-the-assetsyml")
1. Create an `assets.yml` file in the root folder of the plugin
2. Create an `assets` directory in the root of the plugin directory
* The `assets` directory is not required for the `assets.yml` to work as files listed in `assets.yml` can specify the exact path. We are only creating the `assets` directory here to keep our assets organised in the plugin directory
3. Create a new text file `my-text-file.txt` in the `assets` directory. Add some text to the file.
4. In the `assets.yml` file, add the following configuration to include the text file as part of the plugin build
```yaml
- name: files
path: assets/my-text-file.txt
```
* `name` will be the name of the folder where your files will be stored in the plugin once it is built. We will use this value during runtime to specify the file location
* `path` specifies the location of the file. Path can also accept glob patterns, e.g. `assets/*` will copy all files and directories in the `assets` folder
To access the file at runtime, the Plugin SDK provides a constant which is the location of the `assets` folder during runtime, `ASSETS_PATH`. Use this in combination with the `name` provided for the assets in the `assets.yml` to access the file in an action. Below is an example of an action that reads the file and outputs the contents to a command window:
```javascript
import { CommandAction, ASSETS_PATH } from '@logitech/plugin-sdk';
import { exec } from 'child_process';
import { promises as fs } from 'fs';
export class ReadFileAction extends CommandAction {
name = 'read_file';
displayName = 'Read file';
description = 'Reads the contents of the sample file';
async onKeyDown() {
const data = await fs.readFile(`${ASSETS_PATH}\\files\\my-text-file.txt`, 'utf8');
exec(`start cmd.exe /K echo ${data}`);
}
}
```
---
# Working with External Packages
A JS plugin is not a typical Node application as it must be bundled and registered with Logi Plugin Service in order for it to run. If a plugin was created using the `logitoolkit create` command, the `build` NPM script will include external JS dependencies as part of a bundling process. However, some packages may include certain assets in order to function. These may be non-JS script files, binaries, json files, etc. that are used by the package during runtime. If these files are not included as part of the build process, then there will likely be issues using these packages at runtime.
In order to function correctly in a plugin, a package that uses external assets must allow for the location of these assets to be configurable. Then, the `assets.yml` and `ASSETS_PATH` can be used to include these assets as part of the build process. In the example below, we will use the [node-notifier](https://www.npmjs.com/package/node-notifier) package in our plugin to display a notification when an action is triggered.
## Example: Showing a notification using node-notifier[](#example-showing-a-notification-using-node-notifier "Direct link to Example: Showing a notification using node-notifier")
Install the node-notifier package in your plugin:
```shell
npm install --save node-notifier
```
Create an `assets.yml` file in the root of the plugin directory. This will allow the plugin build to copy the executables needed to the plugin bundle for use during runtime. The `assets.yml` file should look like this:
```yaml
- name: node-notifier
path: node_modules/node-notifier/vendor/*
```
Create an action that uses the `node-notifier` library. Node-notifier has a `customPath` property to specify when creating a notifier instance. Use this to specify the location of the binary. Use the `ASSETS_PATH` constant to form the path of the executable so it can be found at runtime:
```javascript
import { CommandAction, ASSETS_PATH } from '@logitech/plugin-sdk';
import { WindowsToaster } from 'node-notifier';
const notifier = new WindowsToaster({
withFallback: false, // Fallback to Growl or Balloons?
customPath: `${ASSETS_PATH}\\node-notifier\\snoreToast\\snoretoast-x64.exe`
});
export class ShowNotificationAction extends CommandAction {
name = 'show_notification';
displayName = 'Show notification';
description = 'Displays an OS notification';
onKeyDown() {
notifier.notify(`Hello from ${this.displayName} action`);
}
}
```
---
# Plugin Basics
This page introduces the core concepts for plugin development.
## Plugin[](#plugin "Direct link to Plugin")
A Logitech plugin is a software component that provides additional functionality to Logitech devices by integrating them with specific applications or services. Logi Actions SDK provides the tools and libraries for implementing plugins. Plugins are loaded and managed by the [Logi Plugin Service](#logi-plugin-service), which handles their execution and communication with devices.
**Key characteristics:**
* **Purpose**: Provide support for external applications, devices, and cloud services
* **Management**: Managed by the Logi Plugin Service (part of Logi Options+ and Loupedeck desktop applications)
* **Development**: Implemented with the C# SDK or Node.js SDK
* **Platform support**: Designed to work on both Windows and macOS operating systems with the same source code
* **Distribution**: Can be distributed via the Logitech Marketplace
* **File format**: Packaged as `.lplug4` files for distribution and installation
The Logitech Marketplace provides a centralized platform where users can discover and install plugins.
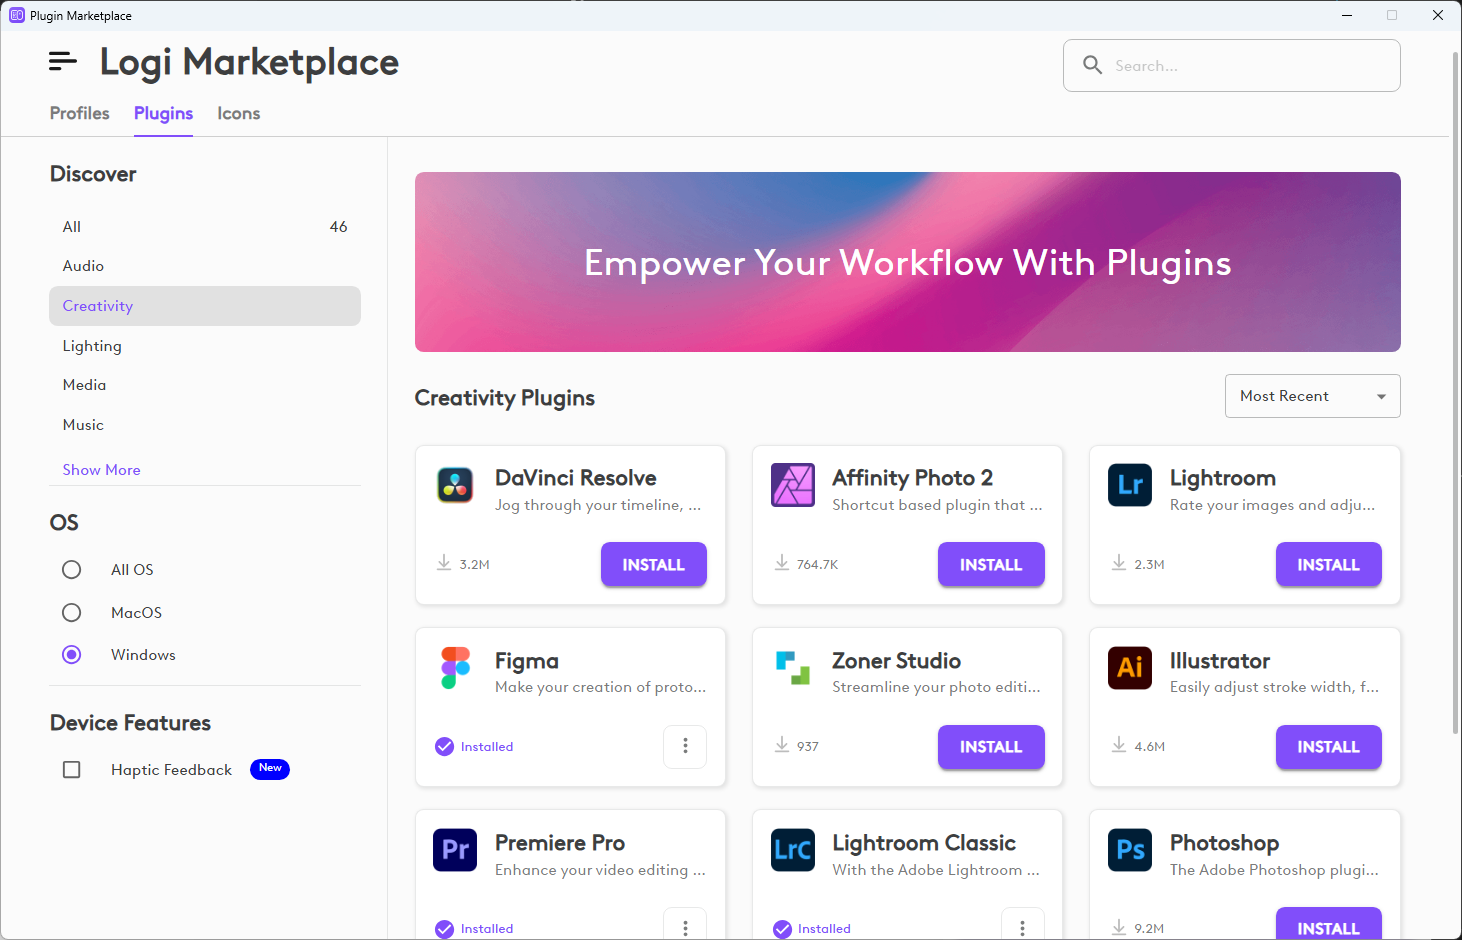
Plugins are typically designed to integrate with specific applications or services. To enable this integration, plugins can use various **communication methods**:
* **Keyboard shortcuts**: Simulate keyboard input to trigger application commands
* **Network-based APIs**: Connect to cloud services or web APIs via HTTP
* **Inter-process communication (IPC)**: Communicate directly with application processes
* **Native application SDKs**: Integrate through an application's SDK or extension system
## Action[](#action "Direct link to Action")
An action defines what happens in software when a user triggers it using a Logitech device. An action typically executes a single operation in the target software. Plugins define the actions available to users, and users assign actions to device controls (buttons, dials) through profiles.
There are two types of actions: **commands** and **adjustments**.
### Command[](#command "Direct link to Command")
A command is an action that executes a discrete operation in the target software when triggered. Commands are typically mapped to button-like controls and execute once per activation.
* **Behavior:** Single activation with immediate, discrete result (on/off, execute)
* **Examples:** *Toggle Mute*, *Save*, *Next Track*
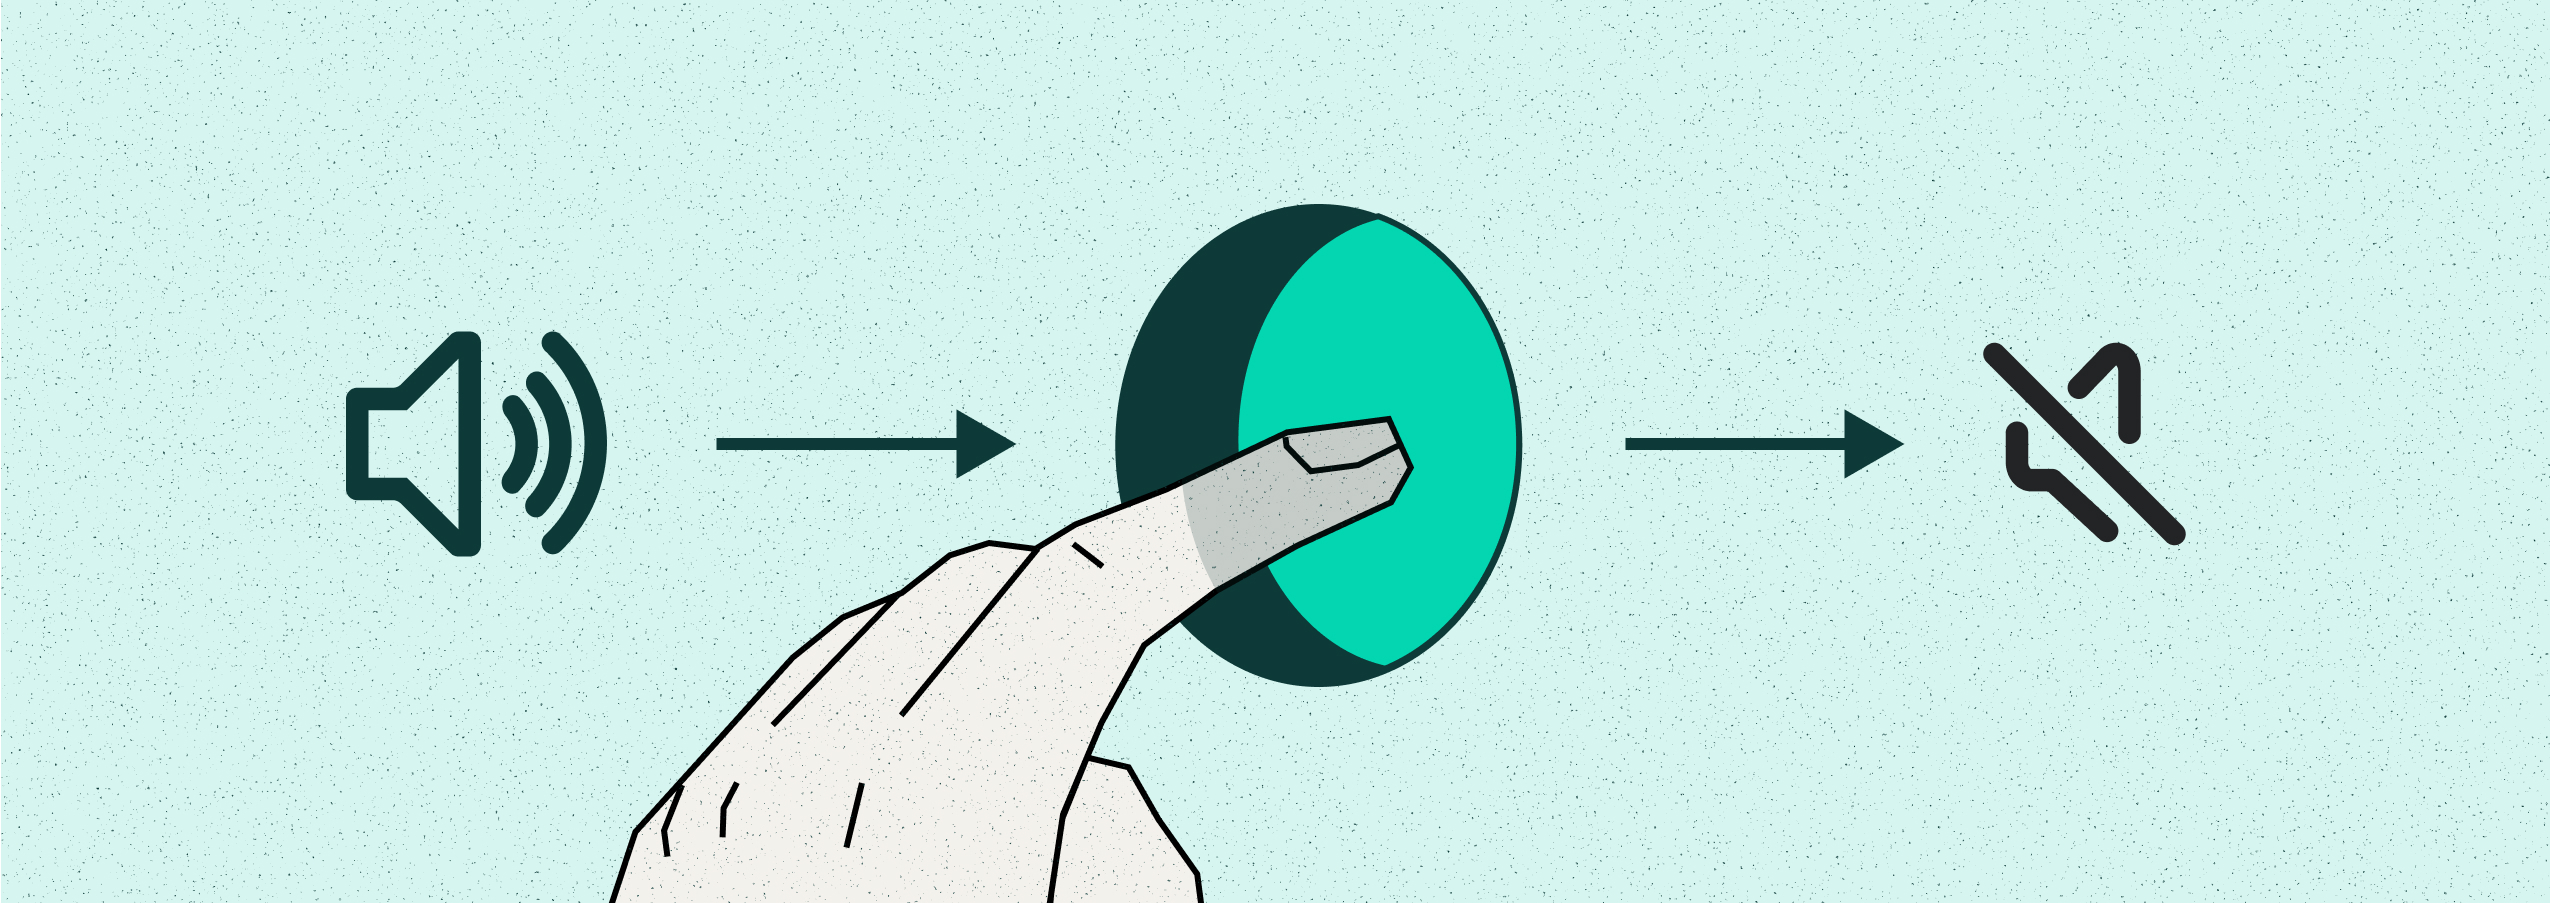
*Command: One trigger, one result*
### Adjustment[](#adjustment "Direct link to Adjustment")
An adjustment is an action that performs a continuous or incremental change in the target software. An adjustment allows fine control over values by increasing or decreasing them in steps. Adjustments are typically assigned to dials, rollers, or wheels.
* **Behavior:** Incremental steps that increase or decrease a value along a continuous range
* **Examples:** *System Volume*, *Screen Brightness*, *Zoom*
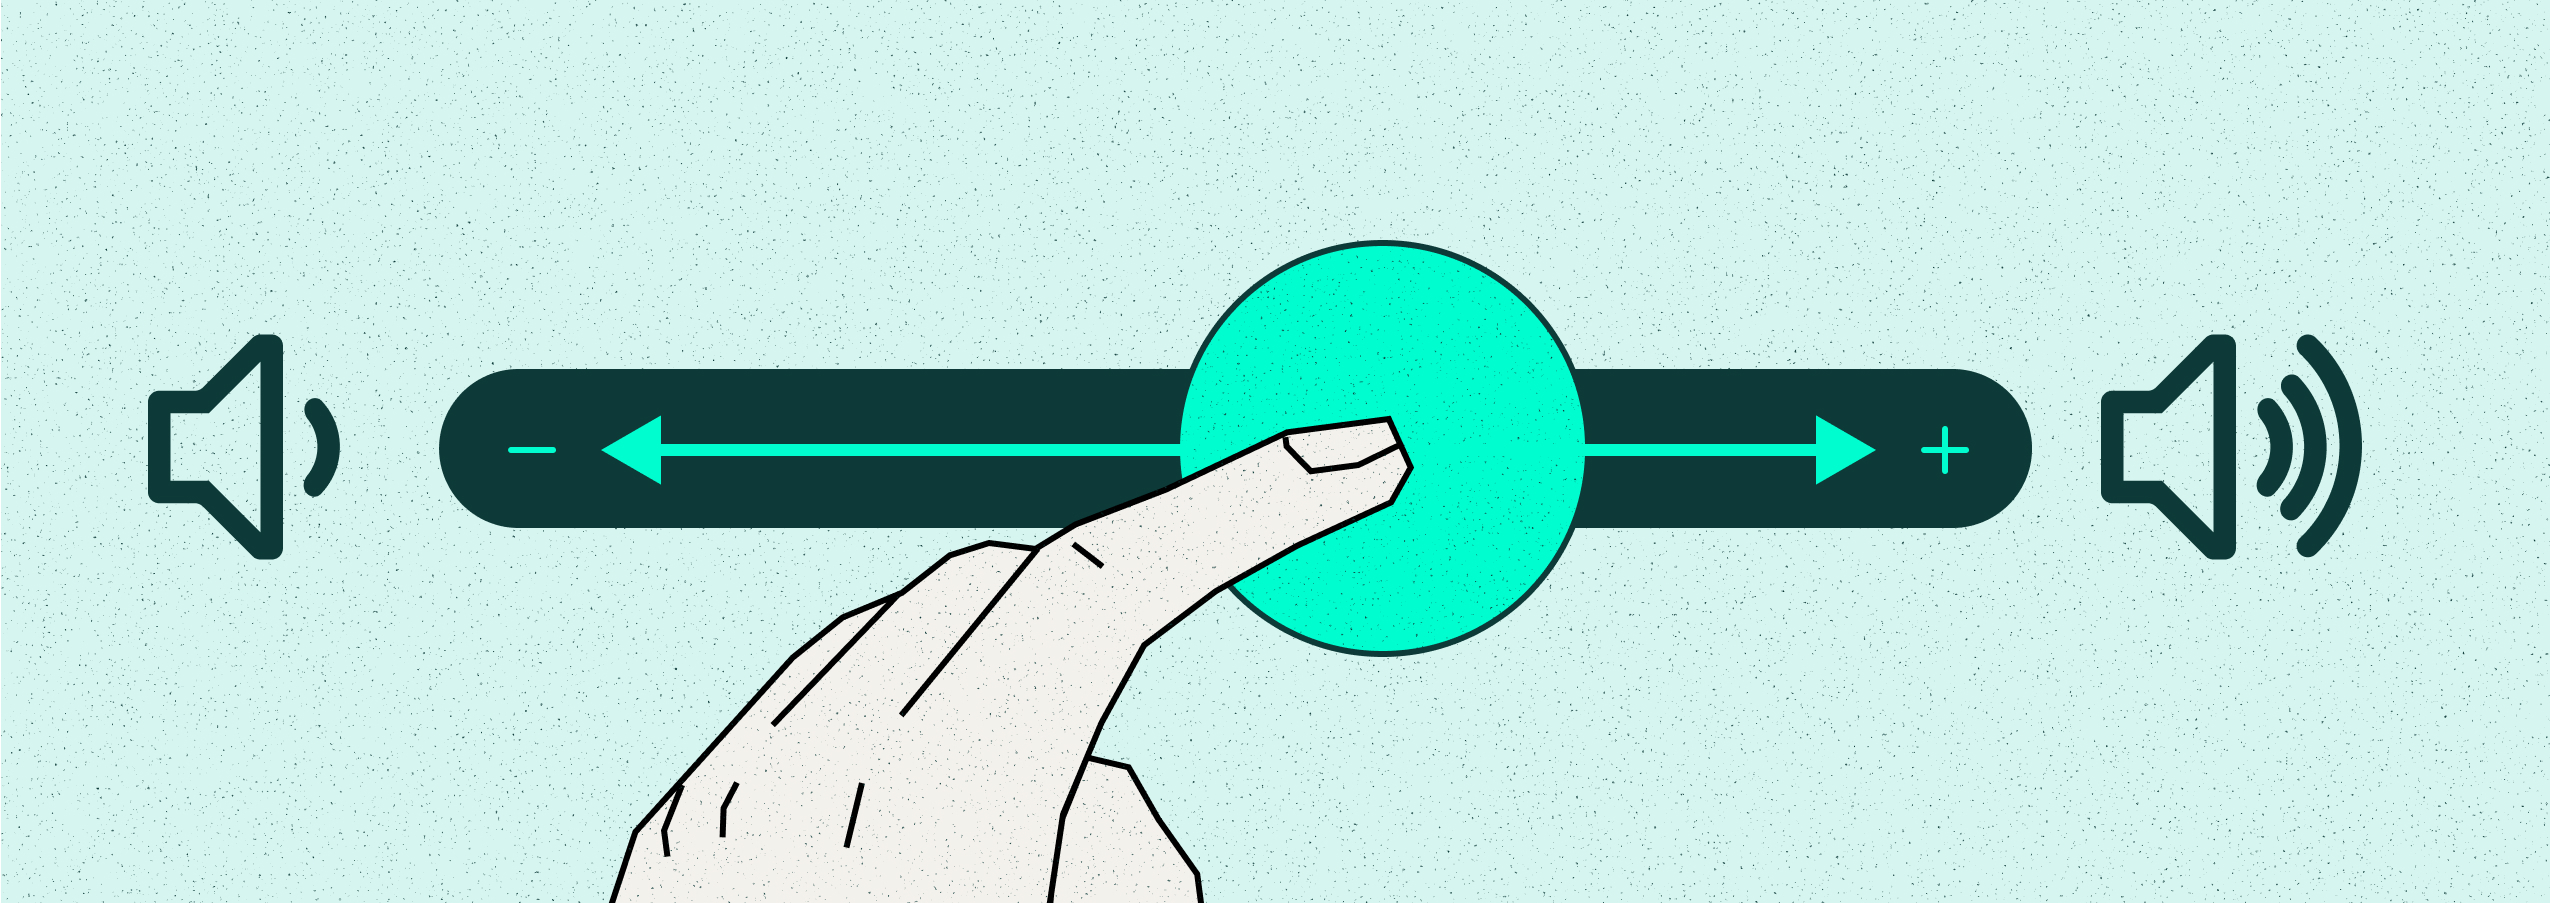
*Adjustment: Incremental value control*
## Profile[](#profile "Direct link to Profile")
A profile defines the assignment of plugin actions to device controls for a specific application or workflow. Users can customize device behavior by creating and modifying profiles to suit their needs.
**Key characteristics:**
* **Customization**: Profiles are user-configurable and enable users to customize device behavior by binding actions to device interactions.
* **Device-specific**: Each supported device has its own set of profiles with control mappings tailored to that device's layout.
* **Plugin association**: Each profile is linked to a specific plugin and contains actions that are available for assignment to device controls.
* **Distribution**: A plugin may provide a default profile for each supported device. Profiles can also be distributed via the Logitech Marketplace.
* **File format**: Packaged as `.lp5` files for distribution and installation.
* **Storage**: Installed or user-created profiles are stored locally on the user's system.
Users configure profiles through the host application UI (Options+ shown below). The user interface displays the device layout, available actions from the plugin, and allows customization of action assignments for each profile.
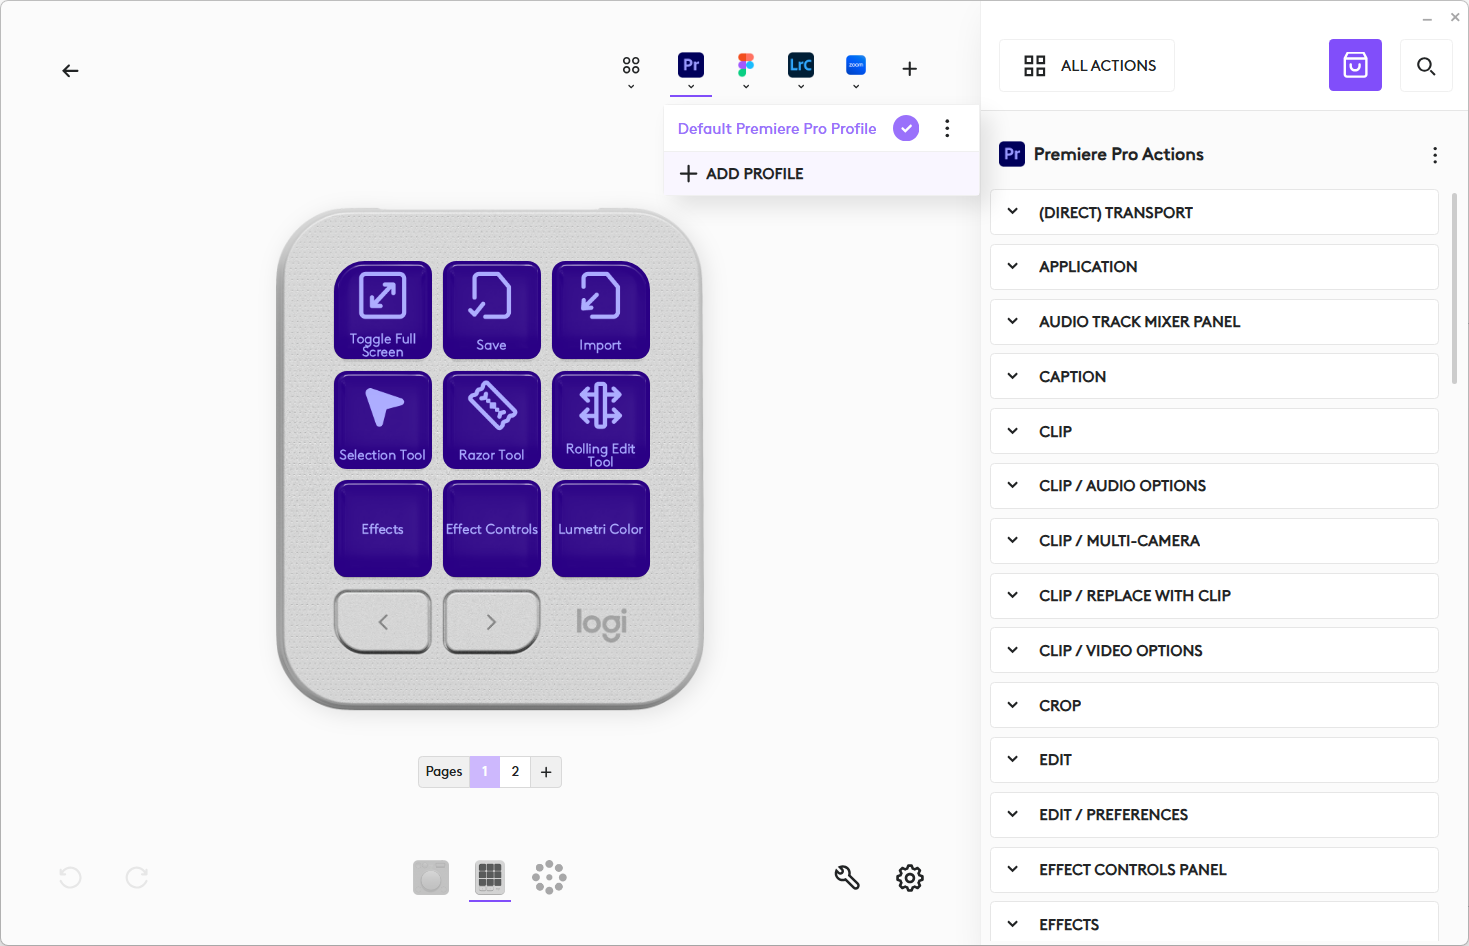
The following diagram illustrates how profiles link plugin actions to devices. A single plugin's actions can be assigned across multiple device types, each with its own set of profiles.
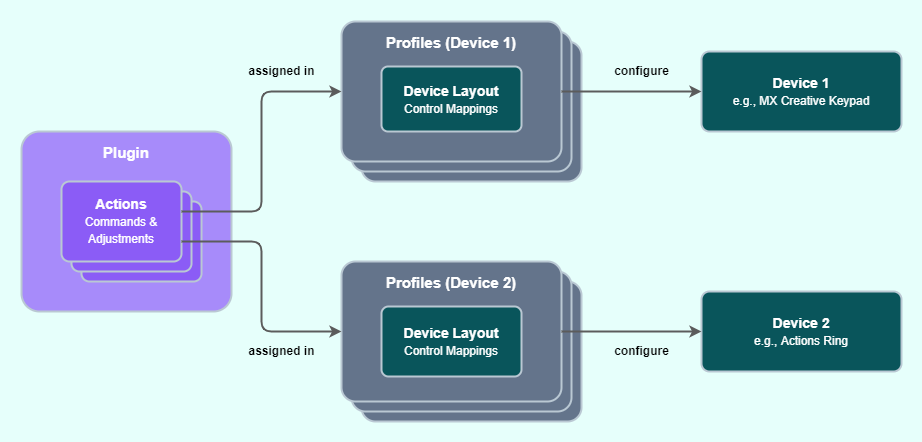
## Logi Plugin Service[](#logi-plugin-service "Direct link to Logi Plugin Service")
The Logi Plugin Service (LPS) is a background application that manages plugin lifecycle and communication. It is included with the Logi Options+ and Loupedeck host applications.
**Key responsibilities:**
* **Plugin lifecycle management**: Loads, initializes, and terminates plugins as needed
* **Communication between components**: Routes messages between plugins, devices, and host applications
* **Resource management**: Manages plugin resources and ensures stable operation
* **Profile handling**: Loads and applies user profiles to configure device behavior
Logi Plugin Service acts as the bridge between plugin code and the physical or virtual devices. When a user interacts with a device control, LPS routes the event to the appropriate plugin action. Similarly, when a plugin needs to update a display or provide feedback, LPS handles the communication with the device.
For a visual overview of how Logi Plugin Service connects plugins, devices, and host applications, see the [System Overview diagram](/actions-sdk-docs/getting-started.md#system-overview).

### Supported Devices
In the Logi Actions SDK, a device is a physical or virtual controller for executing plugin actions. Users can assign actions to device controls and trigger those actions in software using the device.
[](/actions-sdk-docs/supported-devices.md)
---
# Supported Devices
This page describes two categories of devices: devices for executing plugin actions and devices for providing haptic feedback.
## Action-Executing Devices[](#action-executing-devices "Direct link to Action-Executing Devices")
In the Logi Actions SDK, a **device** is a physical or virtual controller for executing plugin actions. Users can assign actions to device controls and trigger those actions in software using the device. These devices are referred to simply as **devices** in the SDK documentation.
For optimal testing and user experience during development, it is recommended to use a device with a screen (MX Creative Console, Loupedeck) or Actions Ring to ensure compatibility with screen-based workflows.
### MX Creative Console[](#mx-creative-console "Direct link to MX Creative Console")
The [MX Creative Console](https://www.logitech.com/products/keyboards/mx-creative-console.html) is a creative control surface consisting of two devices designed to work together:
* **Keypad**: Programmable LCD buttons for triggering commands
* **Dialpad**: Rotary dial and roller for precision adjustments, with additional buttons for commands
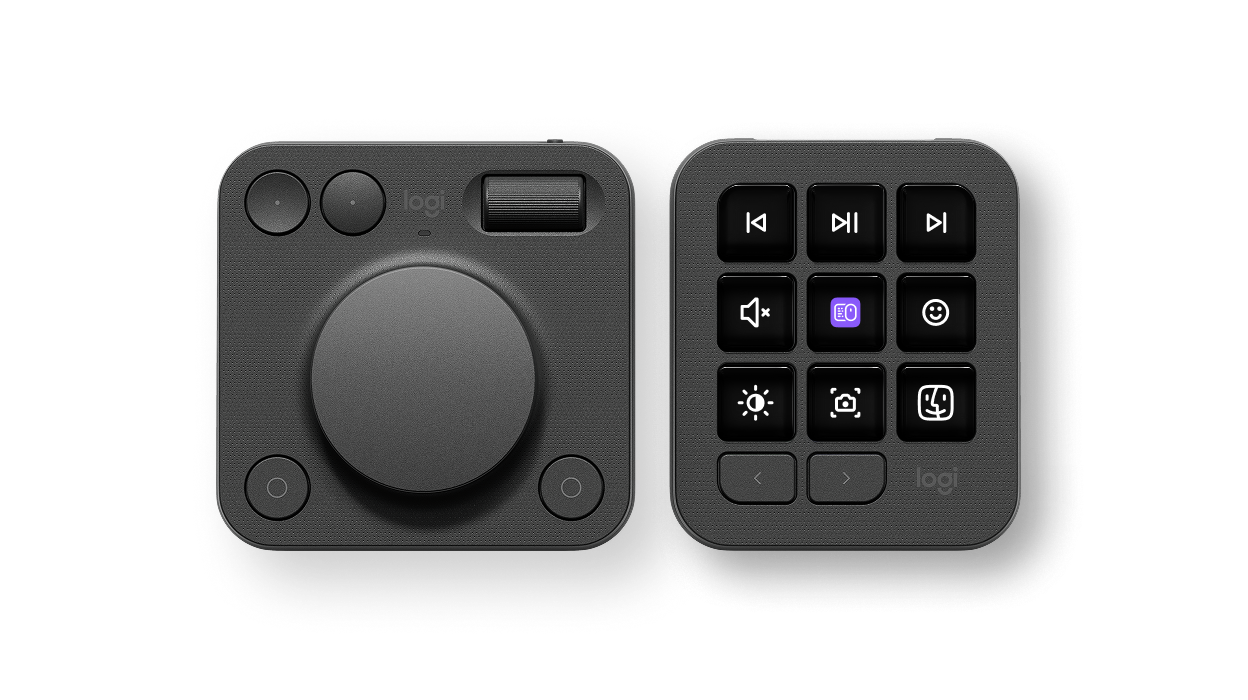
### Actions Ring (available via any MX device)[](#actions-ring-available-via-any-mx-device "Direct link to Actions Ring (available via any MX device)")
[Actions Ring](https://www.logitech.com/software/actions-ring) is a virtual, on-screen controller that provides access to plugin actions through a software overlay. Actions Ring buttons function like the controls on physical Logitech devices. Each button is an assignable control that can trigger commands or adjustments in the same way as a physical button or dial.
A Logitech MX device is required to activate Actions Ring. Once active, the overlay can be controlled using any mouse.
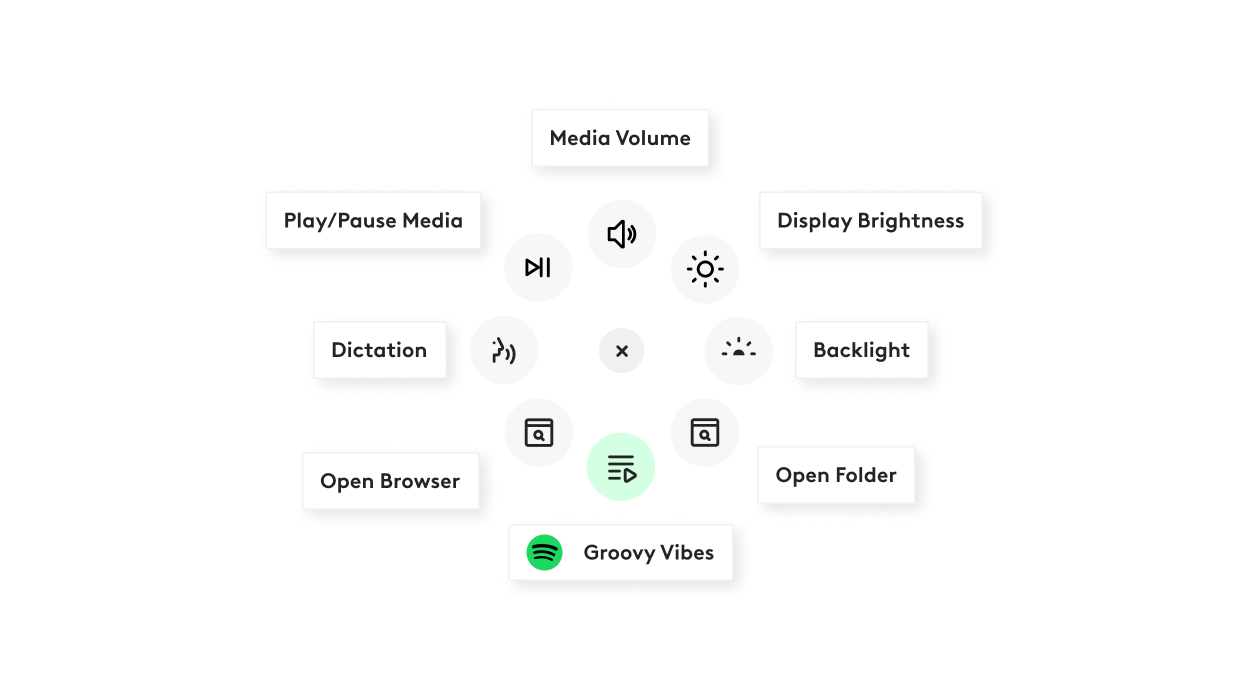
**Key capabilities:**
* **Eight interactive overlay buttons**
* **Buttons behave like assignable hardware controls** and can trigger commands or adjustments using mouse clicks and scrolling
* **Plugin action support**, enabling actions provided by plugins to be assigned to buttons
* **Folder structure** for expanded customization and hierarchical action organization
### Loupedeck Devices[](#loupedeck-devices "Direct link to Loupedeck Devices")
[Loupedeck](https://loupedeck.com/) devices are control surfaces with various combinations of touch screens, LCD buttons, rotary encoders, and hardware controls:
* **Loupedeck CT**: Touch screen, rotary encoders, buttons, and a wheel
* **Loupedeck Live**: Compact surface with LCD touch buttons and rotary dials
* **Loupedeck Live S**: Streamlined version with LCD touch buttons and two dials
* **Loupedeck+**: Analog dials and buttons for photo and video editing
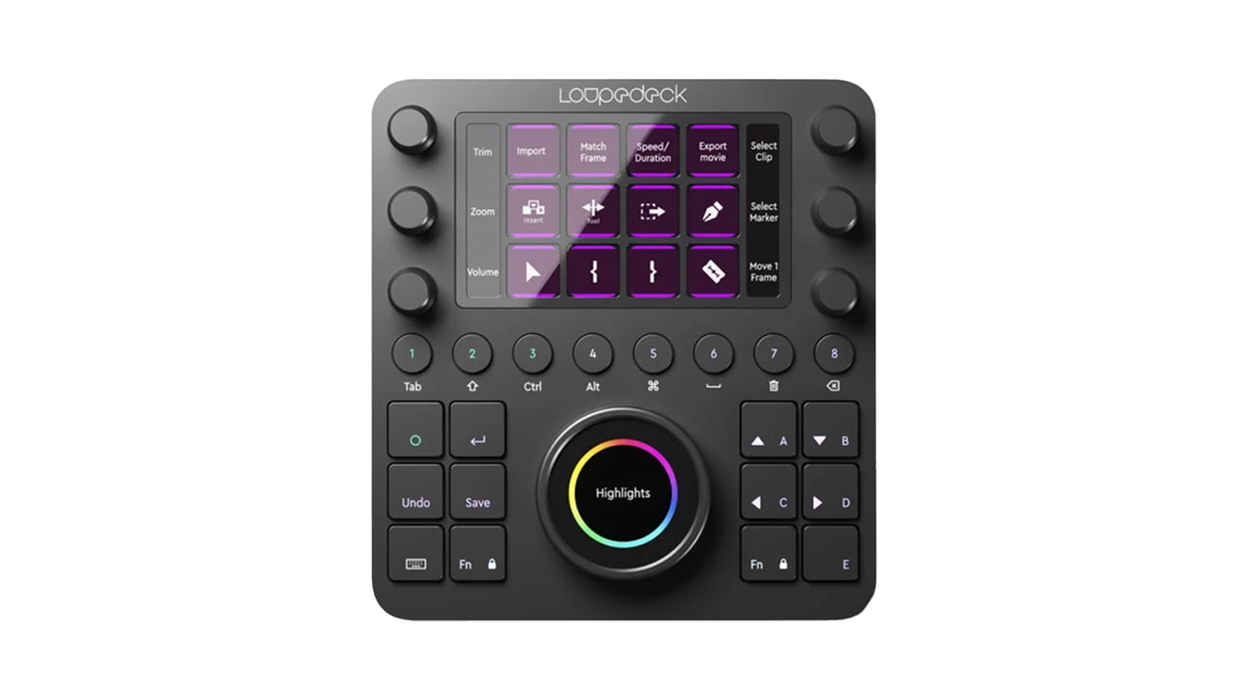
## Haptics Devices[](#haptics-devices "Direct link to Haptics Devices")
Haptics devices are fundamentally different from the action-executing devices described above. Rather than triggering actions, they receive haptic feedback events from plugins and deliver tactile sensations to the user.
If your plugin integrates haptic feedback, testing will require an MX Master 4 mouse, as it is the only device that supports haptic functionality.
### MX Master 4 Mouse[](#mx-master-4-mouse "Direct link to MX Master 4 Mouse")
The [MX Master 4](https://support.logi.com/hc/articles/28321445268247-Getting-Started-MX-Master-4) mouse is a haptics-enabled device that can receive haptic feedback from plugins. When a plugin raises a haptic event, the MX Master 4 delivers tactile feedback through vibrations.
For detailed information on implementing haptic feedback in plugins, see the [Haptics documentation](/actions-sdk-docs/csharp/haptics/haptics-overview.md).
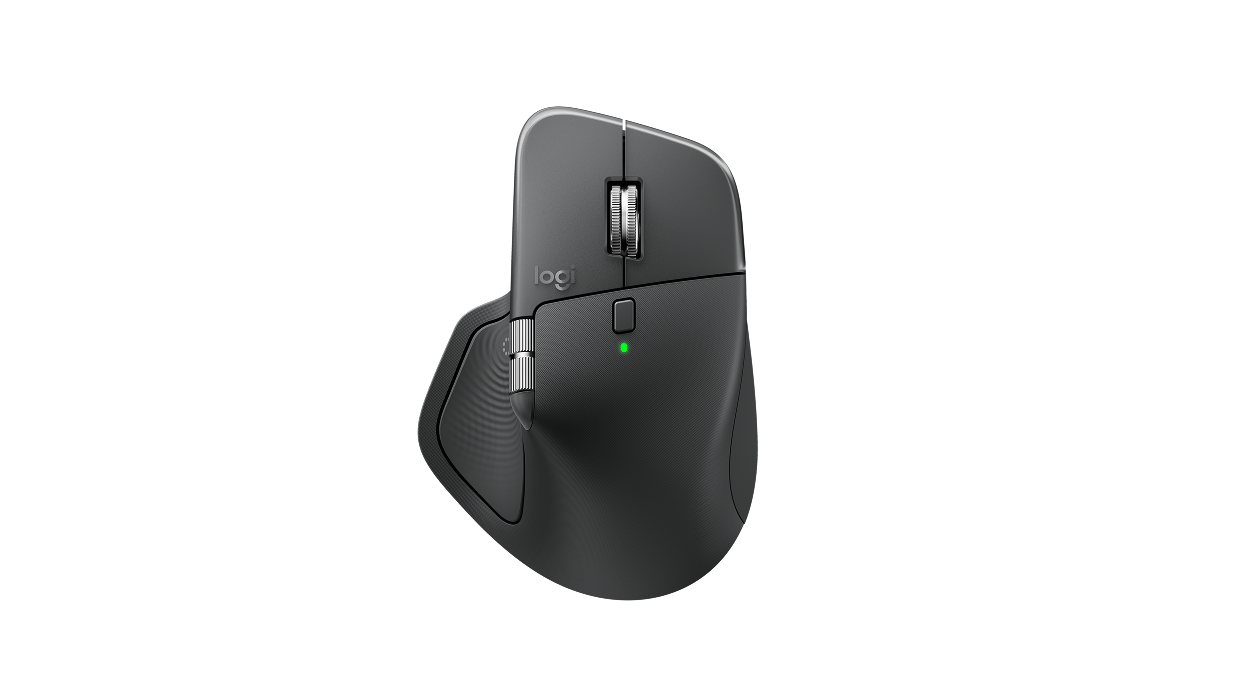
## Need help getting started?
Reach out to us in Discord.
[CHECK ON GITHUB](https://github.com/Logitech/actions-sdk)[JOIN ON DISCORD](https://discord.gg/ptV2BfHCmm)
---