mxink
Adding MX Ink Support to a Unity App
There are three possible approaches to integrate MX Ink into a Unity app:
- Using Unity XR Input Actions
- Using Legacy Mode
- Using Expansion Files
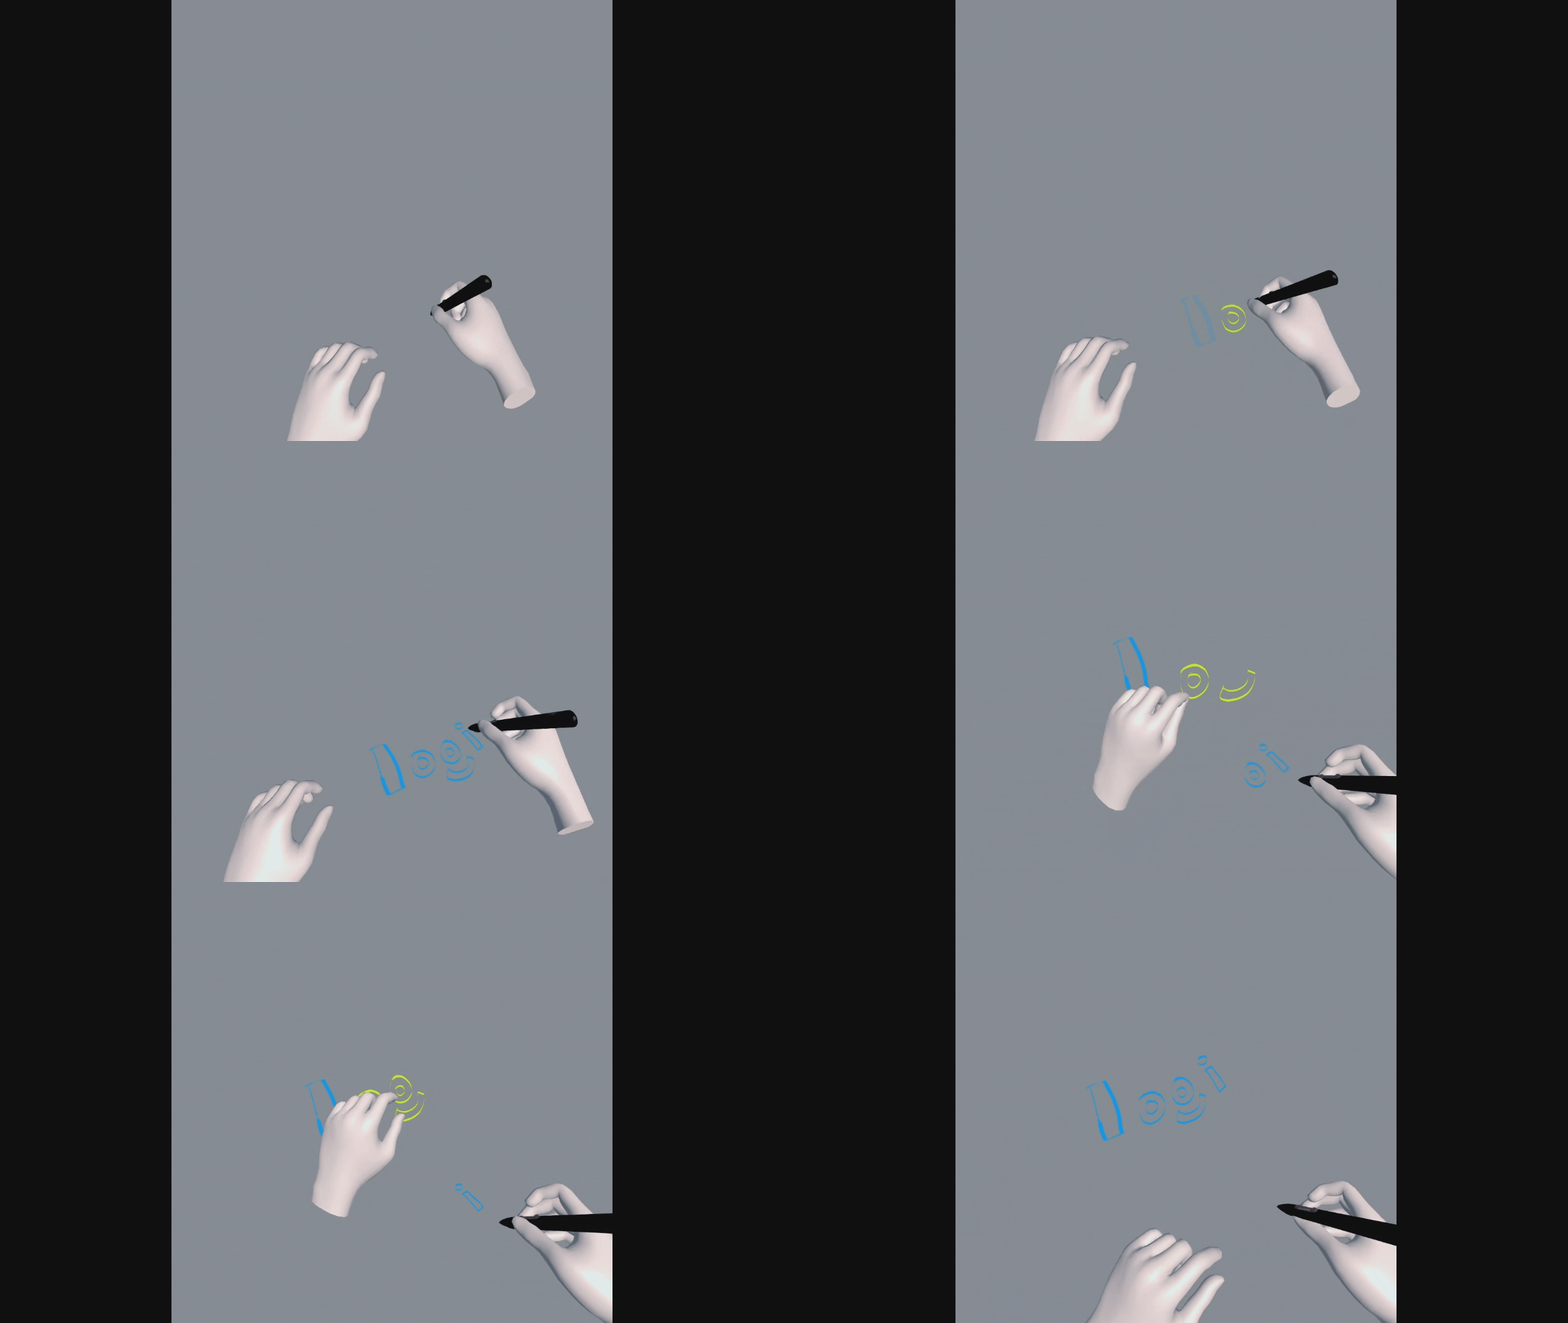
- Stylus + Hands interaction: A Unity XR drawing demo that combines Logitech MX Ink stylus input with Meta hand tracking.
Developing for MX Ink using the Unity OpenXR plugin
This approach relies on the Unity OpenXR plugin and the Unity XR Input System.
The MX Ink OpenXR Sample App (source code, apk) is a Unity project that shows how to use the prefabs from the MX Ink OpenXR unity package to create a basic drawing app.
Get the MX Ink OpenXR Unity integration package here:
The following is a more detailed explanation of the configuration requirements and the basic functionality demonstrated in the sample app.
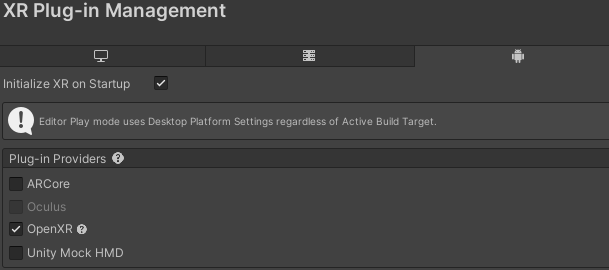
Your application should use Unity’s OpenXR plugin, enable it in the XR Plug-in Management settings:
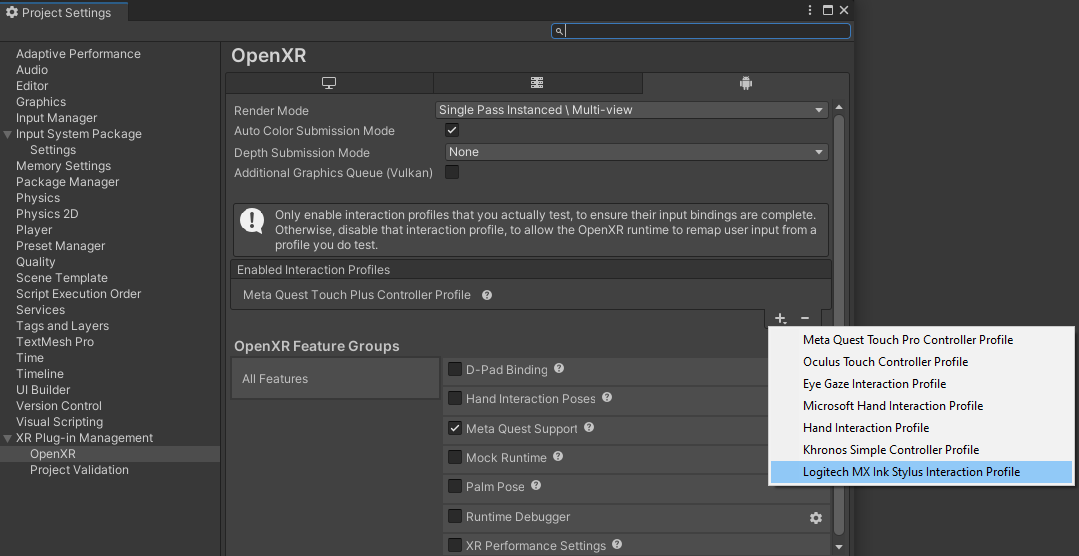
Import the MX Ink OpenXR unity package into your project. This will add support for the MX Ink OpenXR interaction profile, enable it in the OpenXR plug-in settings:
The MX Ink OpenXR integration package includes an example of input actions mapping that is used in the MX_Ink prefab.
MX Ink inputs are mapped to input actions, that can be declared as follows:
private InputActionReference _tipActionRef;
private InputActionReference _grabActionRef;
private InputActionReference _optionActionRef;
private InputActionReference _middleActionRef;
The input action references are configured in the Unity editor:

Enable the input actions, this can be done in the Awake method:
_tipActionRef.action.Enable();
_grabActionRef.action.Enable();
_optionActionRef.action.Enable();
_middleActionRef.action.Enable();
This is how the MX Ink inputs can be retrieved in the Update method:
_stylus.inkingPose.position = transform.position;
_stylus.inkingPose.rotation = transform.rotation;
_stylus.tip_value = _tipActionRef.action.ReadValue<float>();
_stylus.cluster_middle_value = _middleActionRef.action.ReadValue<float>();
_stylus.cluster_front_value = _grabActionRef.action.IsPressed();
_stylus.cluster_back_value = _optionActionRef.action.IsPressed();
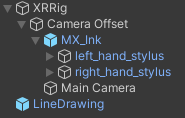
The MxInkHandler.cs script is part of the MX_Ink prefab and implements the code described above. These are the basic components of the scene in the sample app:
In addition to retrieving pose and inputs from the MX Ink Stylus, you can also generate haptic pulses as follows:
var device = stylusIsOnRightHand ? UnityEngine.XR.XRNode.RightHand : UnityEngine.XR.XRNode.LeftHand;
var stylus = UnityEngine.XR.InputDevices.GetDeviceAtXRNode(device);
stylus.SendHapticImpulse(0, amplitude, duration);
The code above requires knowing to which hand the stylus is currently assigned. Stylus handedness can be configured in the Stylus Settings in the Meta OS.
In an application, You can detect the hand where the stylus is active by subscribing to the DeviceConnected event:
...

InputDevices.deviceConnected += DeviceConnected;

...

private void DeviceConnected(InputDevice device)
{
    Debug.Log($"Device connected: {device.name}");
    bool mxInkConnected = device.name.ToLower().Contains("logitech");
    if (mxInkConnected)
    {
        stylusIsOnRightHand = (device.characteristics &
        InputDeviceCharacteristics.Right) != 0;
    }
}
See the MX Ink OpenXR Sample App (apk) for more details about how to use MX Ink to draw in-air, using the middle button, and on 2D surfaces using the pressure sensitive tip.
Legacy Touch Controller Mappings
If an application does not support the stylus interaction profile, the stylus inputs can be still read as legacy Touch Controller inputs. The legacy mappings are shown in the diagram below.
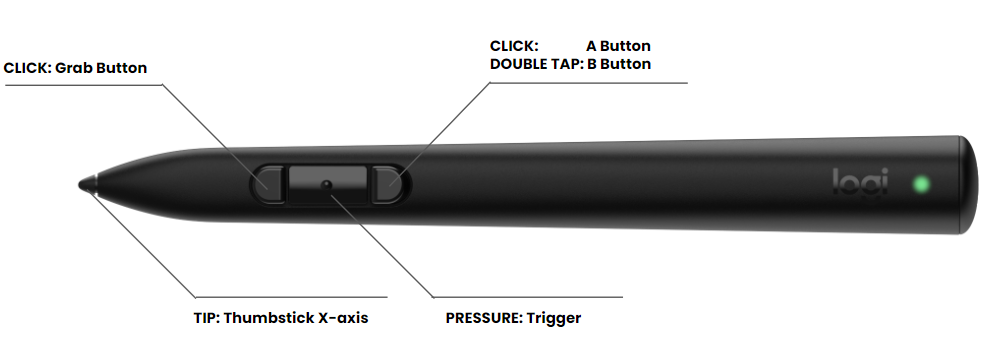
This approach of using the legacy Touch Controller mapping is not recommended. Please be aware that as of Meta OS v69 (and later), there are several known issues to consider when using this approach:
- The stylus pose retrieved in Unity will have an offset of approximately 5.5 cm on the z-axis. Your app should account for this to ensure accurate positioning of the stylus 3D model and other interactions.
- The tip value is reported as the thumbstick x-axis, with a ‘deadzone’ of 10%. This means the stylus tip will not be as sensitive as it could be when using the MX Ink Interaction Profile, as described in the previous section.
- Applications that have not been updated to support MX Ink may not work as expected, as some interactions will not be possible due to the different input capabilities of the stylus compared to the Touch Controller. For example, MX Ink has no thumbstick or B button.